Tuscan Canapes

Tuscan Canapes

At night, when our little one had dozed off and there’s still little time for a catch-up chat between Jake and myself, I make sure there’s some few yummy bites in between our stories. And, bite would mean finger foods to go with our chatter. After all, food is the perfect third wheeler for couples engaged in some light banter after a long day.

Okay, canapes are my small bites of heaven. They’re pretty, easy to make and very engaging to eat. Its a play of ingredients you top on your favorite melba toast or baby baguette rounds. Ahh, I just love doing them as much as I passionately look forward to eating them!

My ingredients are usually encased in small containers and placed in a mother  container and mentally labeled as the “cocktail kit”. What goes inside my cocktail kit are our usual faves:

grilled eggplant

alfalfa sprouts

feta cubes

pesto

grilled bell peppers

jalapenos

cheddar cheese

These toppings are topped on grilled bread or a store-bought cracker. This should make its way to your tummy soon. Best eaten with a partner and two glasses of white wine. Cheers!

Korean Beef Stew

Korean Beef Stew

Trooping over to Korean groceries have been quite a usual habit for me. At the area where we stay, Asian groceries abound and thrive quite lucratively. Back in the day when Asian ingredients and condiments were exclusively accessed only from hard to find Asian specialty stores, I barely knew about, say, mirin or Kasugai! Okay, now is a totally different generation of convenience stores. It has come to embrace spices and other food stuff of countries outside this republic.

Okay, today’s menu had Korean beef stew in it. What I like about this dish is that it infuses flavors that make you savor it, bite after bite. Flavors that make you dump more rice onto your plate and totally enjoy the food! The sweet-salty sauce combo that smothers the fall-off-the-bones kind of short ribs just makes for a perfect meal.

KOREAN BEEF STEW

1/2  kilo beef short ribs

1/2 kilo beef brisket

5 cloves of garlic, minced

1 chopped onion

2 laurel leaves

2 tbsps sliced ginger

1  cup soy sauce

1 cup brown sugar (adjust according to your preferred sweetness if necessary)

spring onions, chopped

1 teaspoon toasted sesame seeds

1/4 cup sesame oil

chili flakes to taste

water

Procedure:

Season ribs with salt and pepper. Saute ginger, garlic and onion using sesame oil. Add short ribs and continue tossing the meat until well coated with the gisa mixture.  Add water (just enough to cover the ribs).

Halfway through the cooking add soy sauce and sugar plus the laurel and chili flakes. Simmer until meat of the ribs start to fall off and the sauce has been reduced to half of the original amount.

Note: Adding water may be necessary until meat is very tender.

Sprinkle with toasted sesame seeds and spring onions. Serve hot.

Cream Of Pumpkin Soup

Cream Of Pumpkin Soup

Cream Of Pumpkin Soup

Now, I am so tempted to lick my computer screen to have my cream of pumpkin soup!

This photo has been in my files since a long time ago and being anything but swamped with Mommy duties now, I will be able to share the recipe for this delightfully sumptious soup right now.

Okay let’s do this:

You will need about a quarter portion of a medium-sized pumpkin or from a big squash.

1 carton of all-purpose cream

1 chicken cube

1 onion, minced

1/4 cup butter

1/8 tsp cumin powder

1/2 cup croutons

salt and pepper to taste

Peel pumpkin and chop coarsely, about 1 inch thick and wide (although honestly, it doesn’t matter! It’ll get mashed later!). Put in boiling water. Cook until tender. Drain off from excess water.

In a soup pan, saute tenderized pumpkin in butter and onion. Add chicken cube. Add about 2 cups of water. Bring to a quick boil.

In a food processor, puree the pumpkin mixture. Blend very well.

Bring back the processed pumpkin mixture back to the soup pan and simmer in medium heat. Slowly stir in cream and cumin powder. Continue simmering until soup is creamy. Season with salt and pepper.

Top with croutons

*Note: You may add fresh milk to adjust texture or soup consistency. Be sure to just quickly heat the soup when there’s milk. Overheating or rapid boiling will cause the milk to curdle.

Final note:

Purists, please don’t crucify me for loosely interchanging pumpkin and squash every now and then. They belong to the same specie but are two varieties that differ in size and color. Whatever you use, it will taste almost perfectly the same!

My Mama, Her Food and Me

My Mama, Her Food and Me
abs-cbn 086

Tinumis. A native dish from Nueva Ecija, where my late Lolo hailed from. Definitely a must try.

Once, I was asked, “What’s your earliest memory of yourself?”.

The immediate image that got to me was my Mom cooking something one rainy morning.  What she cooked, quite understandably, escapes me now.

This leads me to believe that, just maybe, my love for cooking started right about that time. Yeah, even before I got a grip on my cooking ladle, I knew I already liked cooking!

Sopas for the soul!

What is vivid in my mind now were those episodes in my childhood when I would give a third hand to my mom in the kitchen in between commercial breaks of Sesame Street. I might have resented it in the beginning, but the long ‘haul’ turned into passion, overtime.  Needless to say, I started growing into the idea of learning, loving and experiencing serious cooking.

calandracas 023

Calandracas. Soup with beef, chorizos and macaroni. Two thumbs up!

Serious cooking it was for Mom.

Our kitchen was always  abuzz with all the activities she did. Back then, my Mom spent a great deal of time in the kitchen. And despite her tedious load in the office, she never failed to nourish her family with only the BEST meals.

And BEST would mean exceptionally great tasting and  well plated dishes. Yes, kinda like those that you’d be proud to serve to the Royal Family when they visit you at home.

My Dad would hover around the stove hoping to get his share of “tikim” of the food my Mom was cooking. Oh, how we always hankered for her great and well thought out meals. It perfectly went well with all the ‘growing up conversations’ my family and I shared during meal time.

Sinigang sa miso. Fish, sinigang broth and mustasa leaves-- this triumvirate just spells yumminess to the core.

Today, she is still the main moving force in the kitchen. She continues to dish out excellent meals that are loaded with love and passion.

Nueva Ecijano Afritada-- Pork made into adobo 1st before they were made into afritada. Total winner!

Buttered spareribs stew. Mom will never eat meat that's tough. This stew is something else!

Happy Mother’s Day, Ma! Please do know that everything I know in the kitchen is just a by-product of what you have taught me in the many years that you have trained me.

You are the BEST Mom!

Love you!

Garlic tapa. You can't have enough of garlic!

Recipes of Mom:

Tinumis

Calandracas

Chicken Adobo Flakes

Buttered Spareribs Stew

Garlic Tapa

Afritada Nueva Ecija Style


Fish Fingers

Fish Fingers

The thing I like about fish fingers is that it is very easy to make. No hard to find ingredients, salmonella free, rich in flavor and a universal favorite. Best served with garlic mayo (see recipe below) or plain ketchup, it is definitely a certified crowd pleaser.

This is actually my daughter Sam’s flagship food. Like most kids, she thrives in dishes that are big in crunchy texture and juicy-moist- soft filling. This dish has to make its way to your kitchen menu soon!

Fish Fingers

1/2 kilo whole dory fillets

3 cups Japanese breadcrumbs

1 pc lemon, wedged

3/4 cup parmesan cheese

3 tbsps dried basil

3/4 cup flour

1 beaten egg

Dried thyme for garnishing

salt and pepper to taste

In a mixing bowl, combine bread crumbs, basil leaves and parmesan cheese. Set aside.

Meantime, cut fish fillet in finger sizes. Season with salt and pepper.

Dredge  in flour lightly then dip in egg mixture.  Coat with the crumbs. The secret to a perfect coating is pressing it lightly as you coat and letting it stand for three minutes before frying it.

Deep fry until golden brown. Lay on a bed of napkins to blot excess oil.

Serve with garlic mayo dip (half cup mayo, 3 tbsps lemon juice, 3 minced garlic cloves, salt n pepper to taste—then mix everything together).

To have a thicker and crunchier coating, you might want to double coat by dipping in egg twice then breading the  chicken twice alternately before frying.

Creamed Beef With Mushrooms

Creamed Beef With Mushrooms

Creamed beef with mushrooms

The tedious spinning class I had today just had me hankering for a satiating plate of good food. And ‘good’ meant embracing all the requirements to make tonight’s dinner  gastronomic:

1. Relatively healthy  (So I’d be guiltless after the gobble up).

2. ‘Beef related’ (Hey, I spinned hard! I deserved a good serving of protein!)

3. Labor unintensive (Tamad eh! Lol)

4. Nice to plate! (Yeah, for the blog, hee).

Okay, so the cooking began. I defrosted a pack of beef brisket that I would make into creamed beef with mushrooms. From the pantry cabinet, I dislodged a can of mushrooms and a pack of all purpose cream.

Zero transfat and  50% reduced cholesterol — reading the nutrition facts on the newly relaunched Magnolia all purpose cream got me sold in using it for tonight’s dinner of creamed beef with mushrooms.

For this dish you will need:

1/2 kilo beef brisket, thinly sliced

1 carton all purpose cream

1/2 cup butter

1 cup button mushrooms, drained and sliced

4 cloves of garlic

4 tbsps flour dissolved in 1/2 cup water

1 onion

salt and pepper to taste

oil

________________________________________________

Season meat with salt and pepper.

In a skillet, saute onion and garlic. Add beef. Pour water and bring to a boil. Cook until beef becomes tender and water is reduced to half the original amount.

Add butter and flour mixture. Add mushrooms and cream. Stir until desired thickness is achieved. Serve hot.

Paella

Paella

Labor of love!

It was going to be a very special party I was going to and I thought of putting together what could be one of the most laborious paella I’ve ever made. Special celebrants deserve nothing but the best.

And so, one Saturday morning saw me checking out some fresh produce at the Suki wet market in Dapitan, Quezon City to complete my list of ingredients for the paella .

Suki wet market has been my, believe it or not, my palengke eyecandy the moment I discovered it. Having done much of palengke tours in this lifetime, I must say, Suki is one of the best.

Fresh greens lavishly laid on the makeshift shelves, fishes all wriggly from the recent catch (btw, they sell seabass at Suki like it was the most ordinary fish on Earth!), pinkish-bright red meats, quality seafood finds, ready made dishes packed away and very beautiful, ohhh– what a sight to behold! I can live in this wet market twice a week! Lol.

Anyway, I scoured the market for tahong, pacific white clams and squid for the paella. All three went straight to my basket. After I’ve accomplished the marketing, I slipped into my apron and started work:)

Well, not really ‘work’. FUN should be it.

Paella for 30 people. Let’s party!

Happy 1st birthday, Athena! And, Yani, please do know that Ninang loves you:)

Paella

8 cups risotto rice

10 pcs chicken thighs, chopped

1/2 kilo tahong

1/2 kilo pacific white clams or halaan

4 sticks chorizo, sliced

19 cups chicken stock

1/4 kilo squid rings, ink and sword removed.

3 red bell pepper, julienned

1 and 1/2 cups green peas

12 pcs pitted whole black olives

1 head  of garlic, minced

2 onions, minced

olive oil

5 tbsps turmeric powder

salt and pepper to taste

10 threads saffron

8 pcs lemon wedges

1 tsp chopped parsley

______________________________________________

To cook the tahong:

Place tahong in a pan with no oil nor water, just the tahong and salt. Steam until shells open. Drain from excess liquid and set aside.

Meantime, in a paellera, brown chicken until half cooked. Remove chicken and set aside.

In the same pan, saute garlic, onion, bell pepper, green peas, squid, clams and chorizos. Add chicken and rice. Throw in turmeric and saffron.

Mix well until rice is well coated. Add stock. Cover loosely with a sheet of aluminum foil. Simmer until rice is cooked. Remove foil.

Embed paella with tahong and garnish with twisted lemon slices, olives and parsley.

Chicken, Garlic And Tomato Roasts

Chicken, Garlic And Tomato Roasts

The wet market I recently swung by down east had me shamelessly hoarding a coupla kilos of some red, juicy and plump tomatoes. Why, they sold for a measly P20 per kilo! Especially now that the Yrastorza household is slowly taking the ‘healthy-food-only’  route, I thought these tomatoes would be excellent for oven baking, stewing and the like.

Over at my kitchen, I slid my baking casserole onto the counter to toss over the tomatoes for some oven-dried tomatoes for bottling. Lately, I’ve developed a penchant for any food/ingredient that is  homemade, organic and artificial processing- free. And yeah, nothing beats having your homemade tomato sauce which you can conveniently pull out from your ref when your recipe calls for it.

But the oven was too big for the few pieces of tomatoes I was to bake. So in the pan, I threw in 2 whole heads of garlic for roasting (top slightly chopped off, leaving the flesh exposed!). What do you do with it? I spread it on toasts, I put in on my mashed potatoes or I just make it as siding for a fave dish like a pasta fare or sweet and spicy tapa! Okay, there goes my 2nd dish.

3rd dish was the two chicken quarters that I turned into baked chicken in sinigang rub. All three dishes had some about two rounds of drizzles of olive oil. Time, energy and space saving for my oven, I was totally starving right after everything got cooked.

Okay, kumbaga sa bus, naunang bumaba ang mga bawang, tapos ang mga kamatis at sumunod ang mga manok galing sa oven. (Please see links for exact directions for recipes of each of the fares).

Oh, btw, the chicken was the perfect topping for the Japchae I made the day before. Can I just say, the noodles got yummier as the sauce completely got absorbed by the noodles. Yum!

Japchae

Japchae

I took a trip to a public market somewhere down east to find this stall that sold Batangas beef. Foodies literally run the extra mile just to bring home what’s deemed the best, you know. Ha! So, there I was, finding myself all prepped up for the palengke tour.

Scouring the market, I was gawking at the produce lavishly displayed at every stall, corner and bilaos. My, they were totally inexpensive, very fresh and looked picturesque. My eyes were panning from left to right, up and down!

Okay, back to my mission, I looked for a store that had a signage that read “Senya’s Batangas beef”. Upon trekking the aisles and alleys  of this market, lo and behold, I found it and what goldmine I saw. Yeah baby, two kilos of sirloin went straight to my basket.

Yesterday had me do two dishes:  Garlic Tapa and Japchae.

So, what’s the big fuss about Batangas beef? Well for one, this southwestern province of Batangas is well known for its cattle industry. It is home of the best species of cattle. Grass fed, robust in size, they are so special that meat dealers  have made it a ‘claim to fame’ label that the meat is from Batangas. A big smile was plastered on my face as I left with my beef on one hand.

The second dish was japchae. I have been bugging my good friend, Marielle, to take me back to Ye Dang for my Korean food fix but being swamped with household chores would not allow us. So, I decided to just make my own.

So here goes the recipe:

JAPCHAE

500 grams  glass noodles (soak in water for 20 minutes before cooking)

1/2 cup chopped spinach leaves

3/4 cup hoisin sauce

3 tbsps brown sugar

1/4 kilo sirloin, cut in thin strips

1 medium-sized carrot, cut into strips

5 cloves of garlic, minced

1 white onion, minced

2 tsps chili flakes

salt and pepper to taste

sesame oil

water

_______________________________________________

Season beef with salt and pepper. In a skillet, saute onion and garlic. Add beef, spinach and carrots. Stir in hoisin sauce ang sugar. Pour about 4 cups of water and bring to a boil.

Add glass noodles and reduce heat  to a medium simmer.

Cook until noodles are tender and soupiness is gone. Add chili flakes. Serve hot.

Pasta And Peas

Pasta And Peas

Still on with our interesting series on “leftover makeover” inspired by some dishes we lifted from the pages of FOODIE magazine. This second dish I cooked for Studio 23′s “US Girls” was such a big hit that it was gone instantly before I could finish saying “bon appetit” to everybody!

Simple, tasty to the core and very elegant, this dish should work its way on your menu soon.

The leftover food was the pasta. In this case, we used salad macaroni. Have you ever had the experience of over estimating your pasta, cooking more than you need  and ended up just stacking them away in the ref to grow those icky molds?  Ha!

Alright, let’s have some great-tasting solution to this leftover dilemma.

The dish I made called for about 5 cups of cooked salad macaroni (cooked according to package directions), 2 tbsps olive oil, 2 tbsps butter, 1 medium-sized chopped white onion, 3/4 cup chopped bacon or pancetta, 3/4 cup frozen sweet peas (thawed), 2 tbsps dry white wine, salt and pepper to taste and grated parmesan cheese.

I Sauted onion and bacon. Added wine and let alcohol evaporate before I mixed in peas which I had to saute a bit longer til I got it tender while still very bright green in color. Tossed them gently onto my pasta and sprinkled parmesan cheese on top.

Baked Scallops

Baked Scallops

Baked Scallops

The maddening rush last Valentine’s day discouraged Jake, Sam and I to wriggle our way to the busy streets that lead to the uber packed date places.

So, we decided to just spend the evening at home, in the comforts of our humble dining room where I served some mean minted lamb chops with a siding of french beans and baby carrots and partnered with some rich, creamy and luscious plate of baked scallops.

Baked scallops is one dish that’s a breeze to make and makes for a rockstar viand. This particular recipe is strikingly similar with the baked tahong I always make whenever I want a delish fare pronto.

Looking at my finished product of baked scallops, I suddenly scratch my head in slight dismay. It was one of those moments when I wished I lived in faraway Capiz. Why? I got my frozen scallops from Cold Storage, P180 per dozen. In Capiz, scallops sell for P50 PER SACK!!!

Now, that ‘SACKS’! Lol.

Happy Vday!

Baked Scallops

1 dozen fresh scallops (with shell)

2 heads of garlic, chopped

1/4 cup melted butter

3/4 cup mozzarella cheese

1/2 cup cheddar cheese

3 tbsps parsley, chopped

salt and pepper to taste

___________________________________

Preheat oven to 300 deg c.

In a baking tray, assemble the scallops and brush each with butter and season with salt and pepper. Top each with a pinch of garlic and smother scallops with the cheeses.

Bake for 30 minutes or until cheeses turn slightly brown and melted. Sprinkle with chopped parsley before serving.

Squid Ink Pasta, Chorizos And Tuna

Squid Ink Pasta, Chorizos And Tuna

I was marveling at the dried pasta selection over at Terry Selection at The Podium when I chanced upon a pack of squid ink pasta. Almost instantaneously, I visualized the pasta to be infused with red sauce, chorizos and tuna. Perfect for Jake’s dinner, excellent for my quest for a pasta eye candy that was to be quite unique and tasty.

Incidentally, my Sister, Tina, and Brother in law, Oliver, stopped by our place that night I made it. Timely and definitely a welcome surprise, I was so ganado tossing the whole pasta ensemble knowing that I had guests to sample the dish.

The black colored-pasta had a stellar taste that I momentarily forgot that I had burned a thousand calories that afternoon from a spinning class and would just gain it back(?) with the bande-bandehadong pasta that I devoured that night. Yikes!

Okay, the recipe:

1/2 kilo squid ink pasta

1 can chorizos, halved vertically and sliced

1 can Del Monte tomato sauce petite cut

2 cans tuna lite, drained

1 cup Del Monte tomato sauce (Original flavor)

1 head of garlic, minced

1 onion, minced

1/2 cup capers

1 cup black pitted olives, sliced

1 cup grated parmesan cheese

1 tbsp fresh basil, chopped

1 tbsp fresh oregano, chopped

2 tbsps fresh parsley, chopped

salt and pepper to taste

olive oil

____________________________________________________

Cook pasta according to package directions. Set aside.

In a skillet, saute onion and garlic. Add chorizos, tuna, capers and olives. Continue stirring for two minutes. Throw in basil and oregano.

Toss in pasta. Top with tuna and cheese. Sprinkle with parsley. Serve hot.

Minced Pork In Lettuce Wrap

Minced Pork In Lettuce Wrap

My good friend and neighbor, Myze, invited my family for dinner last Chinese New Year at Spring Deer restaurant in Quezon City. It was to be their celebration for their New Year. Myze, a full-blooded Chinese, talked her way to educating me about Filipino Chinese food vs the “canteen” Chinese food she grew up embracing.

I have featured a coupla posts in this blog about her Chinese “canteen” food and how enthralled I get trying it out. The Makut Theng she once sent me while I was nursing a cold was unforgettable. Likewise, the Chinese style steamed fish dish she taught me was momentous.

One of the viands served that evening was the minced pork in lettuce wrap. I thought it looked pretty and tasted great. They served the meat mixture side by side with the plate of crunchy lettuce greens and hoisin sauce. So, the style was to get a lettuce wrapper, scoop a  tbsp of meat mixture and smother with hoisin sauce on top.

Today, I did just that. However, I decided to incorporate the hoisin sauce already in the meat mixture. Twas quite easy to make. Thanks for great neighbors, thanks, Myze!

Minced  Pork In lettuce Leaves

1/2 kilo ground pork

1 large carrot, cut in small cubes

5 cloves of garlic, minced

1 onion, minced

2 tbsps ginger, chopped

3 tbsps cilantro, chopped

2 tbsps hoisin sauce

2 tbsps oyster sauce

1 tbsp soy sauce

salt and pepper to taste

oil

Lettuce leaves

___________________________________________

Season pork with salt and pepper.

Saute pork in ginger, onion and garlic. Add carrots. Continue stir frying until meat is cooked.

Add cilantro, hoisin, oyster and soy sauces. Continue cooking for about five minutes.

Scoop a tsp of the mixture in lettuce leaves and wrap closing on all sides. Serve immediately.


One Glorious Morning On One Plate

One Glorious Morning On One Plate

So, my daughter’s class for today got called off. That means extra three  hours for me to just stay home and take a respite from the horrendous traffic going to her school and the 3 hours waiting time I have before I pick her up. Yay, this calls for a celebration. Bring it on!

Okay, this morning saw me hitting the ref for my grilled eggplant spread and grilled some  few slices of crusty Raf whole wheat bread with   parsley pesto  sauce that I made and bottled up a few days ago.

The combination of the spread and the bread spelled HEALTHY and YUMMY, both in font 99! Yeah, one glorious morning on one big plate!

Spicy Chicken In Charsiu Sauce

Spicy Chicken In Charsiu Sauce
spicy chicken in charsiu sauce
Yes, it’s chicken made spicy and blended in charsiu sauce. It’s like the bbq sauce version of the Chinese.  It’s sweet, flavorful and loaded with the “Eat me! eat more!” factor. So tasty, you will gobble up a lot without let up. It’s the easiest to make, too. Charsiu sauce is readily available in most major supermarkets in the metro.

1. Just season wings with salt, pepper and a dash of chili flakes.

2.Bread with japanese bread crumbs (for breading techniques, please click: http://theeatingroom.wordpress.com/2009/01/19/chicken-crispers/  ). Fry. Set aside.

3. In a separate pan, heat about three rounds of oil then mix in a pack of Lee Kum Kee (nope, this note is not sponsored..) charsiu sauce. Then, throw in fried wings onto the mixture. Voila!

For a knockout plating, lay down the chicken on a bed of buttered (recipe below).

Just fry your rice and mix in butter. Season with salt and pepper. Add turmeric until desired ‘yellowness’ is achieved (optional). You might want to throw in some chopped basil or any herb of your choice for added flavor.

This dish is a conversation piece because it is so easy to make and yet looks elaborate. It’s perfect for potluck or even for baon. Bon apetit!

Spicy Beef Caldereta

Spicy Beef Caldereta

We had so much catching up to do since we arrived from Cagayan De Oro City for the holidays. Talk about parties, reunions and stuff, we gladly and willfully attended those as much as we could in the last two weeks that we’ve been back.

However, there were times when some potluck gatherings just had me pooping out like anything with all the brainstorming on what to bring on those events.  Yes, sure, to buy food can be the easiest and the wisest thing to do, but half of me tells me that it’s still better if you make your potluck share yourself. Why? because 1. it’s more personal 2. the taste is according to your palatal satisfaction 3. cheaper and 4. it’s downright  ’uncommercialized’. There. 4 solid reasons why you shouldn’t buy pansit malabon or mocca roll for your potluck contribution (hee hee).

Over at Marra’s two weekends ago, we had our belated barkada Christmas party. I decided to do a fuss-free (well, compared to my other party dishes..) dish. Spicy beef caldereta- it’s a filipino favorite. It’s my personal favorite, too. This version was passed on to me by my mom, whom I hail as the ‘kitchen queenpin’. She actually calls this dish adobado and is quite different from the usual way of cooking caldereta as the ingredients are layered, uses minimal canned/foiled tomato sauce and the potatoes are fried.

Okay, to cut to the chase, here goes the recipe for this version of spicy beef caldereta:

1 kilo beef brisket

about a dozen medium-sized tomatoes, cubed

1 pc calamansi

half cup soy sauce

1 head of garlic, minced

laurel leaf

2 large onions, minced

3 pcs siling labuyo, chopped

5 medium-sized potatoes, cut crosswise

2 pcs red bellpepper, julliened

a small bottle of pitted and stuffed olives

 salt and pepper to taste

3/4 cup tomato sauce (for coloring)

1. Season beef with salt and pepper then marinate in soy sauce and calamansi for 30 minutes. Set aside.

2. Layer the ingredients in a casserole such that tomato is at the bottom, then marinated beef, garlic and onion at the top of the whole ensemble. This way, flavors lock in the beef that’s in the middle of the assembly.

3. Pour in about 3 cups of water to help liquify and wilt the tomatoes at the bottom. Bring to a moderate simmer.

4. Once drying out, continue pouring in water until beef tenderness is achieved.

5. Add the bell peppers, laurel leaf, sili  and the pitted olives. Mix in the tomato sauce. Set aside.

6. Meantime, deep fry the potatoes.

7. Pour the beef mixture onto a pyrex dish. Garnish with fried potatoes on top. Something like this:

I prefer slow-cooking versus using the pressure cooker for this dish. By slow cooking, you are assured to achieve the ‘nagaagaw na tomato sauce and mantika’ effect. I used minimal tomato sauce because you wanna achieve the most natural tasting  tomato sauce.

Parmesan-Crusted Chicken Crispers

Parmesan-Crusted Chicken Crispers


There’s no dish easier to make than this. Almost effortlessly, my four-year old Sam pulled this recipe off quite easily as we did this a few days ago. Easy, pretty and scrumptious, it is a bestselling dish when we throw parties at home. Cheers!

Parmesan-Crusted Chicken Crispers

1/2 kilo chicken breast fillet

3 cups Japanese breadcrumbs

1 pc lemon, wedged

3/4 cup parmesan cheese

3 tbsps dried basil

3/4 cup flour

1 beaten egg

salt and pepper to taste

In a mixing bowl, combine bread crumbs, basil leaves and parmesan cheese. Set aside.

Meantime, cut chicken breast fillet in finger sizes. Season with salt and pepper. 

Dredge  in flour lightly then dip in egg mixture.  Coat with the crumbs. The secret to a perfect coating is pressing it lightly as you coat and letting it stand for three minutes before frying it.

Deep fry until golden brown. Lay on a bed of napkins to blot excess oil.

Serve with garlic mayo dip (half cup mayo, 3 tbsps lemon juice, 3 minced garlic cloves, salt n pepper to taste—then mix everything together).

To have a thicker and crunchier coating, you might want to double coat by dipping in egg twice then breading the  chicken twice alternately before frying.

Shrimps In Lemon Butter Sauce

Shrimps In Lemon Butter Sauce
shrimp in lemon butter sauce

shrimps in lemon butter sauce

My thoughts were astray as we were hearing the 7pm mass awhile ago (bad!). I was thinking of what food to cook for dinner that was  fast and yummy. I scoured the freezer and found my dinner hotshot– my pack of shrimps. Believe it or not, this meal cooks for under  fifteen minutes!

Shrimps in Lemon Butter Sauce

15 pcs medium-sized shrimps, deveined and shelled

1/4 cup butter

6 cloves of garlic, minced

1 tbsp lemon or 1 pc calamansi

salt and pepper to taste

______________________________________________________

1. Season shrimps with salt and pepper.

2. Saute garlic in butter then add shrimps and lemon. Cook until shrimps turn pinkish in color.

3. Serve with basil rice (recipe below).

4. Assemble in a saucer as shown above. Pour in extra sauce into the saucer. Ahhh, love that sauce!

5. Sprinkle with chopped flat parsley (optional)

_______________________________________________________

 Basil Rice

 2 cups white rice

1/4 cup butter

salt and pepper  to taste

1 tbsp chopped fresh basil

turmeric powder

________________________________________________________

1. Fry white rice in butter.

2. Season with salt and pepper

3. Add turmeric powder until desired “yellowness” is achieved.

4. Add chopped fresh basil. Mix well.


Afritada (Nueva Ecijano Version)

Afritada (Nueva Ecijano Version)

Growing up, I was clueless at how uncommon and special some of our home-cooked meals were. All I knew was that I felt genuinely satiated every after meal time!  

Those dishes were hand me down gastronomic delights from my lolas who’ve had the most intense affair with cooking.  Off hand, I can think of three dishes that are extremely rich in flavor but are virtually unknowns, these are: calandracas (a one-pot wonder of beef stock, beef cubes, macaroni, potatoes, veggies and chorizos), afritada (Nueva Ecijano style) and another Nueva Ecijano dish, tinumis.

(Just a sidebar– My lola was an Ilongga who cooked Nueva Ecijano dishes because of my lolo who hailed from Nueva Ecija).

It’s been sometime last I cooked afritada, Nueva Ecijano style. Ah, how I loved hovering in the kitchen when I was a child watching my mom whip up this dish. As you know, the typical afritada uses the regular tomato sauce plus spices to boot. In fact, instant sauces have become too handy that stewing has almost been forgotten. The Nueva Ecijano version does away with using the commercially available tomato sauce. The glaring difference in the ecijano version is the fact that they make the meat into adobo first before they turn it into afritada. Typically, too, the potatoes you throw into your regular afritada just boils along with the whole dish without giving much flavor. In this version, these tubers are fried to extract the savory taste of it. Indeed, It is ‘labor of intense love’ in its truest meaning because nothing here is instant. 

The final product leaves you guessing what ingredients made flavors that left you asking for more.  Anyway, to cut to the chase, here goes my recipe, Afritada, Nueva Ecijano  style!

1 kilo pork pigue, chopped into cubes

4 pcs medium-sized potatoes, quartered

2 cups of water

bay leaf

4 tbsps atsuete

1 cup water

bay leaf

3/4 cup vinegar

5 cloves of garlic

1 and a half tablespoons patis (fish sauce)

4 tomatoes, chopped

1 red bell pepper, julienned

1 green bell pepper, julienned

1 onion, chopped

salt and pepper to taste

method:

1. In a casserole, place meat marinated in 5 cloves of crushed garlic, salt, pepper, vinegar and water. Set heat to medium. Midway into the cooking, drop in the bay leaf. Continue simmering until liquid has evaporated almost completely. Set aside.

2. Meantime in a small bowl, soak about 3 tablespoons atsuete in a cup of water.

3. In a separate pan, saute garlic, tomato and onion (in that order). The tomatoes should be stewed until thin in consistency. Put in  bell peppers. Simmer some more then  throw in the adobo. Season with  patis. Pour in strained atsuete water. Set aside.

4. In another separate pan, fry quartered potatoes until golden brown.

5. Mix in the fried potatoes into the afritada. Serve right away.

Sicilian Tuna Pasta

Sicilian Tuna Pasta

To date, this dish has been one of the most labor UNintensive meals I turn to when I’m too lazy to belabor myself with cooking. Sicilian tuna pasta– oh yes, inspired by the great cuisine of Sicily (Italy). Food and wine are the two main attractions of Sicily and the former, a ‘must-indulge-in’ when you happen to be there. Sigh, but we are here. Ha! Anyway, might as well bring home the flavors of Sicily, huh? We had this last night. With wine to match. And, stories to boot. How  I look forward to dining at home with Jake after a long stress-peppered day.  Good food and a glass of red just complete the whole dining experience. Okay, here goes:

Sicilian Tuna Pasta

burger-0861

1 pack san remo linguine pasta (or any pasta of your choice, half kilo)

1 small can tomato paste

1 small pack tomato sauce

1 can tuna (in water or brine)

1 red bell pepper, finely chopped

1 green bell pepper, finely chopped

1 head garlic, minced (I love garlic, others find 1 head too much but to me, 1 head just makes the dish extra tasty!)

salt and pepper to taste

1 tbsp fresh oregano, chopped (optional)

1 tbsp fresh sweet basil, chopped (optional)

1 tbsp fresh Italian flat parsley, chopped (optional)

1 1/2 cups chicken stock

olive oil

1. In a pan, drizzle about 4  rounds of olive oil  (about 4 tbsp)

2. Saute garlic. Add tuna, bellpeppers, tomato paste, tomato sauce.

3. Slowly mix in chicken stock to thin the tomato paste. Season with salt and pepper.

4. Add herbs (optional)

5. Sprinkle parmesan cheese on top.

___________________

Cook pasta according to directions.

___________________

Plate pasta and sauce separately.

Chicken Pochero

Chicken Pochero

pochero-044

A Filipino dish majorly influenced by the many races that’s been ‘in and out’ of our archipelago like the Malays and Spaniards, pochero has been enjoying immense accolades from big foodies like me. The salty and sweet blend (from the saba ) gives the dish an interesting dimension.

Interestingly, the original pochero is actually a merry combination of beef, pork and chicken, but since we try to avert the last two for health reasons, I decided to make this chicken pochero.

But the real kick in this dish happens when you start eating this mean dish with the eggplant-squash siding. I promise you, baby, once you’ve tasted this siding, pochero will never be the same again without it. PROMISE!

pochero-062

Chicken Pochero

3 whole chicken breasts, chopped

3 pcs chorizo de bilbao, sliced

3 pcs saba, sliced

4 medium-sized potatoes, wedged or quartered

4 pcs tagalog pechay, leaves separated from the stem

10 pcs string beans, trimmed

1 small pack tomato sauce

4 cloves of garlic, minced

1 large onion, chopped

1 tomato, sliced

2 tbsp patis or fish sauce

canola oil

2 cups water

salt and pepper to taste

1. Season chicken with salt and pepper. In a pan, saute garlic, tomato and onion. Sear in the chicken. Mix in fish sauce. Add water. Midway into cooking, throw in the potatoes and saba. Cook until tender.

2. Mix in chorizos. Bring down to a simmer.

3. Put in tomato sauce.

4. Add pechay and string beans. Serve with the siding.

___________________________________________________

Eggplant-Squash siding

3 medium-sized eggplant, peeled

quartered squash, peeled and seeded

3 cloves of garlic, finely minced

2 tbsp white vinegar

salt and pepper to taste

1. Boil eggplant and squash. Once tender, remove from the pan and mash and mix together. Put garlic and vinegar. Season with salt and pepper. Serve with the pochero.

Zesty Chicken and Potatoes

Zesty Chicken and Potatoes

Sam’s yaya Lisa has been in the thick of watching cooking shows lately. She tells me how much she wants to learn the art of cooking someday. That, to me, is a great start.

The other night, she made this– zesty chicken with potatoes. I love, love, love the mouthwatering blend of asian soy and calamansi! And, I want lots! haaay, you can NEVER have enough of this once you start biting into it.

Anyway, here goes yaya Lisa’s recipe—

Zesty Chicken With Potatoes

2 pcs whole chicken breasts, halved

5 pcs calamansi, juiced

3/4 cup soy sauce

3 medium-sized potatoes, cut into sticks

salt and pepper to taste

canola oil

________________________________________

1. Season chicken with salt and pepper. Marinate in soy sauce and calamansi for a good 30 minutes to two hours. The longer it gets soaked, the better.

2. Fry the chicken. Once cooked, add the remaining marinade. Make sure you achieve the ‘agaw mantika and soy sauce’ effect.

3. In a separate pan, fry potatoes.

4. Mix chicken and potatoes together. Serve.

Hearty Cream Of Spinach Soup

Hearty Cream Of Spinach Soup

spinach-0011

Having Popeye as spinach’s biggest endorser to date, this veggie has gained immense popularity from all four corners of the globe. It is, hands down,  universally acclaimed as one of the biggest providers of calcium and iron. It’s flavorful, versatile and physically appealing to the naked eye.  That’s  why I love giving this green leaf some interesting twists and turns when I get the chance.

The other night I got my hands working on this cream of spinach soup. It’s simple, rich and elegant. So, who says those three can’t go well together? 

To cut to the chase, here goes the recipe:

Hearty Cream Of  Spinach Soup

1 pack of fresh spinach, coarsely chopped

1 box all-purpose cream

3 cloves of garlic, minced

1  small onion, chopped

1 and 1/2 cup chicken or beef stock

salt and pepper to taste

_______________________________________

1. In a skillet, saute garlic and onion. Throw in spinach and mix in stock. Bring down to a simmer. Never overcook the spinach.

2. Meantime, transfer this mixture into a food processor or blender.

3. Pulse until semi smooth.

4. Put back on the skillet. Switch heat to medium. Add cream. Season with salt and pepper. Stir. Serve.

Coming up next…

Spanish Chorizo With Cheddar Cheese  Omelet

Spanish Chorizo And Cheddar Cheese Omelette

Spanish Chorizo And Cheddar Cheese Omelette

The original version of this dish uses scrap ham. Those hams that come from Excelente in Quiapo or Adelina’s Ham are certainly  the ones that garner  adulation and patronage from foodies like me. However, last I checked our fridge for Adelina’s, what greeted me, in one of my food containers, was a lonesome long stick of Spanish chorizo that seemed to have begged me with the, “Eat me! eat me!” appeal.

Chorizos always have that effect on me. It just makes me bite and devour it  selfishly with my eyes closed. To the point of addiction. To the point of gluttony. Ah, to the point where I mechanically eat and eat and eat these chorizos some more. And, to couple it with cheddar cheese? Arg, holy cow! Deadly combination, I must say.

Last week saw me dishing out this mean Spanish chorizo and cheddar cheese omelette. Used my new baby, my non-stick greenpan that’s eco-friendly and amazingly efficient. Wow, if you’re serious in your cooking, this pan is a MUST-have!!!

The bed of egg from the omelette  just flipped so perfectly from the pan to the serving plate!

Anyway, let me share with you my omelette  experience in the company of my Spanish chorizos. Here goes:

3 whole eggs, slightly beaten

1/4 cup all-purpose cream

1 long stick of chorizos, sliced

1 red bell pepper, minced

1/2 cup cheddar cheese, grated

1 tomato, chopped

1 onion, chopped

3 cloves of garlic, minced

2 tbsp butter

1 tsp worcestershire sauce (optional)

salt and pepper to taste

canola oil

_______________________________________________

1. Saute garlic, tomato, onion and bell pepper in oil. Add chorizos. Season with salt and pepper. Add worcestershire sauce (optional).  Add cheese.

2. Mix beaten eggs and all purpose-cream together.  Pour eggs on a buttered skillet to form a round bed of egg. Distribute the chorizo mixture over one half of the egg. Fold egg with the chorizo filling inside. Serve with  your favorite toast.

TOUCHDOWN!

Herbed Yellow Rice

Herbed Yellow Rice


How I crunch at the thought of skipping rice during times I ‘attempt’ to go easy on my carbs. How much more when the rice is much more satiating than the main viand! Arg, I cannot, for the life of me, go through my daily motion without being fueled up by the mighty rice!

For the last two days, I have been having a serious affair with my rice that would later on be fried, wolfed down and remain to be a memory…

I dished out this herbed yellow rice for my friends Aileen and Mai, who swung by my place separately for two nights. In both evenings, I had this and a beef viand plus some vegetable dish to boot.

Healthy, yummy, earthy and truly fragarant, this rice simply rocks.

I just fried four cups of day-old rice into 3 tbsp butter. Seasoned it with salt and pepper, mixed in a teaspoon of turmeric powder  and threw in chopped fresh rosemary, tarragon, oregano thyme and flat parsley, all herbs 1 tsp each . Then mixed it til flavors blended in perfect harmony. TOUCHDOWN! Now, how simple was that?

Coming up next…

Adobo-Brown Rice Sinangag

Adobo-Brown Rice Sinangag

Adobo-Brown Rice Sinangag

We are definitely brown rice converts by now. I mean, my family has succumbed to the concept of healthy lifestyle yielding better health and a more productive ‘self’. Foodwise, we have started embracing the fact that anything organic and low fat is good. Amen.  So, brown rice is it for us now. Well, save for some ocassions when we have guests at home who still would howl for the white variety…

But who says you can’t have that yummy fried rice while being healthy with your choice of brown rice?

Cooking brown rice is a bit different than when you cook the white kind. The brown rice bigas is soaked in water for a good thirty minutes or so before they are cooked. Once cooked, you gotta let it sit for a day or so (in the ref, of course) to achieve the ‘lose’ texture that is best for fried rice.

To do the adobo fried rice, mince about 5 cloves of garlic. Saute in canola oil. Add 4 cups of rice. Season with salt, pepper and a swig of liquid seasoning. You may throw in about 2 tsp chopped chives if you wish for added flavor and extra kick. Once cooked and plated, top with shredded chicken adobo (recipe below). You may actually opt to toss the adobo already along with the chives.

Chicken adobo

1/2 kilo chicken

1/2 cup vinegar

5 cloves of head of garlic, minced

water

laurel leaf

peppercorn

salt and pepper to taste

canola oil

1. Season chicken with salt and pepper. Mix in garlic, vinegar and water enough to cover the meat.

2. Midway into cooking, add laurel leaf and peppercorn.

3. Bring to a simmer until tender and flaky. Add water as needed. Continue to fry until meat gets flaky and crunchy if you wish. Add canola oil as needed (chicken is expected to render fat, though).

I personally keep a container of adobo handy all the time. I store it in my freezer for future use. Who doesn’t cook adobo at least once a week, anyway? I even use it as panini filling (ah, that’s for the next blog, perhaps?)         

There.


Chinese-Style Steamed Dory

Chinese-Style Steamed Dory

I can’t be luckier to have a Chinese neighbor whom I frequently exchange goodies with. Her Chinese cooking is very reminiscent of those fares typically sold in a lot of good Chinese restaurants in Binondo. It’s authentic, hardcore and real Chinese! Nothing adjusted to the Filipino palate. It’s genuine Chinese cooking, period.

Steamed Dory. Two of my favorite things, combined. I love anything steamed and I love Dory. This dish is best for those who avert red meat or those who are battling with the bulges. It’s light, tasty and healthy.

There is a minor tweaking in steaming this dish from the usual method that yields major difference in taste. Ahhh, love this! Indeed, thou shall always love thy neighbor!

Chinese-Style Steamed Dory

2 large fillets of cream dory

salt and pepper to taste

1/2 teaspoon light soy for each fillet

2 tbsp grated ginger for each fillet

1/2 tsp chili flakes or chopped fresh chili

1. After washing the fillets, lather them with grated ginger. Steam for ten minutes.

(Note: Don’t season your dory with salt and pepper at this point. You would want to extract all the excess juices from the fillets first before you season it.)

2. Remove excess juice from the fish.

3. Season with salt, pepper and light soy. Steam for another ten minutes.

4. Garnish with chili flakes or chopped fresh chili on top. Serve hot.

Jack’s Loft, And Ours Too!

Jack’s Loft, And Ours Too!

As newlyweds about four years ago, the place Jake and I first stayed in was  fifty steps away from Jack’s loft in San Juan. No wonder, we trooped over to the place quite often then– whether to just have a swig of banana- peanut butter smoothie or grab a big time bite!

Just today, ‘Jack’ and I had a reconnection of sorts. My high school friends and I decided to hook up at Jack’s loft, Tomas Morato for a catch-up chat. Once  again, I feasted on their gastronomic delights with my eyes closed! Yum-o! 

Our fantastic beginning was made up of lettuce and everything nice…

classic caesar salad

classic caesar salad

 After much deliberation on what to order next, we finally decided to get carbonara, chicken fingers, beef salpicao, and grilled chicken breast with mashed potatoes. Now, that’s 3 hours straight on the treadmill! Haha!

crispy chicken fingers

crispy chicken fingers


beef salpicao

beef salpicao

Their beef salpicao just had the right blend and consistency of the soy sauce and oil. Very garlicky but not offensive nor bitter. Beef, so tender. Yum! Ahh, how we raved about this salpicao (translation: pinag agawan namin!).

grilled chicken breast with mashed potatoes

grilled chicken breast with mashed potatoes

 Their mashed potato dish has got to be one of the yummiest I’ve sampled. It’s soft, creamy and literally melts in your mouth!

classic carbonara

classic carbonara

 I just love their carbonara. The pasta noodles lock in much of the flavors of the white sauce. The play of salty (courtesy of the bacon) and creamy in the sauce, absorbed by the lingune noodles, just makes the whole ensemble wonderful beyond words!

Cheers!!!

Cheers!!!

Mustard-Mayo Tuna Sandwich Spread

Mustard-Mayo Tuna Sandwich Spread

tuna-340

Great-tasting sandwiches do make me giddy every after bite. ‘Great-tasting’, to me, would mean chunky tuna, creamy mayo and a dash of mustard, all in between two slices of freshly grilled whole-wheat bread!

I keep a jar of sandwich spreads in my ref handy for ‘emergency’ purposes. There are times when Jake and I would experience some pangs of hunger in the middle of the night and would automatically turn to these bottled spreads to stuff our famished tummies. One of my favorite spreads would be this mustard-mayo tuna sandwich spread. It’s  got the merry mix of creaminess, chunkiness, yumminess and HAPPINESS in every bite! Ahh, it’s so good that I even convert it into a salad topping when there’s extra. The crunch factor is made possible  by the onion, cucumber and celery, while the zing from the mustard and boy, do they rock!

Mayo-Mustard Tuna Sandwich

1 can tuna (solid in brine or hot and spicy)

3/4 cup mayo

3 tbsp mustard

1 medium-sized onion, minced

1/4 cup cucumber, chopped

1/4 cup celery, chopped (optional)

lettuce

2 slices of cheddar cheese

a slice of tomato

salt and pepper to taste

2 slices whole wheat bread

__________________________________________________

1. Drain tuna from all the liquid. To take off the ‘lansa’ factor, soak tuna chunks in 3 cups drinking water and drain.

2. Mix tuna, onion, cucumber, celery, mayo and mustard together. Season with salt and pepper.

3. On a slice of grilled bread, put lettuce, cheese, tuna spread and a slice of tomato on top. Seal with the remaining grilled slice. Serve.

TOUCHDOWN!

Coming up next….

Chicken Galantina

Chicken Galantina

Chicken Galantina

 Learning how to debone a chicken has been one of the greatest highlights of my food life. Never thought I’d be able to cut through those chicken cavities!  Why, it seemed too intimidating, laborious and kinda time consuming until I learned  how it’s done. And, the first step? Courage.

With the help of my trusty knife, my first attempt was a resounding success. I just let my knife cut through the flesh while it parted from the bone. Trust me, your instincts will guide you all the way. Easy!

I will post pics soon to graphically demonstrate how it’s done. Meantime, you may opt to have your butcher help you with the deboning.

Ahhh, I just adore this dish. It’s a deadly combination of the chicken’s succulence and the filling’s melt-in-your-mouth factor! Individually, the chicken and the filling are already great and all. How much more when combined? Add to that the sauce from the drippings, hello! That’s super!

Anyway, thought I’d share with you one of my favorite dishes. Guys, it’s yours for the taking, dig in!

Chicken Galantina

1 whole chicken, about 1.5 kilos

1/2  kilo ground pork

1 cup carrot, grated

3/4 cup pickle relish

1 small can crushed pineapple, drained

1/2  box cheddar cheese, grated

1/4 cup  cream of mushroom soup (powdered)

1 egg, slightly beaten

1 large onion, roughly minced

1 large red bell pepper, minced

2 sliced white bread (tasty), cut into small pcs

1/4 cup raisins

salt and pepper to taste

__________________________________________________

1. Debone chicken. Season with salt and pepper. Set aside.

2. For the filling:

Mix well all the remaining ingredients.

3. Stuff the chicken with the mixed ingredients.

4. Preheat oven at 350C. Bake for an hour or until chicken is cooked.

5. Let stand for twenty minutes.

6. Place drippings in a dishware. Serve with the galantina.

TOUCHDOWN!

Coming up next…

Moussaka

tomato-022

Legazpi Sunday Market

Legazpi Sunday Market

All too suddenly, the otherwise bustling Legazpi Village in Makati is a favorite destination on Sundays. Why? It’s become the hub for quality merchandise from great food buys all the way to fabulous home decors. Heck, with great food alone I’m more than happy already, how much more finding more interesting buys there?

img_0720


Discovering that  most of their vegetable produce are organic, my appreciation of the place intesified by leaps and bounds. It just made our trip from QC to Makati all worth it.

img_0742


img_0711


img_0718

I was floored by the diversity of cuisines I found there. Truly, a melting pot of  flavors, cultures and foodies. I enjoyed choosing among unfamiliar dishes. A food adventure of sorts, ahh, I love it!

img_0696

A foodie’s piece of heaven right smack in the city of Makati.

img_0732


img_0715

Quite pricey though for a dressed-down ambience. Most of the Persian/Indian fares cost around P300 a pop. Was told that it was so because of the expensive ingredients (like a 5-karat gold? Gimme a break!).

And for the wine lovers, quite a great collection they have there.

img_0729

And the extras being the fabulous home thingies over there.

img_0706

Including works of art.

img_0707

What a Sunday that was! Envigorating, refreshing and yeah, fattening too! Haha. Anyway, we had to fly as soon as we heard our last burping. Also, Sam was too pooped out to stay for the next twenty seconds.

img_0705

Moussaka!

Moussaka!

tomato-021

A greek dish well-loved by all cultures from all over the world! I am fascinated at how this dish perfectly combines the super triumvirate of great meat sauce, roux and eggplant! This is my version of the moussaka. Other versions use bechamel sauce while I prefer to use roux. It’s thicker and firmer than the bechamel. It’s nice when you layer, you will see the partition between the meat sauce and the roux. Just a bit of warning, a single  serving can be very filling! So, keep the that green tea bag handy, okay?

Ahhh, I can’t have enough of this.

Here goes:

2 medium-sized aubergines (round-shaped eggplants, see picture below) , peeled and sliced about 1/8 inch thick or you may use our regular native eggplant.

For the meat sauce:

1/4 kilo ground beef

1 medium-sized red bell pepper. minced

1 large onion, minced

1 cup tomato sauce

5 cloves of garlic, minced

1 tsp all-spice powder

1/2 tsp cumin powder

1 tomato, chopped

1 tbsp fresh oregano, chopped

1 tbsp fresh basil, chopped

salt and pepper to taste

1/4 cup crumbled feta cheese for topping

For the roux:

1 box all-purpose cream

4 tbsps flour

1 box chedar cheese

1/2 cup grated parmesan cheese

1/2 cup milk

1/4 cup butter

salt and pepper to taste

aubergine

aubergine

Salt the aubergines and let sit for at least an hour to excrete all the bitter juices. Rinse well. Pat dry before slightly frying.

For the meat sauce:

1. Saute ground beef in garlic, onion and tomato. Season with salt and pepper. Add red bell peppers and spices.

2. Bring down to a simmer then stir in tomato sauce. Add herbs. Set aside.

For the roux:

1. Melt butter in a skillet. Add cream, cheddar , milk and slowly stir in flour. Season to taste. Never bring to a boil. Cook in low heat if possible.

2. Continue stirring until mixture becomes thick and firm.  Set aside.

In an oven-proof dish assemble/layer  the moussaka.

1. Scoop in some meatsauce at the bottom. Then top with a slice of aubergine, then meat sauce again, then spread some roux. Repeat layering twice. Top with parmesan and feta  cheeses.

2. Bake at 350 c for twenty minutes or until cheese on top is golden brown. Serve with your fave toast.

Nyssa’s ‘Red Adobo’

Nyssa’s ‘Red Adobo’

I was just too happy to hear from my high school buddy Nyssa this morning. We were exchanging  notes on what we’ve become after all these many years that we have been apart. Why, Nyssa was like a sister when we were teenagers. We chronicled each and everyday of our high school life by chatting away like anything during recess time, lunch time and dismissal time! Funny, we were not even batchmates. We just hit it off too well. Sadly, we kinda drifted apart when college years came. Thank God for facebook, we’re hookedup again, at least, on cyberspace!

Earlier today, she was telling me about her being a ‘d.i.y.’ girl.  I checked out her work (for proof! Ha!) when she renovated her house and I was awed with what I saw! You might want to swing by her site, it’s  http://nyssaferedo.multiply.com/photos/album/6

So proud of you, buddy!

Beyond that, she told me that she’s simmered down to being a housewife from being a career person. How noble, I thought.

Anyway, she’s sharing with us her recipe of ’red adobo’ which her kids soooo love. Am sharing, too, (with her permission, of course) the note that went with it.

Dear Caren

It’s been great to hear from you and to know that after all these years we end up loving to do the same things! As promised i am sending you photos of the food i cooked today. I tried my best to get the pics to look as good as those on your blog…but im afraid these fall short. The good news is, the kids love it, and as moms you and i know that this is what it’s all about!!

I’ve said earlier that cooking is what my life is all about now. They say that we spend 1/3 of our lives sleeping and in my case the other third is spent in the kitchen or in front of cookbooks. I collect just about any cookbook or food book that strikes my fancy and i spend way too much time reading and thinking about all the food i would like to cook and taste. But as reality would have it , chores, kids and homemaking eats up our time and well, most days we have to stick with what is doable and practical and hopefully healthy. The dish we had today was born out of that. This is  the kind of dish harried moms resort to when there is little time and we have to make do with what’s in our cupboards. 

Antonio’s Red Adobo

This dish is not a kind of adobo. Once upon a time, Antonio refused to eat anything BUT adobo and i had to find a way to get him to eat his vegetables. He would  tell me ” Mom this is not adobo!” And I would say ” Oh yes it is! It’s RED adobo.” ( parenting experts please do not castigate me for this…moms do get really desperate at times ) These days he has gotten tired of the real adobo but still hankers for this faux adobo.

1/2 kilo lean ground pork ( grocery is good but if you have a suki butcher it would even be better )
1 medium onion minced
1-2 tbsp minced garlic
2 medium potatoes ( cubed )
1 medium carrot (cubed)
1 green bell pepper ( cubed )
1 large packet Del Monte Tomato paste
1 1/2 cups water ( to dilute tomato paste )
1 Knorr pork Cube
1-2 tsp sugar ( adjust to taste)
1 laurel leaf
salt
pepper
a dash of patis


Saute garlic and onions in pan ( i used regular Olive oil  1 tbsp) Add lean ground pork and brown. Add laurel leaf, knorr cube, potatoes and carrots. Add Tomato paste diluted with water. Simmer. Add green bell pepper, season and continue simmering until sauce thickens and meat is tender. Serve over hot rice.

This couldnt be easier.
picadillo

Amici–Great Italian Food!

Amici–Great Italian Food!
amici along tomas morato in quezon city

amici along tomas morato in quezon city

ai quattro formaggi pizza

ai quattro formaggi pizza

After a driving-intensive morning, my daughter Sam and I decided to stop by Amici along Tomas Morato for a well-deserved  quick bite. It is , hands down, Sam’s most comforting food ever.

We had the ai quattro formaggi pizza and the spinach fusili montanara. Quite a tandem there. The pizza crust had the good compromise of ’thin-ness’ but still filling. The types of cheeses had the best fusion  and the right aportioning. No cheese overpowered another type of cheese. It just.. melted in my mouth (yes, again, with my eyes closed!).

The herbs and tomatoes subtly enhanced the whole cheese ensemble.

spinach fusili montanara

spinach fusili montanara

The pasta is a family favorite. The spinach fusili (fusili is a type of pasta that’s spiral in shape), just held so much of the flavor in its crevices from the sauce which made every bite drool-worthy. The sauce, a well-balanced combo of tomato sauce and bechamel just made this dish extra tasty. On top of these, we had the sausages for the ‘what-is-this-yummy-thing-i’m-biting?’ kick.

Of course, the gelato. Anyone?

e-012

Other must-tries there include: milanese de maiale (golden breaded pork cutlets topped with salsa verde), ragu di maiale con risotto (chunky italian style braised pork with risotto and peas), risoto di mare (plate of sauteed mixed seafood on saffron risotto).

Sam was stuffed. Amen!

e-020

Parmesan Crusted Calamari

Parmesan Crusted Calamari

parmesan crusted calamari

 ’Calamari’ or squid in Italian belongs to the mollusk family along with cuttlefish and octopus. Among the three, the fried calamari, by far, is the most loved and sought after by foodies from all over the world.

A staple in most menus, this dish yields the crunchy and addicting taste in every bite. In this version, the parmesan cheese seals the deal– crunchy, soft in the inside and cheesy. In the final stage, you throw a dash of fresh oregano thyme for that woodsy and earthy flavor.

Now, how awesome is that?

Parmesan Crusted Calamari

1 cup japanese bread crumbs

1/2 cup parmesan cheese

6 large squid, cleaned and sliced into rings.

1 egg, slightly beaten

1/2 cup flour

salt and pepper to taste

1 tsp fresh oregano thyme

_________________________________________________

1. Season squid rings with salt and pepper.

2. Dredge one by one in flour.

Note: Anything you decide to bread is best when there is less moisture before you dip in egg. That is the reason why you dredge it in flour first.

3. Dip in egg.

4. Meantime, mix bread crumbs and parmesan cheese. Coat squid rings with the mixture.  Let stand for 3 minutes.

5. Deep fry until golden brown. Sprinkle with oregano thyme.

6. Serve with garlic-mayo dip  (half cup mayo, juice of 1/2 lemon, 3 finely-minced garlic cloves, salt n pepper to taste—then mix everything together).

Good Ole Baked Mac

Good Ole Baked Mac

macaroni-025

My mom had me bake our old-time favorite macaroni today. This baked mac was one of the first pasta dishes I got my hands working on back in my college years. Classic and pleasantly filling, this is what this pasta is all about.

Versions, versions. Baked mac has been immortalized in so many variations depending on one’s taste preference. Some like it a bit sweet while others go for the sour-y taste . Some want it cheesy while some want more of the tomato sauce. And yeah, the tomato sauce… others want the classic blend while some settle for the flavored ones. Ahh, choices.

Well anyway, obviously, the baked mac that I make is the version that I want. It’s one that’s generously smothered with cheeses, rich tomato sauce and creamy bechamel sauce. Now, how sinful is that?

My mom gave away some trays of the baked mac to our neighbors as soon as I finished baking the last batch. Of course, the Bayhon family got the lion’s share! Why, but of course! Haha.

Cheesy Baked Mac

1 pack elbow macaroni  noodles

1 box quickmelt cheese, grated

3/4 cup parmesan cheese, grated

1/2 cup mozzarela cheese, grated (optional)

Meat Sauce:

1/2 kilo ground beef

4 cloves of garlic, minced

1 medium-sized onion, minced

1 tomato, chopped

salt and pepper to taste

750 grams tomato sauce, Italian blend

1 can chorizos, cut lengthwise and sliced horizontally (optional)

Bechamel Sauce:

1 box all purpose cream

1 cup milk

1 box cheddar cheese, grated

1/4 cup  butter

salt and pepper to taste

4 tbsps flour

___________________________________________________

1. Cook pasta according to package directions.

2. In a separate pan, saute garlic, onion and tomato. Add beef. Season with salt and pepper. Simmer until cooked. Add tomato sauce and chorizos. Continue stirring for the next ten minutes. Remove from fire then add cooked pasta in the beef mixture. Set aside.

3. In a skillet, heat  butter then add all-purpose  creamand milk. Mix well. Add cheddar cheese. Slowly add flour to thicken the sauce. Season with salt and pepper. Set aside.

4. In a baking dish, assemble the pasta. Scoop up some beef mixture that would be the first layer. Smother with a generous amount of bechamel sauce on top of the beef mixture. repeat the layering twice.

5. Top the dish with the remaining cheeses.

6. Preheat the oven to 350c and bake for 15 minutes or  until cheeses are turned into golden brown. Once cooked, let stand for 15 minutes. Serve with you favorite toast.

Chicken Shiraz

Chicken Shiraz

macaroni-047

Salty or sweet? Oddly, there are times when I crave  for two tastes at the same time! Dang, why can’t I just slip into a different foodie when moments like that happen? As in dessert time comes, sometimes I want manggang hilaw with bagoong, but dude, can you not obsess with a slice  of a gooey caramel cake, too? Salty and sweet, yeah!

Sometime last week, I marinated some chicken breasts in soy sauce , calamansi and lots of pepper. I craved for the sour-y component of our native calamansi. Ahhh, how I drooled while I cooked (Ooops, chill! I meant it as a figure of speech! Nothing to make the chicken yummier with “it”, okay? LOl) the chicken. 

However, as I forked out my chicken for plating. I saw on the pan the chicken juices/drippings rendered and  stuck on the surface of my pan. GOLDMINE! The most intense chicken flavor is there and I’m not letting it escape! And my bright idea was to make a sauce out of it. Gravy? Nah! I wanted something sweeter and more.. more.. gourmet.

Yes, finally my palate knew what it wanted. It called on a bottle of shiraz (a type of wine) which contently sat on my ref. Then the sweet dimension was courtesy of my trusty white sugar.

Shiraz yields an extra rich plum and ripe blackberry fruit flavor further enhanced with subtle black pepper and soft oak characterts.

Remember, the kind of wine that you use in cooking should be the kind that you like drinking. Arg, I abhor the cooking wines sold in the groceries. They taste awful!

There.

Anyway, what did I do? Here goes:

Chicken Shiraz

Two whole chicken breast fillet

2 pcs calamansi

3 rounds of olive oil

2 tbsps soy sauce

salt and pepper to taste

1/2 cup shiraz or any red wine of your choice

2 tbsps white sugar (adjust according to your taste)

3 tbsps balsamic vinegar

__________________________________________

1. Marinate chicken in soy sauce, calamansi, salt and pepper.

2. Stir fry until golden brown on each side (about 7-10 mins on each side). Set aside.

3. On the same pan where the chicken was cooked, set on low heat. Gently scrape the chicken by adding the wine, vinegar and sugar. Remember to cook the wine well (meaning, you have to let the alcohol evaporate from the mixture. Give it like 3-5 minutes to be released). Continue stirring until consistency becomes a bit thick.

4. You may stir in cooked chicken or slice the chicken then drip the sauce around (like how i did it). Serve.

TOUCHDOWN!

Coming up next…

Baked Dory In Red Pesto Sauce

sams-3rd-bday-040

Amy’s World

Amy’s World
I can’t be happier hearing from my long-time friend, ex-broadcast journalist, Amy Godinez.  It’s always a chat from foodie to another foodie when we’re connected, mostly on-line.
Why, she’s happily settled in NZ with James, her husband, and her stepkids. Great move, I guess. It’s a totally new life for her there and I’m all out for it. 
james and amy (oh, and hunter!)

james and amy (oh, and hunter!)

I miss her, though. I miss the cutting-to-the-chase banters with her that always leave me bitin with the overflowing stories to tell.
Anyway, am just too glad to get an email from her. She’s generously sharing with us some recipes that she has been cooking lately. Thanks, Amy!
Here goes:
_________________________________________________________
Hi Caren,
 
I took some photos of our oven-dried tomatoes which I bottled recently.  Because we had so many tomatoes in varying degrees of ripeness, I wanted to try something other than pasta sauce which I have made lots of, already packed away in the freezer.
oven-dried-tomatoes-in-balsamic-vinegar-and-rosemary-bottled
 
Aside from the oven dried tomatoes, I thought I’d document dinner for tonight and see how it goes for a contribution!  So…I ended up taking pictures of dinner as well… hmmm… the pears will have to wait on the tree a little bit longer!
 
I have always enjoyed sun-dried tomatoes many different ways, but have always found it a bit taxing to actually do it and let it sit out and dry on its own the way it is normally done.  I don’t have a food dehydrator, but not too long ago found out you can actually dry your tomatoes in the oven (for several hours… as short as 5 to 9 hours, to as long as 20 hours!) at a very low temperature.  You can also decide if you want to keep the seeds or take them out, depending on how fleshy or how dry you enjoy them.  I decided to try it out and did a little variation on researched internet recipes.  Here’s what I came up with:
oven-dried-tomatoes-in-balsamic-vinegar-and-rosemary
 
Oven Dried Roma Tomatoes in Balsamic Vinegar and Rosemary
 
Roma Tomatoes, cut in half  lightly salted
 
Preheat oven to 200F or 95C.
 
Lay tomatoes single layer on an ungreased baking tray or non stick baking sheet.  You can fill up the whole tray but do not stack them on top of each other.  Bake for about 8 hours, using the middle tray of your oven.  Some tomato slices will dry slightly faster than other bits, so check after the 5th hour just to make sure. Turn them over if needed. Remove the dryer bits of tomato and let cool.  Let the whole batch cool completely before storing in sterilized jars with the following oil/vinaigrette mixture:
 
1/4 cup Olive Oil
2 Tbsp Balsamic Vinegar
Sprigs of Fresh Rosemary
Salt & Pepper
 
Enjoy!
 ______________________________________________________
 
Dinner tonight was chicken thigh cutlets. I figured I should bake them, and decided to play around with my baking combination.  This is probably the easiest way to bake chicken with no worries.
baked-chicken-with-roast-parsnips-and-onions-and-walnut-basil-pesto-on-bavette-fetuccini
 
Chicken thighs
2 onions cut in quarters
2 small cloves crushed garlic
1 lemon, sliced into wedges
Handful of pitted olives (I used the Fragatta Garlic Stuffed Olives tonight)
Sprigs of fresh Rosemary (so lucky to have this in the garden as well)
1/2 cup of chicken stock
1/4 cup of white wine 
Salt & Pepper
amy's about-to-be-baked-chicken

amy's about-to-be-baked-chicken

 
Preheat oven to 350F or about 180C.
Line a rectangular oven proof glass dish with cleaned chicken thighs.  Slice a lemon into wedges and 2 small to medium onions into quarters.  Arrange the lemon and onions around the chicken for even distribution. Toss in a handful of olives, and stick some rosemary sprigs around the gaps.  finally crush some garlic and dot around the chicken pieces.  Carefully pour in chicken stock so the chicken is partly submerged…enough to keep the chicken moist while baking.  Lightly sprinkle top with salt and fresh ground pepper and cover with aluminum foil.  Bake for 45 minutes.  Remove foil and add the white wine.  Bake another 25 to 30 minutes uncovered. 
 
When the chicken is done, you will find a good amount of drippings in the pan. Scoop or pour some of the drippings into a mug and set aside for making some gravy.  To make this, all you need is a tablespoon of butter and a tablespoon of flour.  Heat the butter in a skillet and add the flour, vigorously mixing with a wooden spoon.  Add the drippings bit by bit, allowing it to thicken while reducing, Adjust taste and thickness to your liking, just remember you have to mix this continously until it is done, just like making bechamel.
 
Serve on the side or pour on chicken pieces when plating.
 
 
We harvested some parsnips from the garden as well.  One was as big as an arm!  Since we had a few I decided we should do roast parnsips on the side along with another side pasta dish of pesto. 
 
I just lined a baking tray with foil, peeled and sliced the parnsips in half, tossed the parnsips onto the baking sheet along with a quartered onion, gave it a dash of olive oil and stuck it in the oven along with the chicken.  This one baked slightly faster than the chicken though, it was ready in about 40 minutes.  No salt or pepper, just as is.
 
 Mind you, we are so lucky to have most what we need in the garden.  We planted this Cinnamon Basil sometime last year and it has a tremendously lovely smell even when walking around it in the garden.  So, pesto it was… I had no pine nuts at hand, but I did have a lot of walnuts from last year.  Walnuts drop from the trees onto the ground, but these are made to dry in baskets for a few weeks to a few months before they are ready for shelling.  Before you even see the shell, there is a green outer covering that turns brownish black and then it peels or falls off, leaving the walnut shell ready.
 
So, my pesto went like this… Walnut Cinnamon Basil Pesto
 
Chop 1/3 cup walnuts in a chopper or food processor, add in a cup of fresh basil leaves, stems removed, and two small cloves of garlic.  Slowly pour in  1/2 cup of olive oil and continue processing till you get your preferred texture.  Season with a little salt and pepper, and for final touch, add in a little grated parmesan cheese, about 1/4 cup or less.  Do a taste test and add a little more olive oil if necessary.
 
Top or stir into your choice of pasta.  We used Bavette No. 13 which is like a very thin fetuccini.  This experiment with walnuts turned into a very pleasant surprise!
 
I hope you try this sometime Caren.  I would be interested to know how yours turned out!  I will send you more when I do something with the pears!!!
 
 
Love
Amy
 

Baked Dory In Red Pesto Sauce

Baked Dory In Red Pesto Sauce

I was so thrilled  as I booted out my flaming hot tray of baked dory from the oven. The sight of melted cheese fused in with the red pesto and oven dried tomatoes just bowled me over. Rich, healthy and very pretty, my baked dory should find its way to my potluck menu very soon!

The contrast of lemon and cheese was quite a combi there. Add to that the sour-y yet a bit sweet contribution of the red pesto. Fantastic, eh?

The original recipe for this calls for the use of Japanese mayo. The layering then  becomes: lemon slices, fish, Japanese mayo, topped with your favorite cheese. Well, meantime,  I thought I’d play around a bit and replace Jap mayo with red pesto.

This dish cooks so quickly. Over less than half an hour. The lesser time you cook it, the juicier and more moist the fish meat remains to be. Now, how mouthwatering is that?

sams-3rd-bday-018

Slice about 4 lemons and line them up on a tray with the slices on top of the other.

Meantime, season 3 large whole fillets of dory with salt and pepper. Lay them on the lemon bed.

sams-3rd-bday-024

Smother generously with red pesto on your fillets (red pesto is readily available at your favorite supermarket).

Top with your favorite cheese. My favorite cheese combi is cheddar and parmesan. Bake at 350c for 20 minutes or until cheese melts.

sams-3rd-bday-040

Chelsea Market And Cafe

Chelsea Market And Cafe

chelbagsempaksiw-060

I crack up reminiscing  the very first time I visited Chelsea Market and Cafe a few years ago. Why, I made a bed out of their table! Yes, I literally dozed off on their table as I wrestled with my fatigue! Coming from work then, I felt too pooped out and just gave in despite the well-lit, packed and bustling ambiance!

All I remember having was a great glass of white wine and the buttered focaccia bread with baked garlic as a starter (that would be an ender as well!). My, I was ‘dead’ way before the main course was served! Worst, I missed the dessert!!! Sigh, what work can do to you..tsk!

Anyway, ranting aside, I had the pleasure of returning there recently. Ahh, Jake and I tagged along our daughter Sam, this time. And, I swore to my self that I would not succumb to slumber!

For a comeback-with-a-vengence-I-will-wolf you-down dish, I picked the slow-cooked herbed  Norwegian salmon (PHP 495). The slow-cook factor rendered the tastiest salmon in the many years that I’ve become a ‘groupie’ of this kind of fish. It was moist, firm  and juicy all the way.

The herbs set the flavor so wonderfully, I tasted the merry mix of that woodsy and earthy combi that spelled YUMMINESS!

Ahh, my return was all worth it.

The other palate pleaser we tried was their five-cheese pizza topped with arugula leaves ( 10-inch, PHP495). Before I took the first big bite into my pizza, I nibbled on the arugula leaves. I liked the bitter-free and kinda sweet taste the arugula gives. Boy, I ate them like I was munching on some Doritos! Man, sarap!

The five-cheese pizza just rocked.

It just had the great combo of cheeses that rolled out my eyes. The secret weapon of the pizza was with the fusion of their great cheeses and perfect crust, crowned by the yummy bunch of arugula leaves. Now, how fantastic was that?

Winding down to our last few bites, I knew I would have to make another comeback. The food definitely teased me big time to make bigger bites the next time we visit.

Chelsea Market And Cafe, Serendra. 9097011 9097012

Paksiw!

Paksiw!

The term ‘paksiw’ refers to stewing in any sour fruit or vinegar. The three viands most often cooked in the house I grew up in were paksiw na isda, paksiw na lechon and paksiw na pata. The latter being my top pick.

mom's fall-off-the-bones paksiw na pata

mom's fall-off-the-bones paksiw na pata

My late Ilongga lola ate her ‘paksho’ (or paksiw to us) like anything! My dad swore by her paksiw na isda. It had the precise proportioning of the vinegar, garlic, water, ginger, etc.  On the other hand, I do worship mom’s paksiw na lechon and paksiw na pata! The sour and sweet just end up happily married!

In a recent trip to Fort Ilocandia, my husband Jake, brought home his loot bag of lechon baka from a grand party that served roasted calf. In other words, the sponsoring company gave away pa ‘take-out’! Haha. Now, the task: What to do with it?

I’m not a big fan of lechon baka. Baboy yes, baka, not really. The roasted calf emits a strange odor that kinda turns me off. The taste is nothing like the lechon baboy that’s succulent to the power of ten.

Given these concerns, I decided to give it a bit of a facelift and made it into a paksiw. Ahh, that one I like! It masked the odor and gave the calf a different taste that my palate so welcomed.

chelbagsempaksiw-160


Saute 4 cloves of chopped garlic, 1 medium-sized chopped onion, 3/4 cup vinegar, 1/4 cup soy sauce, mix in a bottle of Mang Tomas sarsa (yes, it’s my only sarsa brand!), 1 laurel leaf and throw in 3/4 kilo lechon. Voila!


Paksiw in any language means great filipino comfort food. Easy, scrumptious and extremely satisfying, paksiw is just the food to eat when you want to feel good.

TOUCHDOWN!


It’s All About Aileen

It’s All About Aileen

It’s always  the most awaited treat everytime my buddy of two decades, Aileen, invites me to her place. Aside from our usual extremely engaging chats, the food she serves is always, hands down, the most piquant. None of the bad stuff, everything well done and well served.

About a week ago, I had a chance to visit her new place down east. I was marvelling at the posh, very chic  and well thought out design of the house’s interior.

aileen-055

Don’t you just love eating good food with a great interior design at the backdrop?

aileen-060

Now, where is the good food? It’s right here:

roasted aubergines with smoked bacon

roasted aubergines with smoked bacon

I thought that the bacon just complimented well with the neutral taste of the aubergines. Yeah, the ‘melt-in-your-mouth’ kind that kept me grabbing some more bites.

aileen-002

country fried chicken on saffron rice

Aileen’s mom was the moving force behind this gorgeous rice. She promised to share with me the recipe sometime soon. The rice in itself tasted like a complete course! I couldn’t stop scooping up some more of this rice everytime my plate got empty!

The pasta was likewise as palatable. The pasta noodles held so much flavor from the broth used to boil it. The mix of sausages actually brought home the bacon. It just jived in perfect harmony.

The play of herbs and mushrooms did enhance the taste of the whole ensemble.

aileen-009

And, our sweet ending was made of this:

chewy chocolate chip cookie ala mode

chewy chocolate chip cookie ala mode

And that was ten pounds gained in one afternoon. Ha!
Aileen committed to me the recipe of this cookie which I will post here as soon as I get it. Her cookies were so gooey, so gooey that I ate like a crate of these treats!
aileen-062

My heartfelt thanks goes out to my ‘other sister’ for graciously welcoming Sam and myself to their home and feeding us with only the best stuff. ‘Atta day! Cheers!

Pan-Seared Pangasius Fillet In Herbed-Cream Sauce

Pan-Seared Pangasius Fillet In Herbed-Cream Sauce

At around lunch time sometime last week, I got a text message from my husband, Jake. And, it read:

“Babes, my baon is all BUTO.”

I was half-laughing in silence (couldn’t be louder, was right smack in the middle of a busy, busy mall!) visualizing him drooling to get a big bite of his caldereta when he must have realized that his fork was stabbing nothing but bones!

However, I felt half-guilty for not paying attention to the caldereta beef part that I unceremoniously dumped into his baunan. How insensitive, I thought.

Well, I promised him a much better dish the next time. And, so I did.

He had the pan-seared pangasius fillet  in herbed-cream sauce.

Pangasius fillet is actually premium cream dory. This fish has gained ground among foodies all over the world in the last few years that it had been consistently used in many dishes since it became popular. It sears well, feels firm and fleshy. Yeah, nothing ‘fishy’ at all.

(Please refer to my past post, parmesan-crusted-pangasius)

I just seasoned it with salt and pepper, dredged it lightly on flour and pan-seared for about 4 minutes on both sides.

For the sauce, I used 3/4 cup of all purpose cream (If you want to thin the sauce, you may add fish stock or water slowly in the mixture until you achieve your desired consistency), 3 tablespoons of chopped basil, 3 tablespoons of flat parsley (optional) and 1 tablespoon butter.

Just mix them together on low heat and season with salt and pepper. Pour sauce onto the pan-seared fish and voila!

Yes, that EASY!

Haay, nakabawi sa wakas!

TOUCHDOWN!

Smoked Bangus Mania

Smoked Bangus Mania

Smoked bangus is, without a doubt, definitive of Pinoy cuisine.  Yes, one of the many Pinoy food greats that deserves global recognition that’s been long overdue. Waaaay long overdue.

The rich, smoky taste  of this bangus makes it extra palatable, unique and flavorful. Conventionally, this is eaten with itlog na maalat, chopped tomatoes, red onion with matching sinangag (fried rice).  The play of salty, sour and spicy in this combo meal just makes you salivate at any given time that it is suggested.

smoked bangus in olive oil, scrambled eggs with chopped burong mustasa and tomato salad

spicy smoked bangus in olive oil, scrambled eggs with chopped burong mustasa and tomato salad

Tweaking it a bit, though, can spell variety and another food adventure. So, why not?

Well, off hand, there are two smoked bangus dishes I am crazy about, spicy smoked bangus flakes in olive oil and smoked bangus pate. The latter, being a big favorite when we hold parties at home and the former, a flexible dish that can be transformed into many other great-tasting dishes (please refer to my previous blog,  http://theeatingroom.wordpress.com/2009/01/08/one-fine-evening/ for the smoked bangus pasta recipe).

smoked bangus pasta

smoked bangus pasta

This dish I’m featuring now is smoked bangus pate.

By tradition, pate is  presented as  baked in a crust or shaped as a terrine. But the crust’ s purpose isn’t really to be gobbled up but to hold the pate in one piece.

Today, the pate is, connotatively, a combination of any seafood, chicken, meat or vegetables with a base ingredient turned into a meat paste.

This dish I am sharing with you is smoked bangus pate. A fantastic dish perfect for snacking, cocktails or for business!

tinapa-mousse-039

smoked bangus pate

To do it:

In a blender, put in one piece of medium-sized fried smoked bangus fillet (minus the head, tail, skin and bones), 1 box of cream cheese, half cup all-purpose cream, 2 tbsps lemon juice and salt and pepper to taste. Pulse until smooth and creamy. Serve with crostini rounds.

Organic Tilapia In Two Ways

Organic Tilapia In Two Ways

No less than media mogul Oprah Winfrey declared to the whole wide world her reverence for our tilapia. In fact, her website has, in its food category, a great number of recipes that showcase tilapia.

About two days ago, my family paid a visit to a farm my tita, Charito Mercader (a staunch supporter and advocate of Natural Farming),  is managing. Interestingly, this farm is fascinating  in that it institutes, educates and implements, yes,  Natural Farming.

Natural Farming is a sustainable farming and advocates the use of organic elements to grow organic produce.  It heals, rehabilitates and reinvents  the soil and other natural elements hurt by previously used chemicals to grow plants and nurture other livestock.

For more about Natural Farming, please click here:  http://www.youtube.com/watch?v=SflqYxTQ7zI

Anyway, my tita gave us organic tilapia from their man-made pond for take out. Now, what to do? Bake? Steam? Fry? Ahhh, I was pleasantly in a dilemma on what to do with it.

And so, to break the stalemate, I decided to do my tilapia in two ways: Baked and fingers. I had so much fun doing this. I definitely did not need an Oprah Winfrey to inspire me to move it. This fish could stand alone, with or without Oprah!

Tilapia is loved for its tasty flesh and flexibility. Baked, steamed, fried, it just gives a stellar performance each time it’s cooked.

For the baked tilapia, I seasoned each piece with salt and pepper, inserted about two seeded lemon slices, two slices of ginger and scallion stalks in each tilapia. Topped each piece with about two tsps minced red bell peppers and 2 tsps chopped onion. Baked them for 220C for 30 minutes.

the tilapia before baking...

I knew I had a winner in the oven the moment the perfect aroma escaped the oven compartment a few minutes after I set it in. Ahh, the smell and taste were unbelievable! My palate was  just too happy to have tried something light, healthy and scrumptious.

I particularly enjoyed the taste of the fusion of all the ingredients. The union of lemon and ginger propelled the flavors to greater heights. It just rocked!

baked organic tilapia

I topped it with oregano thyme sprigs for garnishing.

For the tilapia fingers, I just filleted the tilapia, cut it lengthwise (about the size of a middle finger) seasoned it with salt and pepper, dipped it  in flour then  soaked it in 1 beaten egg then dredged on Japanese bread crumbs, then deep-fried. Pat dried on a bed of napkin, plated and served!

* Dip in mayo when served:)

tilapia fingers


Mom’s Lechon Kawali, atbp…

Mom’s Lechon Kawali, atbp…
mom's super lechon kawali

mom's super lechon kawali

Last weekend saw me invading mommy’s kitchen. I grew up eating, savoring and devouring her kitchen goodies. I just LOVE her food. Yep, mommy was my 1st cooking  coach who unceasingly fed me with all the food education I needed to be able to efficiently work around in my own kitchen, now that I am married and managing my own kitchen.

She cooked her lechon kawali that had the crunchiest balat and the super tender laman. It was also  ’lesser evil’ compared to the other lechon kawali around. Why? Because she had the turbo broiler to cook it. Didn’t need oil at all, in fact, the pork was the one that rendered the oil.

Conventionally, as the name suggests, lechon kawali is cooked using a kawali or a deep frying pan, but this time, mom avoided the unhealthy use of too much oil and would use a turbo broiler.

Okay, okay, that was putting the carriage ahead of the horse. Let’s take mommy’s recipe step by step. Basically, all you need would be three ingredients: 1 kilo pork (liyempo), salt and pepper to taste.

 ( Important: Please do not cut or chop you pork at this time. The chopping part happens AFTER you have cooked the pork. You don’t want the pork to run dry and let all those precious juices to escape in the process of broiling IF you cut it prematurely)

She just seasoned the pork with salt and pepper. Put it in a pressure cooker (that got filled up with water enough to cover the pork) and cooked for 30 minutes. Please remember that the timing begins when the whistle has already began whistling. The main secret in any meat dish is TENDERNESS. Believe me, no meat dish is good if the meat isn’t tender enough.

After making it tender, she was ready to put it in a turbo broiler preheated and set at 220C, cooked it for about 45 minutes or until the skin turned crunchy. Then she set it aside and let stand for another 15 mins to let the juices settle back onto the meat. Ahhh, sarap, Lord!

You may freeze the pork before or after broiling it for upto three months. Also, you may consider giving it a coupla ‘facelifts’ for variety and turn it into binagoongan, paksiw na lechon or pangsahog to your veggie dishes.

Anyway, to go with the lechon kawali, she served:

halaan sa dahon ng sili

halaan sa dahon ng sili

 My favorite halaan sa dahon ng sili. I liked the broth that had the ginger flavor intensified by a great saute of garlic and sibuyas tagalog.

Other great possible side dishes to go with your lechon kawali could be kamote tops salad in bagoong balayan sauce, munggo with dahon ng ampalaya or papaya atchara.

What a feast! I was simply pleasantly stuffed, yes, with my eyes closed again. Mom just knew how to ignite the foodie in me when I’m there. Oh, and yes, indeed, masarap makikain sa kapitbahay!

Baked Garlic N’ Cheese Tahong

Baked Garlic N’ Cheese Tahong

Tahong can’t be more mouthwatering than this.

The sight of melted cheese just blows me away. The mega tandem of garlic and cheese topped on most dishes where it is suitable always gets me going for seconds each and every time they are served. Ahh, don’t we all?

Tahong is more popularly known in Mindanao as ‘green shell’, it’s actually the species that’s more commercial. It has the green shell, of course, with deep brown streaks on it. The other species of tahong is the brown mussel. As the name suggests, the shell is brown, but the meat is the same as the meat of green shell. In certain areas in the Visayas, like in the town of my lola in Negros Occidental, these brown mussels are called ‘tabahong’.

Today, we had this lovely dish of tahong. It’s baked garlic and cheese tahong. I just put 1 kilo of tahong in a casserole with no water, no salt and pepper, nada! Set the heat on medium and let it cook for about twenty minutes or until the shells broke open. The tahong excreted its own liquid after it cooked. Once cooked, I removed the top cover to expose the meat of the shell for baking.  

I arranged them on my baking pan topping each shell meat with butter, a pinch of minced garlic and quickmelt cheese. In the end I gave it a quick dash of salt and pepper. Cheese and butter were already quite salty that’s why the additional salt wasn’t too much. The pre-baked tahong looked something like this:

Once cooked, you have the option to take your tahong  to another level and top some more with chopped tomatoes and chives. Something like:

baked tahong with cheese, garlic, chopped tomatoes and chives

Not bad, eh?

Or, you may settle with the default recipe which is…

baked garlic and cheese tahong

Steamed Chicken With Black Mushrooms

Steamed Chicken With Black Mushrooms

chx-n-mushroom-071

Have you had days when you got home tired and starving with no intention to cook but would obsess in biting on great food? Ha! Guilty eh? This dish is a one-pot-wonder and very fuss free save for some minimal cutting. A little movement won’t hurt, baby. Let’s do this.

It’s steamed chicken with black mushrooms. Most Chinese restaurants serve this. It’s usually served rice topping style with the rice flavored and ‘powered’ by the big time flavor of the chicken dripping and the Asian flavor of the ginger.

For this dish, you will need:

1/2 kilo chicken thighs, chopped into bite sizes

5 cups cooked white rice

1/4 cup sesame oil (optional)

1 can shitake mushrooms, sliced (You may use dried shitake mushrooms. Just soak them in water for 15 minutes before use)

3 thumb-sized ginger, grated

salt and pepper to taste

chopped chives or sibuyas tagalog for garnishing

To assemble:

In a round pyrex, put in cooked rice and top with seasoned chicken, mushrooms, ginger and oil. Cover and steam for 45 minutes. Garnish with chives. DONE!

Now, was that shocking? Fuss free it was, yeah. I just love the juices of the red chicken meat dripping onto the rice as it cooked. Plus the flavor back up of the ginger, it truly makes every second of waiting for it to cook all worth it.

TOUCHDOWN!!!

The Oven-Dried Tomato Experience

The Oven-Dried Tomato Experience
So, this is the real thing. Plump, juicy and verrry ripe, these tomatoes just got me grabbing my apron for some soiree with my fresh batch of  these fresh and dewy tomatoes. Yes, I’m a kitchen mad scientist again and will train the spotlight, this time, on these picture-perfect cancer-fighting ingredient.
fresh ripe tomatoes for the caldereta base
It was once believed that this fruit was dangerous to be eaten as it was called “lycopersicon” in Latin that meant ”wolf peach”. Obviously, people have already gunned down that belief. Why, it’s been the rockstar of most major cuisines all over the globe for many, many years now!

pre-baking of the tomatoes

I use this as base for a great number of my pasta dishes. The flavors just well embrace the pasta when it’s mixed together. Like lovers of fifty years, they just jive in perfect harmony. Yep, it’s the perfect marriage, hands down.

They can go well with other ingredients like pesto, tuna, cheese, chicken or in soups and stews. Given this flexibility, it is wise to jar them up in an air-tight container and put in ref. Life span can reach up to a week in the ref depending on how perfectly sealed your container is. Freezing is a method you may use, too, as it can preserve these oven-dried tomatoes for up to three months.

Now, what to do:

Pick about a dozen plump and ripe tomatoes. Boil them in water until their skin burst. Drain from water and set aside. Remove skin. Let it cool.

Meantime, preheat oven at 120C. In a baking pan, lay down your tomatoes for the prep phase. Season with salt and pepper. Sprinkle with chopped herbs of your choice (my faves include rosemary, sweet basil, tarragon and oregano thyme). One or two varieties of herbs will do, no biggy. Throw in 6 cloves of chopped garlic. Drizzle generously with olive oil and a quick swig of balsamic vinegar (optional). Bake until the tomatoes begin to shrivel, about an hour. Remove from the oven and drizzle some more with olive oil. Seal well.

 Ahh, this can’t be real!

oven-dried tomatoes

Dishes that go well with this coming soon. Promise!

Tomato and Garlic Pork (Chinese Style)

Tomato and Garlic Pork (Chinese Style)

ribs-007

So, who says you can’t make magic out of leftover food?

I had this leftover lechon kawali in my ref a few days ago from a party at home. Sadly, it ceased to bask in its crunchiest glory after a day. I just had to give it some tweaking to make it appetizing again. And again.

This dish was a three-step recycling wonder. Easy but flavorful, gastronomic and mouthwatering! Cooking purists will curse me for taking the short route in preparing this but harried moms will definitely come to my rescue!

To do this:

Heat the pan with about 3 tablespoons of cooking oil.

Mix in a medium-sized sachet of Lee Kum Kee (hep, not sponsored!) tomato and garlic prawn sauce onto the oil. Obviously, we are substituting the prawns with the pork here. You may opt to use leftover fried chicken, too.

Then throw  in about half a kilo of your leftover lechon kawali (or fried chicken or ,yes, prawns). Mix well. DONE!

 (for lechon kawali recipe, please click http://theeatingroom.wordpress.com/2009/04/16/moms-lechon-kawali-atbp/)

Our sweet ending was made of this:

silvanas!

silvanas!

um-um-ummmm!

ribs-011

It’s silvanas from Carreon’s Sweets And Pastries, you may visit this site for more info, http://www.flickr.com/photos/chris1204/sets/72157605760384753/

Yummy!

ribs-014

Mediterranean Kebabs

Mediterranean Kebabs

We oftentimes run across the word “Mediterranean” in restaurant menus and  cookbooks. But do we actually know what qualifies for Mediterranean food?

Mediterranean cuisine, as we know it,  is the food of the countries that surround the Mediterranean Sea.

These nations include Spain, Italy, Turkey, Greece, Portugal, etc. Overtime, their cuisines have influenced one another, giving birth to what food writers touted as, Mediterranean cuisine.

This type of cuisine is flexible and characterized by its great number of ingredients and its many regional variations. Key ingredients may include: Fish, garlic, olive oil, fruits, vegetables and nuts. Grilling and smoking being the two most used methods of cooking.

Today, I made some kebabs. Chicken kebabs. Along with it on my skewer were red bell peppers, red onion and some cucumber slices. Ahhh, my chicken was in great company!

I seasoned about 2 whole breasts of chicken with salt and pepper plus  3 tbsps light soy (optional). Gave them a quick swig of about half a cup of lemon juice. Threw in a pinch of ground cummin powder for each breast and marinated for thirty minutes. I opted to use the lightest marinade to make the flavors and juices jump out of the chicken meat.

Meantime, I quartered 3 red onions, sliced 1 whole cucumber and cubed 2 red bell peppers. Seasoned all vegetables with salt and pepper to extract their precious juices and for flavors to burst away.

On my other chopping board, I cut the marinated chicken, nugget size. Then assembled  the ingredients into the skewer such that the order went like: Cucumber, chicken, red onion, bellpepper and chicken again. Drizzled the ensemble with olive oil. Then, I was  ready to grill!

Grilled until all ingredients were smoky and had the pretty grill marks. Serve with yogurt dressing:

1 cup plain non-fat yogurt
1 clove of garlic, minced
juice and zest of 1/2 lemon
1/2 tablespoon honey
1/4 cup chopped, fresh mint leaves (optional)
salt to taste
freshly ground black pepper

I just mixed everything together. Yes, that easy.

Please note that you may arrange  the skwered ingredients interchangeably. Or you may even drop an ingredient that you don’t like and replace them with what you want.

My other suggestions to go with the chicken include: Zucchini, cherry tomatoes, half a cob of a corn, leek stalks, etc. Go have fun choosing what you want to put in there! Have a feast!

NOTE: Other kebab recipes will tell you to marinate meat in the yogurt dressing/marinade instead of my concoction. Feel free to try it, too. LikeI said, I just wanted to savor the flavor and juices of the meat almost in its naked glory.

Stir-Fried Honey Mustard BBQ Chicken

Stir-Fried Honey Mustard BBQ Chicken

garlic-chicken-034

Scrumptious food made from scratch. It’s got to be the benchmark of GREAT food. Given this, I am one to make some of  my own cooking ingredients such as homemade tomato sauce, cream-based soups, pizza crust, dressings, marinades, etc.

However, there are instances when I just need to fast track my cooking. And, rush it is— I usually just pluck out great sauces from the pantry to make wonders on my meat given the VERY limited time that I have. Ah, now, can you relate?

One of my favorites would be HUNTS honey-mustard BBQ sauce. The flavor is very  intense yet smooth on the palate. Coats well with your favorite meat, too. It’s become my bestfriend when I need to dish out food that will cook under ten minutes.

For the marinade, I just put in 3/4 cup of the hunts honey-mustard BBQ sauce, 5 cloves of minced garlic, 1/4 cup extra lemon juice , salt and pepper to taste and 5 slices of ginger (optional). Overnight marinating is best.

When it’s time to cook it, I cut the chicken into bite sizes.  Stir-fry them while adding slices of leek stalks for added flavor. Midway into the cooking, I add around 4 more tbsps of the marinade for flavor reinforcement . There. Shockingly fast and easy.

Food purely made from scratch can wait until I’m load free again. Soon, I hope.

Wine-Infused Herbed-Tomato Pasta With Pan-Fried Chicken BBQ

Wine-Infused Herbed-Tomato Pasta With Pan-Fried Chicken BBQ

tgaytay-066

It was already close to 8pm when I realized I still had to cook Jake’s baon. Waaa! I still had to do ten million things but did not want to drop the baon-cooking duty. Okay, what to do?

Another eureka moment again. I suddenly found myself  grabbing some pack of linguine from the pantry and taking out some breast fillets from the fridge for some quick pan-fry.

I decided to make some wine-infused tomato-based pasta sauce. The tomato would be courtesy of a small pack of tomato paste that would be  infused with my favorite white wine ( remember to use only the wines that you like when you use them in your dishes).

The tomato is one of the major sources of lycopene. Lycopenes give tomatoes its red color and has been found to reduce the risk of having lung and prostate cancer.

However, lycopene isn’t well absorbed unless you heat it. In the case of tomato paste, even slightly burning the tomato paste is recommended to aggressively  release lycopenes and intensify the tomato flavor.

Okay, for this dish you will need:

1/2 kilo linguine noodles

2 small packs of tomato paste

4 cloves of garlic

1/2 basil leaves, finely chopped

1/2 cup olive oil

salt and pepper to taste

1 whole breast of chicken, season with salt and peper and marinate in your favorite marinade, in this case, I marinated it in BBQ sauce to counter the ‘sourness’ of the tomato-based pasta.

What to do:

1. Cook linguine according to package directions.

2. Meantime, saute garlic. Add basil then tomato paste. Pour in wine.

3. Dry out the sauce from the wine alcohol. Continue stirring til tomato sauce is well cooked, and yeah, slightly overdone. Season with salt and fresh pepper. Mix in the the linguine.

4. In a separate pan, pan-fry chicken, about 5 minutes on each side or until meat is moist and cooked.

5. Chop the breast. Top on the pasta.

‘FISHstek Tagalog’?

‘FISHstek Tagalog’?

bangus-004

I am so tempted to call this dish, ‘FISHSTEK TAGALOG’. And hey, I just did! Haha. It’s actually the bangus belly version of your regular bistek tagalog. That sour-y, oomph-loaded dish loved and savored by the food-loving public.

This dish was definitely a childhood favorite. It was a staple on our table during my younger years. My mom usually served this with her creamy chicken sopas or some hot  halaan soup with dahon ng sili. Ahhh, ‘atta feast!

The smell of red onion, garlic and calamasi just spell YUMMINESS. The mega combi of onion, garlic and calamansi  seals in the dynamite flavor of the entire ensemble. Of course, it goes without saying, that the bangus belly is the rockstar here. Fat, juicy and tasty, how can you not salivate on this bangus?

To do this you will need:

2 pcs bangus belly

3 pcs calamansi

canola oil for frying

1/2 cup canola oil for the marinade

salt and pepper to taste

5 cloves of garlic, minced

3 medium-sized red onions, cut into rings

1/4 cup soy sauce

1 tsp spanish paprika (optional)

1 tsp fresh oregano leaves, chopped

What to do:

1. Season bangus with salt and pepper. Marinate in calamansi, soy sauce, oil and garlic for about 30 minutes or overnight. Rub with paprika before frying.

2. Pan-fry bangus in oil, about 5 minutes for each side. Set aside.

3. Meantime, caramelize the onions with the marinade from the bangus. Add oregano leaves and continue sweating the onions. Be sure to achieve the ‘agaw mantika-toyo’ effect. Remove from pan.

Now you’re ready to plate:

Assemble the caramelized onions…

your caramelized onion bed

your caramelized onion bed

Then top with the bangus…

bangus-0091

Avocado!

Avocado!

Avocado on Foodista
garlic chicken 026

My tastebuds have recently been clamoring for avocado. For three days in a row, I have been swinging by the fruit stand outside Tropical Hut in QC to get my avocado fix.

Using a medium-sized avocado, I break it open, remove the seed, scoop up the flesh (in bite sizes), stir in some 1/2 cup of low-fat milk, 1/4 cup all-purpose cream, add sugar and then chill for an hour. There, I’m ready for the chow!

You may top this ensemble with either roasted pinipig or a cobbler of vanilla ice cream. I like mine plain, though. I like savoring the avocado almost in its naked glory.

This fruit is a rich source of Vitamin A and contains little amount of vitamin B complex and E.


Deep-Fried Cheesy-Herbed Chops

Deep-Fried Cheesy-Herbed Chops

Am reminded of my grade school days when pork chops made up my usual baon. They were either fried or stewed in tomatoes and mixed with peas and carrots. Porkchop meat is a great cut because it has the delish triumvirate of meat, fat and bone! Ahh, don’t you just love biting on that moist, juicy and tender porkchop?

Today, I had a fatless porkchop butterflied (aww, did you just ask for the fat and bone?). Sorry! The porkchop today wanted to be a butterfly!

I pounded meat until it got half its original thickness, seasoned the butterflied chops with salt and pepper.

Then I filled it with slices of cheddar cheese, basil and chopped rosemary (optional) leaves.

Then dredged it in flour, dipped it in 1 beaten egg, then dredged again in Japanese breadcrumbs.

Deep-fried until golden brown. Served hot.

Garlic Shrimp Kebabs On Red pasta

Garlic Shrimp Kebabs On Red pasta


shrimps 018

A kebab refers to any grilled or broiled meat that is skewered or put on a stick. Extremely popular in places like the  Middle East, the Mediterranean nations, Africa, Central Asia and South Asia, these kebabs are instant crowd pleasers in any occasion.

The known kebabs include lamb and beef. Ahh, kebab meats always get me giddy. I just love its smoky, spicy and juicy feel! Wonderful.

Today, I whipped out my pack of shrimps from the fridge. Got about 8 pcs. Deveined all of them then seasoned them with salt and fresh pepper. Marinated them for 30 minutes in 3/4 cup melted butter (expect the butter to solidify a bit once you put it in the ref, you might want to melt it about ten minutes before grilling) , 1/4 cup of lemon juice and  8 cloves of minced garlic. Afterwhich I grilled them on low fire.

shrimps 008

Meantime, I cooked my whole wheat spaghetti pasta according to package instructions. Set aside and had it wait for the sauce.

For the pasta sauce, I heated the shrimp marinade and mixed with my bottled oven-dried tomatoes onto the pasta. Sprinkled with my  favorite parmesan cheese on top. The richness of the butter, the flavors of herbs and the acid taste of the tomato chunks just revved up the whole pasta dish.

(For the oven-dried tomato recipe, please click: http://theeatingroom.wordpress.com/2009/04/25/the-oven-dried…ato-experience/ )

The last touch would be plating the shrimp kebabs over the pasta ensemble. Serve with your favorite toast.

Elle’s Gastronomic Cooking (Part I)

Elle’s Gastronomic Cooking (Part I)

My good friend from high school Elle Acuña-Lorenzo and I have been in the thick of some culinary-related banters lately. I see her food styling and photography (by her husband) on facebook all the time and man, they sure rock!

Anyway, I got an email from her today in response to my request for her to let us sample (at least, via our ‘cyber palate’, haha) her dishes. Here goes her note:

Dear Caren,

I hope you will be able to use my recipes in your blog. I really love reading your blog & trying out your recipes. Parang natetempt na naman ako mag-aral ng culinary. About 3 years ago I took a short 3 month course at ISCAHM at Katipunan and I enjoyed it tremendously. I just love cooking so much & thanks so much for sharing your passion. Sobrang kaka-inspire.

 Mwah!

Elle Acuña Lorenzo (a.k.a Mari)

Baby Back Ribs,  Potato Gratin and  Balsamic Salad II

Yummy Baby Back Ribs – Pork

 1. 1 Rack of pork ribs – about 1 -1.5 kilos

 2. Marinade ribs – soy sauce, mustard, tomato ketchup, lea & perrins, garlic, calamansi, pineapple juice, sprite & brown sugar.

 3. Put ribs in pressure cooker with marinade.

 4. Bake slowly till cooked while basting in its own sauce.

 Procedure:

 Mix all ingredients except pork and adjust amount of ingredients to your own taste. Afterwards marinade pork for about an hour then pressure cook for 10 minutes.

Transfer to a pan and bake for 10-15 minutes at about 250 degrees Fahrenheit. Serve hot.

 Serving Suggestion: may serve with salad & potato gratin

*Will publish two more of her recipes in the succeeding posts.

Calandracas!

Calandracas!

calandracas 023

CALANDRACAS was certainly one of the greatest flagship dishes of my childhood. Growing up, my lola served calandracas to us quite often when our family gathered in her house for the usual Sunday lunch. Ahh, her food was fabulously gratifying! Simple home food that rocked til the very end!

My lola dished out the most unforgettable tinumis, the best torta and her gastronomic rendition of the classic pochero. I sorely miss her. The scent of her hand-me-down food just plesantly haunts me. Yeah, I miss her…

Today, I swung by my mom’s place and had lunch there. She had lola’s Calandracas. Beef cubes slow cooked and blended in with chorizos, pasta and cabbage. 

Warm, hearty and filling, this  dish was  packed with all the beefy goodness that spells  YUM-O (font 94! Haha!). Truly, one ‘hot’ heirloom from my lola!

To do, it you will need:

1/2 kilo beef brisket or kenchie

about two cups macaroni or penne pasta

4 medium-sized potatoes. quartered

1 can chorizo de bilbao (or 2 sticks), sliced horizontally

1 small head of cabbage, cut into four parts

2 large onions, quartered

3/4 cup chickpeas or garbanzos, drained

salt and pepper to taste

water

____________________________________________

1. Season Beef with salt and pepper. Add onions. Cover with water. Cook until tender.

2. Mix in potatoes, chorizos, chickpeas and pasta. Cook until potatoes and pasta are tender. Add in the cabbage. Serve hot.

‘East Meets West’– Shiitake Walnut Pasta

‘East Meets West’– Shiitake Walnut Pasta

shitake pasta 002

Chef Ming Tsai recently  turned up in Manila to be a head judge in a culinary competition among the country’s top 6 culinary schools. As a writer for FOODIE magazine, I had the chance to do a one-on-one interview with him (full interview on June issue of FOODIE mag). I was so in awe! My smile was like:

ming tsai

I was such an avid fan of his shows, ‘East Meets West’ and ‘Ming’s Conquest’. I covered his 3-day public appearance and boy, was that awesome!

Born out of my ‘Ming exposure’, my food today was inspired by the very concept of most of his dishes– FUSION. Yes, Eastern cuisine blended in with Western ingredients. Something out of the ordinary, eh?

Ming told me (naaks!),  that we have to be adventurous with our palate, he says we can never be ‘high’ in terms of culinary taste and standard if we don’t jump over the bridge. He was referring to Filipinos who are too conservative in their palate depriving themselves of concepts like food fusion and other tastes very unfamiliar to them.

Anyway, today I made my version of ‘East Meets West’. I called it Shiitake Walnut Pasta. Shiitake is a kind of mushroom that is edible. Off white to dark brown in color, these mushrooms are quite common in East Asia and eaten in a lot of Asian countries. Can be used in cooking  as either fresh or dried. It’s a common ingredient in most Chinese, Japanese, Korean and Thai dishes.

Today, Shiitake of the East met Pasta of the West. It’s the my box-office hit for the day.

And now my lunch:

shitake pasta 016

 Shiitake Walnut Pasta

1/2 kilo whole wheat spaghetti noodles

10 pcs fresh shiitake mushrooms, sliced

3/4 cup hoisin sauce

5 cloves of garlic, minced

1/2 cup walnuts, coarsely chopped

salt and pepper to taste

1/4 cup olive oil

1/2 cup sesame oil

2 tsps dried rosemary

1/2 cup parmesan cheese

What to do:

1. Cook pasta according to package directions.

2. In a separate pan, saute garlic. Add shiitake mushrooms and hoisin sauce. Season with salt and pepper. Add dried rosemary and walnuts.

3. Mix pasta and sauce. Top with cheese. Serve while hot.

shitake pasta 031

Some Great-Tasting Finale

Some Great-Tasting Finale
fried rice ala dominique

fried rice ala dominique

What a grand finale! Being the last course of the day (unless you have midnight snack..) , dinner of fried rice definitely makes a scrumptious day-ender dish. It’s pleasantly filling, aromatic and very fun to make!

Tonight, I dished out some great fried rice I named after my daughter, Sam (whose formal name is Isabel Dominique). Fried rice ala Dominique was gone on the serving plate in a flash. What a great dinner. Arg, bitin!

Why am I not surprised?  We had a  second dish that looked like this:

beef with broccoli

beef with broccoli

The conventional beef with broccoli dish served in most Chinese restaurants usually has thick sauce with thicker beef slices. The one  I made had a sauce that was a thinned out version due to the absence of starch or flour. I purposely dropped the latter since I like biting on the more natural tasting beef minus the thick sauce.

Also, if you are expecting to get the conventional Chinese resto ‘beef with broccoli’ dish, this is not the one. Oyster sauce is replaced with hoisin that is sweeter, tastier and posesses the ‘eat me! eat me!’ effect.

Now, the recipes:

Fried Rice Ala Dominique:

5 cups of cooked white rice

1 small red bell pepper, minced

3/4 cup sweet ham, cubed

5 cloves garlic, minced

2 leek stalks, sliced

1 tbsp worcestershire sauce

1 tbsp turmeric powder

salt and pepper to taste

canola oil

___________________________________

1. Saute garlic and leek stalks. Add rice, ham and bell pepper. Put worcestershire sauce and turmeric powder. Season with salt and pepper. Serve hot.

___________________________________

Beef With Broccoli

1/2 kilo rib-eye sukiyaki cut

3 tbsps hoisin sauce

5 cloves of garlic, minced

6 pcs broccoli flowers

salt and pepper to taste

oil

___________________________________

1. Season beef with salt and pepper

2. Saute beef in garlic and hoisin sauce. Add broccoli. Serve hot.

Paella Valenciana In A Hurry

Paella Valenciana In A Hurry
valenciana ala dominique

valenciana ala dominique

My series on rice continues. My last post featured some fried rice I called ‘fried rice ala dominique’ (named after my daughter Isabel Dominique). I got a coupla emails requesting for more rice twists and recipes.

fried rice ala dominique

fried rice ala dominique

The Fried rice garnered good reviews and I thought of giving it just a bit of some tweaking. This valenciana is similar to the ‘fried rice ala dominique’ (in terms of ingredients and appearance), only more labor-intensive. But hey, don’t worry, this is the ‘quick to make’ version that’s great for harried moms like me.

I used jasmine rice instead of the usual malagkit na bigas. Chorizos and mushrooms were used to replace the usual chicken and prawns.

Oh how I loved biting on the rice that’s been coated with the chicken and ginger flavor. The harmony of flavors and spices just made the dish so satiating.

Yeah, this version is the scaled down and simplified version. Culinary purists might crucify me for simplifying this, but hey, I got things to do while I still want great food— in a snap. Simple but flavor-loaded.

So, here goes:

Paella Valenciana

2  cups jasmine rice

5 cups chicken stock

*Okay fine, if you don’t have chicken stock, use 5 cups of water then add a cube of chicken broth

4 medium-sized shiitake mushrooms, sliced

1  stick chorizo de bilbao, chopped1 thumb-sized ginger, sliced

4 cloves of garlic, chopped

1 medium-sized red onion, minced

1 large bell pepper, julienned

2 tbsps turmeric powder

1/2 tsp spanish paprika (optional)

oil

chives for garnishing

What to do:

1. Saute garlic, ginger, onion, bell peppers, chorizos and mushrooms. Season with salt and pepper.

2. Add rice, turmeric powder and broth. Give it a quick stir.  Cover until done. Sprinkle with chopped chives before serving.

Basil Chicken In Coconut Milk

Basil Chicken In Coconut Milk

Coconut milk or what we call gata in the Philippines, is one of the major staple ingredients in Asian cooking. In Brunei, Malaysia  and Indonesia, it is referred to as santan. In Thailand (where a lot of great tasting coconut milk-based dishes come from), it is called ga-ti . In Brazil, it is called leite de coco. To me, I simply call it ‘yumminess overload’!

This milk is a product of some vigorous squeezing from the meat of a mature coconut. Ahh, how I love all dishes with coconut milk. It can be used in a lot of savory dishes and likewise in a great number of desserts!

Today, I made some basil chicken in coconut milk. My tastebuds demanded for a reunion of ginger, basil, chicken and coconut milk. The aromatic contribution of the basil,  the succulence and tastiness of this chicken’s red meat plus the malinamnam quality of the gata just did a mega ensemble that definitely gave us an extra scrumptious lunch.

To do this you will need:

3  thigh and leg parts, cut into bite size

1 can coconut milk

1 green bell pepper, jullienned

3 medium-sized potatoes, halved

1/2 cup green peas

8 leaves basil, chopped

2 thumb-sized ginger, sliced

3 tbsps fish sauce (patis)

4 cloves of garlic, minced

1 medium-sized red onion, chopped

water

salt and pepper to taste

oil

______________________________________________

1.Season chicken with salt and pepper.

2. In a skillet, saute ginger, onion and garlic. Add chicken and potatoes. Cover with water. Season with 3 tbsps fish sauce. Cook until tender and water has evaporated by half the original amount.

3. Add bell peppers, green peas and basil leaves.

4. Stir in coconut milk.  Simmer for five more minutes. Serve hot.

Buffalo Wings

Buffalo Wings

I always get bitin when I munch on those mouth-watering buffalo wings at places like Chili’s or Fridays. Each serving usually has six to eight wing pieces. Why, it posesses the ‘mahirap tigilan kainin‘ effect similar to when you eat butong pakwan or chicharon balat. And, going for seconds would  mean whipping out another P400 (or thereabouts) from your wallet. Tsk, so that’s P800 plus for the 16 precious wings. Over at  the grocery, 16 pieces would only cost you P300 or less. So, there.

Now, the point: MAKE YOUR OWN!

Buffalo wings originated from Buffalo in New York. It is famous for its taste, degree of ‘hotness’ and the blue cheese dip that traditionally goes with it. It’s very definitive of American dining especially among ‘clubbers’ who wolf these wings down while drinking some beer. In our native language, we refer to this buffalo wing dish as the perfect pulutan. Its spicy nature makes these drinkers drink more to numb the throat and mouth-tingling sensation caused by the spices.

This dish can be made in two ways: baked or deep-fried. I prefer the latter. While the former advocates health benefits (since it does away with cooking in oil), the later yields a better texture, appearance and taste.

Okay, to do this, you will need:

10 chicken wings, wingtips removed

1/2 cup hot sauce

1/4 cup melted butter

1 tbsp cayenne pepper

1 tsp paprika

salt and pepper to taste

1 tbsp worcestershire sauce

________________________________________

1. Season chicken with salt and pepper. Add hot sauce, butter, cayenne pepper, paprika and worcestershire sauce. Marinate for an hour.

2. Deep-fry chicken until cook. Pat dry. Set aside

3. Meantime, in a separate skillet, heat 1/4 cup oil.  Pour chicken marinade. Stir in chicken. Serve hot with dip.

_________________________________________

Traditionally, buffalo wings are served with blue cheese dressing. I did not have blue cheese when I cooked this today and so I settled for the next best thing, garlic-cream cheese dip.

To do it, you will need:

8 oz cream cheese

3/4 cup sour cream

(If youdon’t have sour cream, you may make your own. Just Mix in half a lemon juice or 1 calamansi or 2 tbsps vinegar onto 3/4 cup all purpose cream)

3 cloves of garlic, minced

salt and pepper to taste

__________________________________________

1. In a processor, blend in all ingredients until smooth in consistency.

__________________________________________

SERVE WINGS WITH CELERY STICKS.

RED At Makati Shang

RED At Makati Shang

blog11

I knew I was going to be in for a gastronomic experience when my FOODIE editor rang me up for a wine tasting event that I had to cover. It was to be held at RED at Makati Shang, yes, the same place where my husband, Jake, asked me to marry him about four years ago.

The dinner was exclusive to just about ten people. The diners were people who communed at RED for a common purpose (aside from work) — to eat, drink and be merry! Great company in one table. Did I say all of them were hardcore foodies?

blog20

The event was Casa Lapostolle Winemaker’s Dinner hosted by Moët Hennesy Asia pacific (Full article on the wines will be for FOODIE’s July issue). Diego Urra walked us through our wine tasting experience, detailing extensively everything we needed to know about the wines we sampled.

blog30

Anyway, the dishes that went with it really propelled us to extra high gastronomic levels.

After the cocktails, we had this:

crab and mango canneloni

crab and mango canneloni

I have to confess. I’m allergic to crabs.  Funny, I grabbed these fancy bites the moment it was laid before me without knowing that I was to have some crab-infused dish. I whispered to FOOD’s editor-in-chief Mickey Fenix, who was seated beside me, to be on stand by for a possible respiratory attack as an allergic reaction.

The guys dining with us called on the hotel’s pharmacy nurse the moment they got wind of my concern. I took antihistamine and yes, tuloy ang ligaya!

The second dish was this:

pan seared scallops wrapped in parma ham

pan seared scallops wrapped in parma ham

The choice was between this or pan seared sea bass. I thought I wanted something salty and meaty-juicy last night. The parma ham and the scallops just perfectly satisfied that craving. It went with some corn puree dripped all over the plate and basil pesto that gave extra spunk to the whole ensemble.

Then came along this:

mango sorbet with chardonnay foam

mango sorbet with chardonnay foam

 At this point, I thought they were winding down already with their food presentations. Finally, the sweet ending (or so I thought!). The sorbet had the perfect consistency. Compact but icy-soft. The mango flavor tasted very natural, almost in its naked taste. It sat on a foam of chardonnay that further kicked out the great taste of the sorbet.

I was ready to sip my tea to cap the whole dining experience when I discovered that we were just about to start with the real deal!

And this was what next popped on my plate:

grilled beef tenderloin with foie gras and chicken mousse

grilled beef tenderloin with foie gras and chicken mousse

Suddenly, I felt the food in my stomach giving space for the night’s rockstars. This dish, hands down, made my night! The beef gave away the juiciest, most scrumptious beefy goodness anybody can imagine. Cooked medium well, it just got me closing my eyes for some savor-the-moment experience!

Shortly after we finished,  we were served with this:

roasted rack of lamb

roasted rack of lamb

The photo says it all. It was served with cous cous, gremulata. Tender, oomph-loaded and very satisfying, the lamb was superior.

Finally, the fantastic ending was served:

bitter chocolate macaroon (berry compote)

bitter chocolate macaroon (berry compote)

Dream job it is. I want to work everyday.

Cheesy Chicken Balls

Cheesy Chicken Balls

The super tandem of meat and cheese is back.  Recollective of the traditional cheeseburger, this dish combines ground chicken meat and cheese that’s been tucked in the ball of meat. So, when you cut it in half, the cheese greets you with the “Hello, eat me!” surprise!

I get emails from readers requesting for recipes they can execute with their kids.  This dish has to be the answered prayer. It’s easy, fanciful and tasty.

Cheesy Chicken Balls

To do this you will need:

1/2 kilo ground chicken

1 small egg, beaten

1/4  cup flour

1 onion, minced

3 cloves of garlic, minced

salt and pepper to taste

1 sprig of rosemary leaves, chopped (optional)

cheddar cheese cubes

1 tsp cayenne pepper (optional)

oil for frying

__________________________________________________

1. Season chicken with salt and pepper.

2. Mix chicken, egg, flour, onion,garlic, rosemary and cayenne pepper.

3. Scoop some meat mixture forming a patty on your palm. Put  cheese cube on top. Now, lift the patty sides up to enclose the cheese inside. Mold into a ball.

4. Fry in medium heat until golden brown. Set aside and let stand for 5 minutes.

Arroz A la Cubana

Arroz A la Cubana

arroz ala cubana 109

Our favorite Arroz a la cubana means Cuban style rice in Spanish. Its origins traced from Spain (during the time when Cuba was still under the Spanish rule). And, due to its mega combo of meat in tomato sauce, fried egg, fried banana (saba or plantain) and rice, it immediately gained ground among foodies in several countries  including the Philippines.

I particularly like the play of tastes in this dish. The meat providing the spice and succulence, the bananas giving the sweet dimension, the egg yielding the linamnam factor and the rice just binds everything before it slides down to our stomach in the best possible gastronomic way.

There are versions to this dish. Some throw in peas and carrots or sometimes cubed potato bits in the meat dish. Not for me, thank you. I go for the  beefy and savory version of this. Peas, carrots and potatoes tend to steal some degree of beefiness in the process. Better to keep it simple but extremely tasty. Don’t worry, the saba will have to combat the umay factor of the meat. Also, your call whether you want it spicy or mildly spiced. Would taste fantastic any which way, anyway.

arroz ala cubana 176

To do this you will need:

For the meat dish:

1/2 kilo lean ground meat (preferably, ground round)

2 red medium-sized bell peppers, cubed

1 onion, minced

4 cloves of garlic, minced

1 tomato, diced

1/2 cup raisins

1 cup tomato sauce

salt and pepper to taste

oil

1/2 tsp cayenne pepper (optional)

1/2 tsp spanish paprika (optional)

1 pinch cumin (optional)

salt and pepper to taste (must! hehe)

__________________________________________

10 pcs bananas (saba) cut lengthwise, 5 cups rice (depending on how many will eat!), 5 eggs (again, depending on how many will eat!)

What to do:

1. Season meat with salt and pepper(s). Saute onion, garlic and tomato. Mix in meat then red bell peppers. Cook until brown and tender. Put tomato sauce and bring down to a medium simmer. Throw in raisins about 5 minutes before you turn off the heat. Set aside.

2. In a separate pan, do a sunny-side-up.

3. Fry bananas. Pat dry on a bed of napkins to remove excess oil.

4. Plate all components. Be creative!

Henry’s Pizza!

Henry’s Pizza!

pizza2 184

Today saw me make pizza with my daughter, Sam. Quite laborious, this pizza ate up a good part of my morning, our morning. Sam kept coaxing me since yesterday to go on with our pizza project. And so, we did just that.

pizza2 072

sam greasing the pizza pan

It was fun rummaging through the ref for potential toppings for the pizza and we found these:

meatball chunks, tomatoes, bell peppers, capers, mushrooms, olives and garlic

meatball chunks, tomatoes, bell peppers, capers, mushrooms, olives and garlic

After I made my labor-intensive dough, I started doing the topping assembly, such that:

the dough topped with the trimmings although still cheeseless at this point...

the dough, topped with the trimmings (although still cheeseless at this point...)

 Now the fun part– ‘cheesing’ the pizza!

now ready for baking!

now ready for baking!


To do this you will need:

For the topping:

3/4 cup tomato paste

1/4 cup sundried tomatoes

1/2  cup mozzarela cheese

1/2 cup monterey  jackcheese

1/2 cup cheddar cheese

1/4 cup capers

1/4 cup pitted black olives, sliced

1 red bell pepper, sliced

2 tomatoes, sliced

6 cloves of garlic, minced

3 pcs meatballs, diced

For the dough:

3 1/2 cups all purpose flour, sifted

1 tsp salt

1 cup warm water

2 tbsp sugar

2 packages dry yeast

1/2 cup olive oil

cornmeal for sheet pan

____________________________________________________

How to make the dough:

1. Mix flour and salt in a bowl.  In a  food processor fitted with a metal blade, pour the mixture. Combine the warm water and sugar in a measuring cup. Sprinkle the yeast over the warm water. Let stand until foamy in appearance, about 5 minutes. Pour the water and oil into the food processor. Process until the mixture becomes a ball.

2. Remove the dough from the food processor and put on lightly floured surface. Slightly knead until smooth. Put  in a greased bowl and let rise in a warm place (about 45 minutes).

3. Punch down the dough and let rise for another 45 minutes.

4. Divide the dough into 6 equal pieces. Roll each piece on a clean surface, with a bit of flour if necessary, to a 6-inch circle.

5. Meantime, dust 2 sheet pans lightly with cornmeal. Place the dough disks on the prepared sheet pans and top with sauce and toppings. _____________________________________________________

Meantime, preheat oven to 500F.

Now, you’re ready to do the toppings.

Brush dough with tomato paste the add sundried tomatoes. Distribute evenly all topping ingredients except cheese. Put a dash of salt and pepper.

Add cheese. Bake for 10-12 minutes.

______________________________________________________

I would have loved serving this to my late dad, Henry. He wasn’t big on pizza.  He would’ve changed his mind had he tried this. Cheesy, tasty, and oomph-loaded, Sam just munched a lot. Yum!

pizza2 198

Dampa Forever!

Dampa Forever!

My sister turned a year wiser very recently and decided to mark her natal day by grabbing some great eats made up of baked oysters, crabs, shrimps, etc.

Dampa was to be her ‘party place’. Fantastic!

Dampa destinations have flourished around the metro in the last few years that it made sensation. If my memory serves me right, these dampa places have been around as early as in the 80′s and Roxas boulevard (then Dewey boulevard) has been the original hub since it all began and grew big time.

The concept of dampa or sometimes referred to as a paluto eatery, is that you go to a particular resto (in our case, we went to ChaCha at Julia Vargas Avenue), and will have the option to either personally scour for fresh eats (meat, vegetables or seafoods) at a nearby palengke or ask the restaurant runners to do it for you.

They then cook what has been freshly bought. Next, you are handed a menu that contains plenty of options as to how you want your food cooked  (ihaw, sigang, kilaw, etc). Ahhh, it’s the coolest.

And, FRESH is the operative word here.  I can’t overemphasize how satiating it is to  eat at these dampa places that serve everything fresh and great. Yeah, nothing beats eating anything F-R-E-S-H!

Now, I’m hungry again. Anyway, here goes what we had:

The ‘hot front act’ dish was made of halaan soup with onion leeks.

My family is a crab-loving family. These crabs got amputated in the first ten seconds that it landed on our table!

arroz ala cubana 070

These shrimps were dipped in a special sauce by the resto. Sweet, nutty and malinamnam, the sauce was a hit.

arroz ala cubana 063

Baked oyters in garlic and cheese.

arroz ala cubana 098

Grilled tuna belly. Fat, juicy and smoky, I love this!

arroz ala cubana 114

Baked scallops. A must-try!

Meet my FOODIE mom, Baby. My nephew, Marty, and my daughter, Sam.

My celebrant-sister, Tina and her hubby, Oliver.
My sis-in-law, Michelle with my brother, Jerome and their son, Marty.
The family!
My husband, Jake.
And me looking very, very stuffed by this time!

Tinumis!

Tinumis!

abs-cbn 086

Mom served our favorite tinumis today with a very wet weather at the backdrop. Can there be anything more soothing than having your best comfort food in the middle of a chilly-rainy-sleep-encouraging day?

Tinumis is a favorite dish among Nueva Ecijanos where it is believed to have originated. It is closely similar to dinuguan, only it uses ground pork (as far as my Mom’s version is concerned) as opposed to dinuguan’s pork that is cut in chunks.

abs-cbn 098

Growing up, I always looked forward to having this on our dining table. The distinct taste of pork blood, combined with the gratifying flavor of ground meat and the zing of the peppers and vinegar just left me pleasantly stuffed each and everytime I had it on my table then.

Now, fast forward to 2009, Mommy had me go back to those days. Her tinumis for lunch just made my day. Great weather, fantastic comfort food, good company, life is great.

_________________________________________________

To do tinumis, you will need:

1 kilo ground pork (whole skin included, separated from meat)

200 gms Pork liver , chunked

3 cups pork blood

1 cup vinegar

1 tali tanglad (lemon grass)

8 pangsigang peppers

3 cloves of garlic, chopped

1 medium-sized onion, chopped

salt and pepper to taste

water

__________________________________________________

1. Season pork and the pork balat with salt and pepper. Add garlic, onion and vinegar. Dump everything in a casserole. Don’t stir for the first 2 minutes or until vinegar is cooked. Bring to a simmer until vinegar seeps into the meat ensemble. Add water when necessary until the meat is cooked.

2. Midway into cooking, add liver, tanglad and peppers. Remove pork balat and cut into fine cubes. Throw back into the mixture.

3. Meantime, strain in pork blood onto the mixture. Coarsely chunk the blood left on the strainer and throw back into the mixture again. Continue simmering until meat is cooked. Serve hot.

Pan-Fried Lemon-Rosemary Chicken

Pan-Fried Lemon-Rosemary Chicken

lemchx 023

In the olden times, our Christian brothers and sisters  referred to rosemary as the “Holy Herb”. Why? Well, based on Spanish legend, Mother Mary put her cloak over a rosemary bush during the Holy Family’s journey to faraway Egypt, turning the shade of the blossoms from white to blue.

In this day and age, we regard rosemary as a major herb-cuisine player used in most scrumptious dishes. It shines best with lamb or chicken, perfect with a lot of pasta dishes and salad dressings, and even makes a refreshing summer refreshment! Rosemary sometimes doubles up as a Christmas ornament, potpourri or as insect repellent, or its fanatstic scent used in oils and other aroma-generating  products.

Tonight, I combined it with my chicken and lemon. I loved the way the sauce coated the cooked chicken after I pan-fried and sliced it. The meat just absorbed a lot of the lemony flavor of the sauce, that plus the aromatic component of the rosemary herb. Obviuosly, I’m a big rosemary fan. People at Edsa Garden House (where I buy my fresh herbs), know how big a rosemary fan I am.

Okay what to do, you will need:

4 pcs chicken breasts, halved

juice of 1 lemon

4 cloves of garlic, minced

5 sprigs of rosemary, chopped

1/4 cup soy sauce

salt and pepper to taste

4 potatoes, french fries cut

_______________________________________________

1. Season chicken with salt and pepper. Marinate in rosemary, lemon juice, soy sauce and garlic for an hour. Pan-fry in a skillet on medium heat. Remove from pan and let it rest for ten minutes.

2. Meantime, deep-fry potatoes until golden brown. Drain using table napkins. Set aside.

3. Add chicken marinade to the pan used in frying chicken. Try to achieve the “agaw-toyo-mantika” effect.

4. Slice chicken. Toss over to the sauce in the pan until chicken slices are well coated.Add potatoes  or put on a plate with the potatoes on the side. Sprinkle with some more rosemary for garnishing.


Sweet Ham In Two Easy Ways

Sweet Ham In Two Easy Ways

I enjoy working with sweet ham. It’s versatile, flavorful and pleasantly juicy. A great  ingredient for cocktail pica, paninis, salads, soups or even for ‘pangsahog’, sweet ham just shines at any given time in any dining event. In Manila, my favorite brands are Adelina’s, Excelente in Quiapo and Salazar’s. Ahh, Adelina’s ham in hot pan de sal with kesong puti, God help me! Sarrrap!

My sister-in-law, Tish,  recently swung by Manila from Cagayan De Oro City. My in-laws had her bring this fantastic Oro ham for pasalubong. The ham just oozed with all its  precious juices. The meat,  tender and moist, perfect for a great omelette. The kind that you would make papak!

Meantime, Jake’s aunt, tita Aling,  gave us some wonderful and tasty  native eggs from her farm. I thought the two would make a perfect tandem for a power omelette. And, it did!

And so went the first of  the two dishes that I used it in.

To do this simple omelette, you will need:

3 eggs, scrambled

3/4 cup sweet ham, cubed

1 red bell pepper, julienned

7 pcs pitted olives, sliced (optional)

1/2 cup cheddar cheese, cubed

1 onion, chopped

1 tomato, diced

3 cloves of garlic, minced

salt and pepper to taste

_____________________________________________

1. In a skillet, saute onion, garlic and tomato. Add ham, olives, bell pepper and cheese. Stir lightly. Set aside.

2. In a separate pan, pour beaten eggs creating a round form. Add ham mixture.

3. Flip two sides of the egg to enclose the ham mixture. Serve hot.

_____________________________________________

You will be amazed with the next dish, it’s caramelized ham. This one is a personal favorite. I always obsess in having this for breakfast with scrambled eggs with sliced onions to match.

Even your one-year old kid can shine in the kitchen doing this. It involves just three steps all in all. Step one: slice sweet hams. Step two: dredge in white sugar. Step three: Fry.

caramelized ham 095

Sweet hams aren’t really sugary sweet. Intensifying its sweetness  will perfectly strike a balance with its built in saltiness. Best served with hot steamed rice and coffee.

Bangus Belly ‘Sandwich’

Bangus Belly ‘Sandwich’

This is perfect for bangus belly fanatics. It’s steamed, stuffed with all the healthy stuff, covered and cooked in fresh banana leaves. Potentially the perfect partner for your ginisang munggo sa hipon or your pinakbet, this dish should work its way to your menu soon, somehow.

Easy to make, too.

Just season two whole bangus bellies with salt and pepper. Chop 1 tomato, 1 onion, mince three cloves of garlic and chop 5 leaves of basil (optional). Dump everything on top of  one bangus belly.  Drizzle with canola oil. Cover with the other bangus belly on top (fat side down) to ‘sandwich’ the filling.

tinacondobanguschoc 003

 Loosely cover with banana leaf.

tinacondobanguschoc 005

Steam for 45 minutes or until cooked. Serve with the vinegar-soy sauce dressing ( 1/4 cup suka, 4 tbsps toyo, 1 minced small onion and 1 siling labuyo. Just mix all ingredients).

tinacondobanguschoc 008

A Taste Of Spain!

A Taste Of Spain!

Spain’s got to be one of the loveliest places I’ve been fortunate to see. The haunting beauty of its awesome character just made me want to see it a million times all over again.

The picturesque setting set the tone for one unforgettable journey.

The richness in history, cultural heritage,  majestic architecture and the excellent gastronomic treats certainly make Spain the “IT” destination, hands down.


mime artists do move for a fee, a few bucks should do it.

mime artists do move for a fee, a few bucks should do it.

For some art appreciation, do swing by Barcelona and Madrid when you happen to visit Spain. Quaint museums that are rich in artifacts, historical pieces and world-famous obras abound all over these two cities.
at museo del prado

at museo del prado

These are but just some of the few of major attractions in Spain aside from the many other bewitching destinations you might want to visit.

And, for foodies like me, Spain is the place to be. It’s got to be one of the most exciting culinary destinations in the world.

at museo de jamon, madrid.

Great weather, fanatstic company, a heart-stopping architecture at the backdrop with matching sangria for toasting spelled JOY OVERLOAD!

chillin' at plaza mayor

chillin' at plaza mayor

These are but memories on a playback now.

Anyway, last night was a blast. Suddenly, I was back in my “bring-me-back-to-Spain” mode again. I hosted an event that presented the exclusive screening of the Mallorca episode of “Spain On The Road Again” which airs on the Asian Food Channel (Skycable channel 58) every 9pm on tuesdays. 

afc 025

The show is hosted by my favorite Italian Chef, Mario Batali and actress Gwineth Paltrow.

*photo from brownturtlenecksweater.typepad.com

A cooking demo of pescado ala sal or fish baked in salt, sobrasada or sausage or pate and a paella was one of the main highlights of the event. All dishes wonderfully executed by fantastic Spanish Chef and owner of Tapella by Gaudi, Chef Xandra Got Pradera Cacho.

The paella was a winner. Saffron and broth based paella that used calrose rice witha mix of mushrooms and chorizos, this dish blew me away.

chef xandra's paella

chef xandra's paella


the chef and i

the chef and i

Have some sobrasada pate!  Oh, lord! It tasted like a pate version of the Spanish chorizo. It sat well on those cruchy crostinis.

sobrasada

sobrasada

 The event was peppered with tapas all over the serving trays! Add to that the food  served to the guests by Chef Xandra, which she cooked during the demo.

afc 014

  Great food! Truly delicioso! Isalud!

Farfalle in Pesto And Sun-Dried Tomato Sauce

Farfalle in Pesto And Sun-Dried Tomato Sauce

pestosundpasta 042

“Mommy, you’re the pasta queen!”, I couldn’t be more flattered when Sam referred to me as that. She delightedly finished her plate of ribbon pasta in pesto and sundried tomatoes in a jiffy. Quite a surprise there,  considering Sam’s preference for unflavored pasta and all.

But hey, before somebody raises a howl, it was just Sam labeling me as the ‘queen’, okay? Chill! In her eyes, I am. So be it! Haha!

Healthy, tasty, meatless and fanciful, this pasta has the x-factor kids would love to eat. The very pretty ribbon pasta (farfalle) should be the main attraction here to get kids into eating it. Then you load the pasta with all the healthy flavors that taste just as great.

Okay, for this dish you will need:

1/4 kilo ribbon pasta (farfalle)

1/2 cup pesto

3/4 cup sundried tomatoes

4 pcs shitake mushrooms, sliced

1/4 cup kesong puti, diced

1/2 cup parmesan cheese

1 tbsp dried rosemary

3 cloves garlic, minced

1 onion, minced

1/2 cup black olives, sliced (optional)

salt and pepper to taste

olive oil

_________________________________________________

1. In a skillet, saute onion garlic, olives  and mushrooms. Add cooked pasta. Mix in pesto and sundried tomatoes. Season with salt and pepper. Add dried rosemary. Serve.

2. Top with parmesan cheese and kesong puti. Serve with your favorite toast.

pestosundpasta 023

Paksiw Na Pata

Paksiw Na Pata

 paksiwpata 012

Food doesn’t have to be complicated to be big in taste. In fact, most dishes that, to me, are drool-stimulating  are those that are simple, common and very easy to make. The secret to making it extra rich and scrumptious is actually in the way that it is cooked.

Let’s take the case of my all-time favorite, paksiw na pata. I am bothered by the fact that quite a number of restaurants serve these pork knuckles half-cooked and still gummy. If this is their way of saving up on gas, time and effort, then I suggest that they better just ditch this dish for dishes that are less labor-intensive. Serving them matigas and makunat kinda bastardizes the real thing.

Paksiw na pata is best eaten when it’s tender, falling off the bones and immeresed in a sauce that has the balance of sweet and sour.

Ahh, my dad loved having this dish while he watched his fave tv programs. He liked this with matching ginisang munggo with dahon ng sili or pritong bangus (na ‘posta’ and hiwa..).

I’m reminded of how my dad introduced me to simple but delish home-cooked meals that included halaan soup with dahon ng sili, inihaw na liyempo in just salt and pepper, batchoy (that was made super tasty courtesy of the kinchay), laing, inadobong atay ng manok, pancit molo, etc.

And this, paksiw na pata. Another great flagship food of my happy childhood.

So easy to make, here’s how to do it:

You will need..

1 pork pata (front, it’s meatier!), chopped

1 cup vinegar

1/2 cup soy sauce

4 cloves of garlic, chopped

1 onion, chopped

1/2 cup banana blossoms (bulaklak ng saging)

3 pcs saba (banana plantain), cut diagonally

1/2 cup brown sugar (adjust according to taste)

1 tsp pamintang buo

1 laurel leaf

salt and pepper to tase

__________________________________________________

1. Season pata with salt and pepper. Put pata in a casserole with the garlic, onion, paminta, vinegar and soy sauce. Cover with water and bring to a simmer. It is best slow-cooked (about two hours).

2. Continue adding water until meat is tender and sauce is reduced to half. Add saba, laurel leaf , sugar  and banana blossoms about 2o minutes before turning off the fire.  Serve hot.


German Franks In Spicy Tomato Sauce

German Franks In Spicy Tomato Sauce

germany 053

A German Wurstchen or a frankfurter sausage is, traditionally, made from veal and lean pork meat. The flavor, usually powered by some fresh seasonings like fresh onions and other great tasting spices, just makes it one of the best-tasting sausages around.

Interestingly, the mixture is encapsuled in some  natural sheep casing and cooked through a special smoking process. The cooking method definitely yields the aromatic factor that makes this sausage extra addictive.

It was said that during the 13th century, a butcher from Frankfurt created this dish in Vienna and later on made this dish world-famous. Now that’s interesting, a German creating the frankfurter in Vienna!!

Anyway, Jake got me some German franks from his trip to Germany. He brought home several kinds of sausages, but the one I picked to cook first were the franks. So, what did I do? I did some mean spicy frankfurter bites in spicy tomato sauce. It looked something like this:


germany 132

The juiciness of these sausages was well accompanied by the rich taste of the spicy tomato sauce. Imagine Regine Velasquez in a concert backed up by the Philippine Philarmonic Orchestra! Yeah, something of that magnitude…

Anyway, to do this you will need:

2 German frankfurter sausages, sliced diagonally

1/2 cup tomato paste

4 cloves of garlic, minced

1 onion, minced

1 bell pepper, julienned

1/2 tsp cayenne pepper

1 tsp fresh rosemary, chopped (optional)

salt and pepper to taste

oil

germany 118


 Saute garlic, onion, bell pepper and sausages. Stir in tomato paste. Slowly add in water to thin the sauce until desired consistency is achieved. Season with cayenne pepper, regular ground pepper and salt. Add chopped rosemary. Serve hot.

germany 122


Tapenade On Sliced Burger

Tapenade On Sliced Burger

tapenadeburger 480 by you.

I love flavors. Don’t like it when the same taste (spanning weeks)  dominate the flavors of our home food. Variety is key. Ahh, how I enjoy a  see-saw of  sweet and sour, of spicy and zingy… my palate is insanely adventurous.

Today,  I decided to do a tapenade-grilled beef tandem. Tapenade is an extremely popular dish in France. It is used as spread on breads or fillng in fillets or paninis.

The original recipe calls for olives, capers and anchovy fillets, mixed together and finely chopped. Now my version, coarsely chopped. LOveet!

Biting into these roughly chopped olives and capers excite my palate. The play of salty and sour in these two great ingredients take me to some great gastronomic trip.

The meat that went with it was actually some sliced beef burger that I earlier cooked.

The tapenade would be the meat topping, wrapped in some warm pita bread.

(Meats are always kept moist when cooked whole then sliced after it’s cooked as opposed to meat that were cut before they were cooked.)


So, here goes how it’s done:

tapenadeburger 501 by you.

The tapenade will call for 20 pcs black pitted olives, 2 tbsps capers, 3 tbsps lemon juice, 1 tbsp mashed anchovy fillet (optional) and 3 tbsps olive oil. Coarsely chop the olives and capers, mix in anchovies, lemon juice and olive oil. Set aside. Tapenade can keep well in the ref for upto 2 weeks.

tapenadeburger 511 by you.

Meantime, to prepare the burger meat, season 1/2 kilo of ground meat with salt and pepper. Add 1 beaten egg, 3 cloves of chopped garlc, 1 minced onion and 3 tbsps flour. Mix all ingredients together. Form patties and grill. Let rest for 3 minutes. Slice into 1 inch width or your desired size.

Meantime, warm some pita bread (available in most supermarkets). Place some sliced burger on the center, top with tapenade and fold pita with the meat-tapenade fillng inside.

tapenadeburger 487 by you.

Cooking On TV 3 (US Girls, Studio 23)

Cooking On TV 3 (US Girls, Studio 23)

I left ABS-CBN today feeling totally awesome. Taping went great and was very excited cooking before the cameras again. Angel Aquino was the nicest and most grounded celebrity I’ve met recently.

Here goes some snippets of the taping to be aired sometime this week on Studio 23.


Ham and Cheese Waffle ‘Sandwich’

Ham and Cheese Waffle ‘Sandwich’

Lifted from the recipe pages of FOODIE magazine, I literally dished out three exciting  food treats from leftovers during the taping of Studio 23′s “US Girls”.

Ahh, how I embraced the challenge of having to revv up an otherwise dull, unappetizing, ex-yummy-now-eecky leftover dish! My magic wand/sandok just had me do some quick but yummy dishes.

Okay, the first dish was the ham and cheese waffle sandwich. The leftover ingredient was the waffle (waffle recipe courtesy of FOODIE magazine). The challenge for me was how to tweak the waffle and transform it into a mega breakfast. And so, I did this:

Nice? Nothing easier than this, really. I just put a piece of salami and cheese in between two waffles and toasted them using a lightly greased pan, a minute on each side. There. Shockingly easy! I cut them into bite sizes and placed a dipping bowl of maple syrup. Dipping your waffle bites into it should be a great idea.

I thought allowing the citrus fruits to join my waffle ensemble was a good idea, too. There. Shockingly easy.

The next two leftover ‘wonders’ on my next blog, stay tuned!

Creamed Pork Stew

Creamed Pork Stew
A crowd pleaser, this creamed pork stew is definitely a delectable treat at any given dining ocassion. Creamy and extremely  palatable with the other flavors jumping out of this dish, this should be on your plate this very minute!
classic pork stew

classic pork stew

I originally  cooked a simple but delish pork stew and I thought it tasted  sooo good as it was until I had a eureka moment again and decided to pour in some cream to further liven up my stew. The dish just got better and better. And yeah, it turned out to be  the best!

Okay, to do the creamed pork stew you will need:

1/2 kilo pork loin, cut into thin strips

3/4 cup shitake mushrooms, sliced

1/2 kilo ripe tomatoes, diced

4 cloves of garlic, minced

1 medium sized red onion, sliced

1 medium-sized bell pepper, julienned

1/4 cup soy sauce

salt and pepper to taste

1/4 cup butter

1/4 cup olive oil

1/2 cup all-purpose cream

________________________________________

1. Saute pork in onion, garlic and tomatoes in butter and oil. Add pork, season with salt and pepper and soy sauce.

2. Bring to a medium simmer. Add water until pork is tender and tomatoes totally wilted. Midway into cooking, throw in bell peppers and mushrooms.

3. Add cream. Bring to a simmer and stir for about four minutes,. Serve hot.

Baked Dory In A Hurry

Baked Dory In A Hurry
pre-cooking stage of the dory

pre-cooking stage of the dory

All too suddenly, my palate started to nag me for a juicy, tasty and very savory dish of baked fish. So, I rushed to the freezer to grab some dory fillets to silence my craving. I knew I just had to have it right away!

I am a fan of dishes with salty, sweet and sour combinations. And, with a fat, juicy and moist dory to go with it, ahh, it’s the best, baby.

baked dory 039

Anyway, here’s how to do it.

You will need:

2 whole dory fillets (medium-sized)

salt and pepper to taste

2 large lemons, seeded and sliced (see picture on top of this page)

3/4 cup mayo

1 tbsp honey

5 cloves of garlic, minced finely

3/4 cup parmesan cheese

3 tbsps bread crumbs (optional)

1  tsp fresh rosemary, chopped (optional)

_______________________________________________

1. Preheat oven to 350c. Season fish with salt and pepper. Set aside.

2. In a baking ware, bed  lemon slices vertically. Lay fillets on them (see picture on top of this page).

3. In a bowl, mix mayo, honey, rosemary and garlic. Season with salt and pepper. Mix well.

4. Top fish with mayo mixture. Sprinkle cheese and breadcrumbs on top.

5. Bake for 20 minutes or until cheese become bubbly hot. Serve warm.

baked dory 048

Cooking Demo On MomWorx (Lifestyle Network)

Cooking Demo On MomWorx (Lifestyle Network)

I have no regerets having dabbled into newscasting for a good decade or so. Why, it was a dream waiting to happen since I was seven years old! When all the kids obsessed in becoming doctors, lawyers and artista, little me fantasized in becoming somebody like Tina-Monzon Palma. And, as fate would have it, it ‘kinda’ happened although not in the magnitude that I wanted it to be. Still, newscast was one of  my life’s most remarkable highlights, bar none.

Now, fast forward to 2009. I’m now officially out of the newsroom and finally in the kitchen! Yehey! Like a fish thrown back into the water, like an eaglet back in the wings  o f her mother, I can’t be happier in the company of my ‘sandok’ and ‘kawali’. Like I always tell my friends, I’m better off annotating how to ‘gisa’ than annotating  rallies in Edsa!

Cooking is ME. Since birth. And yes, even in my past lives.

And now that I’ve become the ‘kusinera’ that I have always dreamt of becoming (back to back with my news ambitions…), I sure have to tighten my grip in holding on to this dream and focus, focus, focus! It’s definitely the best recipe to succeed:)

Anyway, here goes a video clip from a guesting I made for Lifestyle Network’s “Momworx” with Maricel laxa-Pangilinan. All the recipes I did were lifted from this site.

I hope in my own small way, I am able to offer you a third hand in your kitchen.

Corn Chip-Coated Chicken Fingers

Corn Chip-Coated Chicken Fingers
chicken fingers on tomato-wheat pasta

chicken fingers on tomato-wheat pasta

I love the thousand and one ways you can have your chicken fingers. In most fast food restaurants, their basic breaded chicken is always given a makeover, usually by way of adding special sauces to it.

Traditionally, the sauce choices for the chicken include teriyaki, curry, sweet and sour and other great-tasting sauces. Why, as long as the chicken finger is made excellently (translation: crunchy, moist and juicy!), pouring over any good sauce on it will definitely yield a perfect combination.

On the other hand, it is also used as  pasta topper, usually in any pasta that’s meatless and tomato based. It provides the crunch and savory factor in the otherwise almost subdued taste of a simple tomato-based pasta.

Today, I whipped up a corn chip-breaded chicken fingers on a simple, basic tomato based-pasta for dinner. The corn chips actually got my hands into doing this dish. It’s the first time for me to get those chips onto my fillets, a momentary breakaway from my Japanese bread crumbs.

Now, here’s how to do it. You wil need:

1/2 kilo chicken breast fillet

1/2 cup bread flour

1 cup corn chips, coarsely pounded

1 egg, slightly beaten

salt and pepper to taste

For the pasta, you will need:

1/2 kilo whole wheat spaghetti

2 cups tomato sauce

4 cloves garlic

1 large bell pepper, cut into strips

1 tbsp hot sauce

salt and pepper to taste

parmesan cheese

___________________________________________________

chicken fingers

Season chicken with salt and pepper. Dredge in flour then dip in egg. Coat with corn chips. Let stand for 5 minutes. Deep fry for four minutes on each side. Top on pasta.

tomato pasta

Cook pasta according to package directions. Meantime, in a sauce pan, saute garlic and bell pepper. Add tomato sauce. Season with salt, pepper and hot sauce. Toss in pasta. Sprinkle with cheese on top.

Inadobong Baka Sa Gata

Inadobong Baka Sa Gata

It started this way. ADOBO. Yum.

Half of me clamored for some classic adobo and the other half  howled for some dish that used rich gata (coconut milk). And, both sides won. Yehey.

Beef, isn’t really the most popular main meat of the traditional adobo. It’s usually pork and chicken grabbing the lead star spot in any adobo fare, but hey, beef rocks too.

In fact, tonight, I did both adobong baka and inadobong baka sa gata.

inadobong baka sa gata

inadobong baka sa gata

I know that was insane. I just had to scratch the  itch to cook and taste adobo in two ways. And, was it good!

I am a serious advocate of pinoy food. Very serious, actually. In fact, this post has to be the nth time I am talking about adobo, otherwise touted as Philippines’ flagship dish. Yeah, mabuhay ang adobo!

Okay, here’s how to do it. You will need:

1 kilo brisket, cubed (choose the part that has the fat marbling all over!)

6 cloves garlic, minced

1/2 cup white vinegar

1/4 cup soy sauce

1 laurel leaf

salt and pepper to taste

1 pack instant gata (hey, was running late eh!)

water

oil

____________________________________

1. Season beef with salt and pepper. Put garlic. Pour vinegar, soy sauce and water enough to cover the meat. Simmer. Continue adding water until meat is very tender and most liquid has evaporated. Once sauce has been reduced to half, add oil. Proceed by adding laurel during the last 3 minutes of your cooking.

2. Add gata. Stir for about 5 minutes more. Serve hot.

The Perfect Sansrival Cake

The Perfect Sansrival Cake

pupsansrival 143

This must be pure joy in cake form.

With extreme glee written all over my face, I felt like wolfing down a slice or two the minute I got this. Pistachio sansrival cake by Delize of Chef Jill Sandique, it’s simply the Louie Vuitton of cakes, hands down.

Had my mom taste it and grabe, she was blown away, big time. Haaay, new finds like this get me very giddy. I’m like “oh-dear-this-must-be-love” as I was tasting it, yeah love at first taste!

pupsansrival 146

I particularly like the use of pistachio nuts as opposed to the traditional peanuts in this cake. Definitely an excellent source of protein, it dramatically reduces cholesterol too, among some of its benefits. Love pistachio nuts.

The butter wasn’t overwhelming. Not at all. I did not feel that I was munching on some butter bar with ‘incidental ingredients’ like nuts. Walang daya.

Great taste plus the vibrant green color of the nuts spelled excellence in this cake. Gooey, creamy-rich and really pretty, Chef Jill is the pastry rockstar!

This just worked its way on my ‘top-of-mind-party-potluck-contribution’ list. Loveeet!

*for orders, please call/text 09228262673 look for Lea.

Beef Cannelloni

Beef Cannelloni


I was pleasantly surprised to find a pack of cannelloni pasta at S&R last I did the grocery there. Cannelloni pasta should be a welcome change/addition to my pasta family. Why, my spaghetti begged for a day-off  today. So, newbie cannelloni took the centerstage in my kitchen for some rich, beefy and cheesy pasta.

This is excellent with some clear soup and a glass of white wine (naks!). I love, love, love capping my day with a relaxing chat with my hubby, Jake, over some good serving of pasta and a glass of wine, on certain nights. It just winds me down in the best possible way.

Anyway, here goes the recipe:

1/2 kilo ground beef

10 cannelloni shells

1 can diced tomatoes

1 large tomato, chopped

1 onion, minced

1 large bell pepper

6 cloves of garlic, minced

1 cup grated jack monterey cheese (or your favorite cheese)

1/2 cup chopped ham (optional)

3/4 cup fresh milk

1/4 cup butter

1 egg, slightly beaten

4 tbsps flour

salt and pepper to taste

oil

1 tbsp fresh rosemary, coarsely chopped

________________________________________________

1. Saute beef in garlic, tomato and onion in oil and butter. Season with salt and pepper. Add ham. Cook until meat is tender. Set aside. Let cool for ten minutes.

2. Once cool, mix in egg and flour. Stuff uncooked cannelloni with beef mixture. Set aside.

3. Using the pan used for the beef mixture, pour in tomato sauce and milk. Simmer for five minutes.

4. In a greased pyrex dish, pour about 1/4 cup of the tomato sauce mixture. Lay down cannellonis giving a 1/4 inch-space in between each piece. Pour over the rest of the tomato sauce mixture. Top with cheese.

5. Bake in a preheated oven (160 c) for an hour. Garnish with fresh herbs. Serve with your favorite toast.

Sirloin Strips With Baby Corn

Sirloin Strips With Baby Corn

DSC_0162

Love your own.

Yes, that seemed to have been our family’s battlecry everytime Christmas happened and we had this dish as potluck for the usual clan get-together and my immediate family would dig in ahead of everybody onto this dish and dig in some more for a  second, third and even fourth serving! Haha, talk about extreme fanaticism!

Sirloin is a personal favorite cut. Top sirloin, is the ultimate. It’s tender, very savory and excretes all the beefy goodness one can ever imagine. Kinda pricey, though. Quality’s got a price tag, so..

Now, the baby or young corn. I learned from our past helpers that these baby corns, in the provinces, are nothing but waste, dirt or trash. To them, they are freaks born out from a supposedly, “normal” corn. While me here in Manila is crazy about my beef sirloin with baby corn. Yee.

Okay, how to do this dish now. You will need:

1/2 kilo top sirloin, cut into thin strips

1/2 kilo ripe tomatoes, diced

3/4 cup tomato sauce

4 cloves of garlic, minced

1 medium sized red onion, sliced

1 cup baby corn

1/4 cup soy sauce

salt and pepper to taste

laurel leaf

1/4 cup butter oil

oil

________________________________________

1. Saute beef  in onion, garlic and tomatoes in butter and oil. Season with salt, pepper and soy sauce. Add water to cover meat.

2. Bring to a medium simmer. Continue adding water until beef is tender and tomatoes totally wilted and half of the water evaporated. Add about 1/2 cup of oil.

3. Add baby corn, tomato sauce and laurel leaf. Cook until done. Serve hot.

Meatloaf With Sundried Pesto Rice

Meatloaf With Sundried Pesto Rice

DSC_0139

The immortalized classic meatloaf  dish, hands down, has proven to be one of the most popular dishes over the centuries that it has been served in a great number of dining banquets all over the world since the 5th century. It is a traditional German, Belgian and Dutch dish, and is a cousin to the Italian meatball.

Usually made of ground beef with a classic combination of lamb or pork, I personally think that this dish is best when it’s baked or smoked as opposed to steamed. I just adore the juicy, tasty and engaging taste of this dish. The play of flavors just work in perfect coherence. You wanna  bite on it like there’s no tomorrow.

Anyway, here’s how you do it. You will need:

1/2  kilo ground beef

1 small bottle pickle relish, drained

1/2 cup cheddar cheese, grated

1 pack cream of mushroom soup (powdered)

1 egg, slightly beaten

1 large onion, roughly minced

1 red bell pepper, minced

2 sliced white bread (tasty), cut into small pcs

1/4 cup raisins

1 cup chopped sweet ham

3/4 cup black olives, chopped

salt and pepper to taste

1.. Preheat oven to 350c. Mix all ingredients.

2. Place the mixture in a 9×4 rectangular baking pan. Cover with aluminum foil and bake for 45 minutes.

3. Serve with VELOUTE sauce.

It’s…

             1 1/2 cups beef or chicken stock

            2 tablespoons unsalted butter

            3 tbsp flour

            Salt & Pepper, to taste

In a saucepan, raise heat to medium. Melt butter then add flour to it to form a roux. Stir in stock until thickened. Season with salt and pepper.

For the sundried pesto rice, you will need:

4 cups overnight rice

4 tbsps sundried pesto sauce

1. Heat pan. Pour sauce. Mix in rice. Serve hot.

Lime Chicken

Lime Chicken

DSC_0078

Quite impulsively, I picked up a pack of lime that I saw when I did the grocery at Tropical Hut very recently. I thought it looked really pretty and would love to use it sometime. It hasn’t yet cooled down much in our ref when I decided to use it up in tandem with my chicken right away.  

In the culinary world, lime holds a lot of value as it is appreciated for its acidity of its juice and the aromatic properties it posseses. Quite a popular ingredient in Mexican, Southwestern United States and Thai dishes, it’s become very popular in our household too:)

And yeah, finally, my fingers are back pounding away on these keys, blogging. I missed blogging. The last two weeks kept my hands tied having had to work on certain important “missions” (a.k.a rakets, lol).

Anyway, here goes the recipe:

2 whole chicken breasts, cubed

juice of 1 lime

1/4 cup soy sauce

4 cloves of garlic, minced

salt and pepper to taste

1/4 cup oil (for marinating)

1/2 cup oil (for frying)

_____________________________________________

1. Season chicken with salt and pepper. Meantime, combine all ingredients (except frying oil) to make the marinade.

2. Marinate chicken for an hour. Pour marinade and chicken in a shallow pan. Fry until chicken is done and liquid has almost evaporated. Pour chicken in a plate including sauce from frying. Serve hot. 

Lime

Chicken Spaghetti Melt

Chicken Spaghetti Melt

DSC_0128

Yes, chicken. With all our might, hubby Jake and I have been trying to look away from the pork and beef that have been calling our names since the time we succumbed to the call of healthy lifestyle. Save for the few times we bite on beef, we usually settle for the chicken viand. Healthier, as delish, but less of the fat (unless you eat the skin!).

Okay, today’s lunch was chicken spaghetti melt. Spaghetti that used ground chicken meat in the sauce.

Instead of the usual grated cheese we conventionally top on that good ‘ol hot spaghetti, I decided to melt my medium-sharp cheddar cheese that crowned my chicken spaghetti.

Cheddar, hands down, is my ‘comfort cheese’ as opposed to the other bland tasting variety. I love the saltiness that romances well with the creaminess component of the cheese. I just love, love, love cheddar cheese!

Okay here goes, you will need:

1/2 kilo ground chicken

1/2 kilo whole wheat pasta

1 can diced tomatoes

1 small pack tomato paste

1/2 cup heavy cream

1 large tomato, chopped

1 onion, minced

1 large bell pepper, cubed

6 cloves of garlic, minced

1 cup grated medium-sharp cheddar cheese

salt and pepper to taste

3 tbsp butter

oil

________________________________________________

1. Saute ground chicken in garlic,onion, bell peppers, tomato sauce and paste in oil and butter. Season with salt and pepper. Cook until meat is tender. Pou heavy cream and continue stirring until bubbly. Set aside.

2. In a separate pan, cook pasta acording to package direction. Shock and drain.

3. Mix pasta and sauce. Top generously with cheddar cheese. Microwave for 3-4 minutes. Serve hot.

NOTE: You may substitute cheddar with mozzarela, parmesan or both! Enjoy!

Mashed Potato Makeover (Tuna Croquettes)

Mashed Potato Makeover (Tuna Croquettes)

Okay, all too suddenly you craved for some creamy mashed potatoes.  You decided to whip up this dish in excessive quantity. You totally forgot about the word GLUTTONY. Yeah, you wanted to binge that night, alright.

Finally, you surrendered gobbling it up. Oh, but the problem was, there were ten containers of mashed potatoes you made. Ha!

Then you decided to stack it away in the ref. One, two, three days later and you realized these mashed potatoes have turned from yummy to icky.

Why, potatoes are always best when they’re fresh from the heat. Old potatoes tend to taste starchy, stiff and overly bland.

But who says days-old potatoes can’t be rockin’ anymore?

Not me.

Today, I made some croquettes. Yeah, using mashed potatoes from last night. The filling was made up of tuna, crumbled white cheese and red bell pepper cubes. I just sauted about 3 cloves of minced garlic, 1 small-sized red bell pepper (cubed) and 1 can of drained tuna. Final ingredient was about half a cup of crumbled white cheese, mixed in the tuna ensemble shortly before turning off the heat.

I thought Tuna and melted white cheese make a great tandem. My mom uses ground beef while others even throw in some chopped raisins on their meat filling. Your choice, really.

croquette filling

croquette filling

I then molded my mashed potatoes into balls and flattened them to push in some filling inside. Dredged them on flour, dipped in one beaten egg and finally coated it with Japanese bread crumbs.The final shape was something like:

croquettes 003

Then deep fried:

croquettes 012

Crunchy outside, creamy and savory inside:

croquettes 049

Mashed poato recipe:

3 large potatoes

1/4 cup butter

1/4 cup heavy  cream

salt and pepper to taste

_____________________________

Boil potatoes.

Mash with potato masher.

Throw in remaining ingredients. Mix thoroughly.

Corned Beef With Beans

Corned Beef With Beans

DSC_0044

She cooked from the heart. Savory, succulent and well plated, she paid intense attention to details. Ahh, I miss her food. Her homemade ham that had the best glaze, her pochero with the mashed squash and eggplant siding, her fluffy tortilla, her nilagang kenchie, her calandracas, tinumis, etc. I can go on and on..

My lola was an excellent cook. Okay, biases aside, she was. VERY!

Today, I made one of her dishes. A 2-step wonder. Definitely, the best tasting 5-minute meal.

Okay, how to do this:

1. Saute 4 cloves of minced garlic and 1 chopped red onion.

2. Add in 1 can corned beef and 1 can pork and beans. Stir-fry some more for two minutes.

3. Add 1/2 cup shredded cabbage (optional). Serve hot:)

How easy was that?

The Most Memorable Cooking Experience

The Most Memorable Cooking Experience

DSC_0172And so it happened.

Super typhoon ravaged, crushed and shattered a great number of homes— and dreams of thousands of Filipino. All too suddenly, I realized how, in a snap, everything you have can actually just go–for good.

I felt guilty being  just comfortably home in the heels of the storm as I watched on TV how Ondoy victims clung on to trees, waded in muddy floods just to survive. I felt so helpless. Super.

So, I grabbed the computer and started to mobilize some help through facebook. I felt that the best I could do was to at least give the victims some hot meals after their tumultous date with the storm.

Using my small kawali, with the help of friends (even from as far as Tokyo, Japan– Sieg and Jen Penaverde), High Schoold friends Kit Apari, Pia Canda-Roxas, Faye Singson, Ex-workshop classmate Tanya Titong, childhood friend, Lily Anne Dela Paz, Gym buddy Mae Ramos, John and Coleen Lesaca, we got the feeding operations started the day after the typhoon. The chickens just came pouring in. Whether in kind, in a form of service or in cash, thanks to you guys in behalf of the Ondoy victims.  The meals were brought to Ateneo,  Rizal and some to various baranggays.

 The whole cooking yielded 400 packs all in all, one and a half days of cooking and a lifetime of gratitude to all who made the relief ops possible.

The food:

DSC_0170


DSC_0215


DSC_0201


DSC_0238


DSC_0195


DSC_0217


DSC_0184


DSC_0226


DSC_0286


DSC_0232


DSC_0222

Hoisin Balls

Hoisin Balls

DSC_0282

Very recently, I discovered how to make meatballs that are consitently tender and  juicy even long after you’ve cooked and stored them in the ref for reheating.  Culinary purists might just crucify me for this unconventional method but hey, anything to eat good food, right?

Traditionally, meatballs are either deep or stir fried before they are mixed in with certain sauces and are left to simmer some more. While it yields a slightly crunchy texture in the outside and soft in the inside, it easily stiffens in a matter of minutes making it dry, hard and not too pleasurable to eat anymore.

Okay fine, there are other factors that make these balls “hard” (ex. too much egg, too much flour, etc.) But I discovered, it’s really the manner of cooking that makes it so.

Okay, what did I do recently? I made some Hoisin Chicken Balls. The meatballs, obviously, were the rockstars of this dish. I used half a kilo of ground chicken meat, seasoned it with salt and pepper, 1 minced onion, 4 cloves of minced garlic and mixed in 4 tablespoons of flour and mixed all ingredients together.

THERE. No egg, no crumbled bread, no too much flour. You just need the chicken meat and the potential burst of its juices with the aide of some basic spices. I  formed them into balls. Size? Your choice. Wanted mine mini’s so I balled them up this way:

DSC_0245

Then I boiled water and boiled the balls! Wee! Boiled them for about fifteen minutes. Drained and set aside.

The balls came out tender, juicy and very meaty.

In a separate pan, I put about 1/4 cup oil, sauted 1 large chopped onion and about 1/2 cup hoisin sauce. Then threw in the meatballs in the pan until all balls were well coated. THERE. Shockingly easy, right? Okay, the secret is out. The taste and texture of the balls were consistent from the moment it got cooked upto the next meal when I needed to reheat them. Yay!

DSC_0258

Beef With Mushroom Gravy Sauce

Beef With Mushroom Gravy Sauce

DSC_0033

The last few weeks saw me mostly biting on Chicken. I planned to cut the pattern and  decided to whip up some beef dish that used my fave part, top sirloin.

Top sirloin should be the tender part as opposed to the bottom sirloin. And equally yummy was the gravy that went with the beef. I love, love, love homemade gravy. It’s got all the beefy goodness that makes gravies the most sought-after sauce next to ketchup.

Believe it or not, this dish is one of the easiest dishes to make. Easy, yeah, EASY as in E-A-S-Y!!!

Okay, the ingredients: 1/2 kilo top sirloin, 1 minced onion, 4 cloves of chopped garlic, salt and pepper.

For the gravy, you will need: 1/2 cup butter, 2 cups beef stock, 3 tbsps flour and 1 big can of sliced button mushrooms.

DSC_0004

Okay how to do it:

Saute onion and garlic. Add beef, season with salt and pepper to taste and cover with water. Add water as needed until meat is very tender. And I mean T-E-N-D-E-R!

DSC_0010

Okay, this is the deal with sirloin. It’s very tender if you stir fry it for a few minutes but it gets hard and rubbery when you let it fry and simmer a bit longer than a few minutes.

But hey…

If you let it cook some more, as in for another hour, it will soften again with doneness a guarantee. That I like as opposed to cooking it a bit rare. I like the beef staying on for quite sometime in the pan to make the sauce truly beefy!

Okay, once th beef is done, take out the meat leaving juices and oil still in the pan. Reduce oil when there’s too much to avoid curdling. Some remaining 1/4 cup of oil won’t hurt.

Using the same pan, mix in butter, 1 cup beef stock and flour. Mix flour well until sauce is free of lumps. Add more flour in case you want your sauce thicker.

Stir constantly until sauce is thick enough for you. Be sure to thoroughly scrape all beef residues stuck on the pan. The wealth of flavor is there!

Slowly pour in the remaining stock. Adjust consistency according to your preference by adding or minimizing pouring of beef stock.

Finally, throw back beef onto the pan. Mix in chopped mushrooms. Simmer for five more minutes. Serve hot.

Tuna Pesto Wrap

Tuna Pesto Wrap

DSC_0113

I saw a pack of tortillas sitting on a lonely shelf at Rustan’s yesterday when Jake and I did the grocery. I just knew I had to grab it for some warm, comforting  and delish “blank-blank” wrap, well, I impulsively got it without any exact intent as to what I wanted to do with it.

A lightbulb moment happened today and I was able to fill in the  “blank blank”. I felt like making some tuna pesto combo that I randomly teamed up with some great cheddar cheese and crunchy lettuce plus a number of spices.

Sarap!

DSC_0098

Okay, how to do it:

2 cans tuna (solid in brine or hot and spicy)

1 cup mayo

2 tbsps mustard

3 tbsps pesto (store bought or try this)

1 medium-sized onion, minced

1/4 cup cucumber, chopped

1/4 cup celery, chopped (optional)

2 pcs romaine lettuce leaves

1/2 cup grated cheddar cheese

salt and pepper to taste

6 pcs tortillas

__________________________________________________

1. Drain tuna from all the liquid. To take off the ‘lansa’ factor, soak tuna chunks in 3 cups drinking water and drain.

2. Mix tuna, onion, cucumber, celery, mayo, cheese and mustard together. Season with salt and pepper.

3. On a piece of a heated/grilled tortilla bread, put lettuce and tuna spread and put some pesto on top. Fold two sides of tortilla towards the center. Serve while pita is warm.

NOTE: Tortillas can be heated through a teflon pan or a griller. Heating time should only be a minute or less to maintain its softness.

Fish and Oysters

Fish and Oysters
Parmsan-crusted lapu-lapu fillet with garlic-mayo dip

Parmesan-crusted lapu-lapu fillet with garlic-mayo dip

 Wet markets have always awed me. The sight of freshly-delivered fishes jumping in ‘balde’ -fresh water majorly amuses me. The seafoods and veggies– fresh and obviously spelling quality never fail to get my attention.

A few days ago, my mom rang me up to ask what I wanted from Farmer’s Market. Almost instantly and instinctly, I pleaded for fish and oysters. Ahh, who needs to go outside the city for some fresh catch? It’s right in Cubao!

And so, the moment I got hold of them, the cooking began. The lunch ‘project’? Some parmesan-crusted lapu-lapu fillets!


Ready to be deep fried

Ready to be deep fried

I sliced two whole fillets of lapu-lapu (finger size) and seasoned them with salt and pepper. 

In a bowl, I beat 1 egg and mixed in a tablespoon of flour to make a batter.

Dipped the fish fingers one by one onto the batter then coated them with Japanese breadcrumbs mixture (1 and 1/2 cup Japanese breadcrumbs, 1/2 cup parmesan cheese and  1/2 teaspoon cayenne pepper and mixed everything together. Then I was ready to deep fry.

Ahh, how I devoured the crunchy crust and moist flesh inside!

 The fish went with some garlic-mayo dip. I mixed 1/2 cup mayo with 3 cloves of minced garlic and 2 tablespoons of lemon juice, seasoned with salt and pepper too!

Hot from the oven!The second dish was made up of creamy cheese and oysters. Ahh, this was the bomb. I boiled 1 and 1/2 kilos of oysters until shells opened. Them I arranged the oysters on a baking plate, then topped each with a pinch of garlic, 1/4 teaspoon butter and 1 spoonfull of quick-melting cheese. Baked for 15-20 minutes at 275 c. Now, how easy was that?
Don’t forget to squeeze in some swig of lemon before eating!
Baked cheesy oysters

Baked cheesy oysters


If I win the lotto, I’m gonna buy an hacienda!

If I win the lotto, I’m gonna buy an hacienda!

Say Cheese!

Foodie drives all the way down south to experience the lethal combination of good food and nature tripping.

WE started clicking away with our cameras the moment we stepped down from the van.

Why, the place, Hacienda Macalauan in in Laguna, was every inch captivating and oozing with charm.

We were greeted by a refreshing breakfast of mozzarella sticks, a pitcher of chilled freshly-squeezed dalandan juice and their very own yogurt of different flavors, all locally grown.

Then we proceeded to check out the cow barn where fresh milk is sourced from.

We walked over to the main plant where they make all the cheeses that go to the market. Definitely some milk and cheese 101 for the FOODIE team.

Witnessing first hand how commercial milk and cheeses are processed, a dairy 101 of sorts for the FOODIE team, was one of the major highlights of the tour–and that alone, made the three-hour trip well worth it.

We scoured the Hacienda some more and caught a majestic view of the place. The luscious landscape with the steady gurgling of the water stream nearby just blew us away.

 Milk and cheese plus a nice nature tripping experience equaled some good memories of the hacienda. Moo!

I’ve made up my mind, if ever I win the lotto someday, I’m gonna buy out this Hacienda:)

XOCOLAT!

XOCOLAT!

Did somebody once say that chocolate is cheaper than therapy and you don’t need an appointment?


Indeed, there is really something about chocolates that eases up the stress, discomforts and other aches of the daily grind.


It’s rich, creamy and heaven-perfect. It reminds me of the old adage, “In heaven, chocolates have no calories and are served as the main course”.


It was during one hot choco break when a life-changing eureka moment would happen between two friends, Pinky Ortiz and Valerie Lopez, while they sipped away what they thought was the best-tasting version of their favorite drink.

The setting was at Christian Escriba in lovely Barcelona, Spain. Friends Pinky and Val, enamoured by the great-tasting dark beverage they sampled, thought of  bringing home their experience back to the country. They struck a partnership with two more friends, Trish Malvar and Rina Avecilla, in 2004 to establish Xocolat, a chocolate-inspired restaurant that would soon be an important player in the highly-competitive restaurant scene of Manila.

In an interview with FOODIE at their Katipunan Ave. branch, Pinky intimated to us the inspiration behind Xocolat. “A journey to Barcelona (Spain) brought us to the doorstep of this curious pasteleria in Las Ramblas. It served the creamiest and yummiest cup of hot chocolate. That little cup of heaven is the blueprint of our legendary ‘taza de Xocolat’”.


Now considered a breakthrough in the local restaurant environment dominated by conservative-palated Pinoys, Xocolat is able to pull off  a menu that includes savory dishes with drizzles of chocolate! But who’s complaining? I can eat a pillowcase that’s chocolate coated!

The owners of Xocolat definitely get a kick out of seeing their loyal clients enjoying every bite and sip of their delights. They excitedly spoke about the “high” they get when a customer goes for seconds, and thirds, of that thick, dark and rich drink!

Pinky also shared with us their future dreams. “We see Xocolat as being recognized as a homegrown chocolate bar that that can compete with the global giants.” She adds that Xocolat’s vision is to someday dabble into more ambitious plans like setting up a Xocolat village, factory or a museum.

Pinky shared with FOODIE that, to date, they are still hurdling with the fact that coffee is still the default stress relaxant in the metro. “We are entering a coffee-dominated arena; so, we need to start creating a sustainable chocolate-drinking market,” she adds.

There is strong evidence that they will soon achieve their vision. The four branches that they’ve established so far have been enjoying continued patronage from a rather discriminating clientele. Who can say no to chocolates, anyway?

After all, it has been written somewhere that “On the eighth day, God created chocolates.”

Off to heaven now.


My Little Chef!

My Little Chef!
DSC_0009

Chocoholic!

Here goes something my little one and myself love to bond over– food and all the fun that goes with it. The past few days saw Sam helping in the kitchen when she tried her hand (literally) at baking some soft, chunky and chewy chocolate chip cookies that would not stay in the cookie jar for long and the other project, whipping up some white chocolate lollipops that our dear family friend Mae Ramos taught us how to make.

Sam greasing the pan for the chocolate chips. I got the sense that she enjoyed more brushing on some shortening as opposed to brushing watercolor on paper!

Sam was extra giddy as I officially announced to her that we were to make chocolate chip cookies. Like always, she just HAD to do the mixing. She loves, loves, loves to mix practically anything “mixable”! Ahhh, starting ‘em young eh? Well, kinda.

Future pastry chef?

Her faves include our carrot cake and now, these cookies.

9124_193512858274_555133274_4032549_1957111_n

Soft, chunky and chewy chocolate chip cookies

Next on our to-do-list was our white chocolate lollipops– in ring and candy cane shapes.

DSC_0464

Serious. Very serious!

 These are lovely!!!

DSC_0527

White chocolate ring lollipops

Our first time to do these chocolate delights.

DSC_0523

White chocolate sugarcane-shaped lollipops

Our dear family friend gave us pointers on how to make this goody possible. Quite simple I might say. So easy that even kids can do their culinary obras by way of doing this.

DSC_0481

Sam was uber delightful just sprinkling the toppings!

DSC_0495

The little chef!

She had the finished products given to cousins and titas soon after. Okay, next project please!

Cheesy Chicken Sticks

Cheesy Chicken Sticks

DSC_0025

Inspired by my friend, Aileen Lara, and an HRM student from PUP during a chefwars competition, I created a dish that will make parties extra exciting, elegant and gastronomic with these cheesy chicken sticks on the table. The crunch on the exterior just ends up getting chewy and everything nice inside with that cheese peeping hello to you as you make that big bite.

DSC_0046

Just a sidebar, the choice of cheese is a bit crucial. Mozzarela sticks tend to melt right away the moment it hits the pan. Should you decide to use it, make sure you freeze it a bit first before you use it for cooking. Other soft cheeses like kesong puti, feta, brie, etc. tend to behave in the same manner too. Cheddars like the sharp ones and medium sharp are likewise as vulnerable to quick melting. Personally, I’m fine with Eden cheese. Heehee, I hope I don’t get a flack for choosing the ‘unexpected’ choice. There.

The green chillies are actually optional. Yes, you have the option to make it yummier! Ha! I love, love the lethal cross of the cheese’ saltiness and the kick of chillies, rolled into one and made crunchy by the parmesan-crusted lumpia wrapper.

So, are you hungry now?

Okay, here goes the recipe:

6 lumpia wrappers, small

6 slices cheddar cheese, sliced horizontaly 1/4 inch thick on all sides

1/2 breast of chicken, seasoned, boiled and sliced

1 egg, slightly beaten

1 tsp flour

1 cup Japanese bread crumbs

1/2 cup grated parmesan cheese

6 pcs green chillies (siling pang sigang), SEEDED OR BE READY TO BURN YOUR TONGUE!

oil

______________________________________________

1. Arrange sliced cheese and chicken inside green chillies. Close both ends of wrapper and roll with the filling.

DSC_0009

2. Meantime, in a separate bowl, combine egg and flour. Mix to form a batter. Dip the lumpias onto the batter.

3. Dredge in the breading mix (to do this, combine Japanese bread crumbs and parmesan cheese). Deep fry until golden brown. Pat dry on napkin and serve immediately.

Bonding Over Easy Pastillas De Leche

Bonding Over Easy Pastillas De Leche

DSC_0275

Sam was extremely looking forward to whipping up some pastillas de leche today. Almost in a mantra fashion, she kept saying, “My work is to pour and mix, my work is to pour and mix! Let’s do the pastillas now, puleeeeease!”.  NOW was her operative word and that got me running to the nearest grocery to get the ingredients.

Okay, pastillas project was finally underway. She was ready to grind away and have fun at the same time.  Happiness was written all over her face:

DSC_0264

She poured, mixed and packed some of the pastillas. For twenty minutes, she left the Disney Playhouse channel that momentarily seemed less significant than making pastillas.

DSC_0256

Bonding over cooking and food has been one of my greatest moments with my daughter, Sam. My heart jumps for joy at the site of those bright eyes over the prospect of  “cooking with mommy”.

DSC_0262

I get overwhelmed each and everytime I hear her proudly announce to family and friends that we cooked and that she immensely enjoyed it.

Ahh, simply priceless.

DSC_0268

Pastillas De Leche:

2 cups sifted powdered milk

1 can condensed milk

Sugar for coating

__________________________________________________

Mix  powdered milk and condensed milk. Mix well. Let settle in the ref for 5-10 minutes before molding or kneading by hand.

Form into balls or tubular shaped pastillas. Roll into sugar.

Wrap in cellophane.

DSC_0298

Spicy Grilled Chicken Wrap

Spicy Grilled Chicken Wrap

DSC_0380

Tortilla is my new rice. I eat a lot of food that well goes with it– chicken, beef, pork and yeah, even tuna. Oh, how I devour my wraps each and everytime I make them. I just love, love biting into those freshly warmed tortillas like crazy.

Today, I wanted to make some chicken fajitas. I scoured the ref for guacamole and sour cream and found my mental ingredients list for those all crossed out. So, I settled for the sidings-less version of that. It was great just the same.

Okay, let’s bring it on. You will need to grill three chicken breasts, seasoned with salt, pepper and some lemon squeeze.

DSC_0307

Meantime,  chop 1 big onion, mince 4 cloves of garlic and julienne one red bell pepper.

Once chicken is cooked, slice and set aside.

In a skillet, saute garlic, onion and bellpeppers in olive oil. Add sliced grilled chicken. Add 1/2 teaspoon cayenne pepper powder, 1/4 teaspoon cumin and 1/4 teaspoon taco seasoning.

Actually, the cooking could stop here.

DSC_0344

See? Yan pa lang ulam na! Kanin na lang! Haha! Hey no, we have a mission! Gimme the wrap!

Assemble the filling on a freshly warmed tortilla wrap. Add cheese if you wish.

DSC_0355

Roll over both ends of the tortilla bread and eat with your eyes closed:)

DSC_0380

Salmon, Oysters And Baby Potatoes

Salmon, Oysters And Baby Potatoes

About to be baked pink salmon

Salmon is my new beef. I love the fresh and nude taste of this salmon. Literally, melted in my mouth, today’s power lunch was made of salt, pepper, garlic and this salmon– foiled and baked for 20 minutes at 350 c. Now, was that the easiest, simplest superstar meal you could possibly have?

To go with the baked salmon as siding, I boiled a few pieces of baby potatoes,  drained once cooked and assembled  inside  a piece of aluminum sheet for baking. Of course, that after I seasoned them with  salt, pepper and a teaspoon of butter. The potatoes went with half a cup of green peas, too. Such that:

The second dish was three-cheese baked oysters. The cheeses: cream cheese, quick-melting cheddar cheese and some grated parmesan. In a skillet, heat in butter 3 cloves of minced garlic, then add 3 tbsps cream cheese, 2 tbsps heavy cream, 1/4 cup whole milk and 1/2 cup quick-melting cheddar cheese. Adjust to desired consistency by adding whole milk. Season with a bit of salt and pepper. Stir continously until thick.

Once cooked, top cheese mixture on open faced oyster shells. Sprinkle with parmesan cheese on top. Garnish with chopped rosemary. 

 Bake for 20 minutes at 350c. Serve hot:)

Yakinuki-Wrapped Chicken Roulade

Yakinuki-Wrapped Chicken Roulade

Yakinuki commonly refers to a Japanese method of cooking bite-sized meat (usually beef and offal) and vegetables on gridirons or griddles over flame of wood charcoals carbonized by dry distilation (sumibi) or gas/electric grill.

Originating from horumonyaki, it now enjoys immense popularity  among foodies all over the world. Invented by Korean immigrants in the Kansai area after the Second World War, it has been a favorite dish or major ingredient in major dishes across the globe.

The first time I tried yakinuki was when a Japanese Resto opened somewhere in Valero street and invited me and Jake for some great Jap meal. I thought their yakiniku was totally awesome, literally melting in my mouth.

Fast forward to last Friday, I saw a pack of yakiniku sitting on one of the freezers of the newly opened SM Hypermart along Quezon avenue corner Edsa. Yeah, It was calling my name, alright. Ahh, almost automaically I knew I wanted these yakiniku strips to be all over my chicken roulade.

The fusion of an Asian wrap on Europe’s roulade just made the perfect combination. Every bite just spelled YUMMINESS font 88!

Okay, how to do it:

Yakinuki-wrapped chicken roulade

6 yakinuki strips

6 whole chicken breast fillets, seasoned and pounded

salt and pepper to taste

Filling:

1/2 kilo ground pork

1/2 cup grated cheddar cheese

1 chicken cube

1/2 cup pickle relish

1 small can crushed pineapple, drained

2 bell peppers, finely cubed

1 egg

3 tbsps flour

salt and pepper to taste

__________________________________

Preheat oven to 350c.

Using a transparent plastic wrap, pound chicken breasts to thin and make bigger the chicken meat. Season with salt and pepper. Set aside.

Meantime, mix well all the remaining ingredients (except yakinuki strips) to make the filling.

Assemble chicken on a flat surface. Scoop filling and spread on the center of the breast fillet. Top with another breast fillet to seal the filling. Form into a roll.

Wrap the roll with yakinuki strips. using a string, tie the roll to prevent disintegration while baking. Place rolls on a baking sheet and bake for 45 minutes.

Once cooked, REMOVE STRING. Let it rest for ten minutes.

Slice roulade and serve with gravy or the dripping.

Smoked Bangus Pate

Smoked Bangus Pate

Simple but fanciful cocktail details do make parties look extra elegant. Very recently, I hosted a lunch at home and had these garlic sticks to go with my smoked bangus pate. I thought the shake glass was too tall for my sticks that was why I did some “apple box” for it by using cubed cucumbers. Why, I loved how it turned out!

My smoked bangus pate has never let me down. An instant crowd pleaser for its very delicious taste, I always whip this up when there’s any gathering at home. So engaging to eat, you’ll never know when to stop! It’s perfect, too, with crostinis and even on french bread.

I’m using here a file photo of my smoked bangus pate I took a few months ago since I failed to take pics of the one I made recently that we ate with the bread sticks. Was a busy bee doing preps that taking pics totally slippped my mind, tsk.

I hosted a lunch thing for a photo shoot that would feature this author’s cooking for their magazine’s valentine issue. Hopefully, the pate pic would come out in the feature.

I used shot glasses for my pate. 6 guests had one shot glass of smoked bangus pate each to savor with the bread sticks. It looked really elegant and picture perfect.

Smoked Bangus Pate

In a blender, put in one piece of medium-sized fried smoked bangus fillet (minus the head, tail, skin and bones), 1 box of cream cheese, half cup all-purpose cream, 2 tbsps lemon juice and salt and pepper to taste. Pulse until smooth and creamy. Serve with crostini rounds.

Stir-Fried Tuna With Holiday Peppers

Stir-Fried Tuna With Holiday Peppers

I have totally lost count the number of times I tried, with all my might, to ignore all the lechon, jamon and other ‘cardiac delights’ servings on the table this holiday season. Did I succeed? I should have, but the call of cholesterol just had me munching on these fares that were absolutely rich with all the fats.

Yech.

To dampen the guilt, I whipped up something light today. Stir-fried fresh tuna with drizzles of worcestershire sauce and red peppers  just glided smoothly down my throat– certainly, guiltlessly this time.

Stir-fried tuna with holiday peppers

1/2 kilo fresh tuna, sliced

1 large bell pepper, cubed

1 large green pepper, cubed

1 onion, sliced

4 cloves of garlic, minced

2 stalks onion leeks

2 tsps worcestershire sauce

salt and pepper to taste

oil

_________________________________________________

Season tuna with salt and pepper.

Meantime, in a skillet, saute onion, garlic, leeks and peppers. Add tuna. Drizzle with some worcestershire sauce.

Stir-fry for four minutes. Serve on a sizzling plate.

Leftover Galantina Surprise

Leftover Galantina Surprise

Trust me, this chicken galantina never stays long on the buffet table each time I serve it during our parties at home. Well, unless I double up the usual quantity, it’s never going to reach the ‘leftover’ stage.

Okay, in case, there’s going to be some leftover galantina slices, what can you do with it? Ahh, this dish I so like! I make a killer sauce by just sauteing in a skillet  1 medium-sized onion (minced), 4 cloves of garlic (chopped), 4 ripe tomatoes (seeded and diced), 1 red bell pepper (finely cubed) and a teaspoon of fresh basil leaves (chopped). I season it with salt and pepper and would give it a swig of lemon juice (about 2 tbsps) for some great flavor. Add about 1/4 cup of water to yield better consistency. Continue simmering until sauce has been reduced by 1/4 from the original amount.

The secret is in the ripeness of the tomato and the manner by which you slow cook it to let the juices flow naturally while simmering it without drying it out too soon.

When sauce is done, assemble galantina slices in the skillet while you continue to simmer them with the sauce.

CHICKEN GALANTINA RECIPE:

http://theeatingroom.wordpress.com/2009/02/27/chicken-galantina/

Easy Paella

Easy Paella

History says that paella was once a laborers’ meal. A story closely similar to the origin of  kare-kare which, according to food historians, was a dish eaten by peasants who made a dish out of the leftover parts (bituka, twalya, buntot at tuhod ng baka, etc).

Paella, in its early beginnings in Valencia, Spain (where paella was said to have originated), was cooked over an open fire and was eaten directly from the skillet using wooden spoons. The most common ingredients used were chicken, rabbit, duck and snails. Seafood was kind of scarce in Valencia.

Ahh, I must’ve been one of those laborers who devoured paella in my past life! I love, love the many exciting ways that paella is prepared. It simply makes a great dining experience when paella is seated prettily on my plate!

Paella

2 cups risotto rice

4 pcs prawns

3 pcs chicken thighs, chopped

1 stick chorizo, sliced

5 cups chicken stock

1 red bell pepper, julienned

1/2 cup green peas

4 cloves of garlic, minced

1 onion, minced

olive oil

1 tsp turmeric powder

salt and pepper to taste

5 threads saffron

4 pcs lemon wedges

1 tsp chopped parsley

______________________________________________

In a skillet, brown chicken until half cooked. Remove chicken and set aside.

In the same pan, saute garlic, onion, bell pepper, green peas and chorizos. Add chicken and rice. Throw in turmeric and saffron.

Mix well until rice is well coated. Add stock. Simmer until rice is cooked.

Meantime, stir fry prawns until it turns pink in color. Set aside.

Top rice mixture with prawns. Garnish with lemon wedges and parsley.

Stories Made Of Tempura And Maki

Stories Made Of Tempura And Maki

Okay, today’s lunch ballooned my waistline 2 inches bigger. Translation: 5k run must happen asap. If you had this today, you would forget about diet:

Spicy Tuna Crunch

My high school barkada decided to troop over to Ebisu restaurant in Eastwood for a catch-up lunch that would extend all the way to meryenda. Haaay, like always, everybody grappled for ‘airtime’, haha. Our hubbies were tormented following the broken vignette of stories each one had to tell!

Nothing beats a lively and animated kwentuhan with good food on the table, right? The starters were made up of shrimp tempura, salmon crisp and spicy tuna crunch.I was stuffed way before the main course was served!

Shrimp Tempura

It’s always one funny sitcom when my HS barkada meets up. I don’t know, these guys are anything but flat. I mean, their personalities just make up for great movie characters, lol. Meaning, we are a body of characters (go figure!)— and I love it! Yeah, I do love them dearly.

Yes, with or without food.
Pero sana meron.

I knew I was in for an uber fantastic lunch today. This maki was so good! Pesto, cucumber and bacon combination really kicked a_s big time!

Ebisu chicken that Jake and I shared:

Love this. Rice and everything nice!

Steak from Jay and Sheila’s meal:


Us during our talkathon break:

These guys are my friends (READ: FRIENDS) Jo, Marra, Carla and Sheila (guy in blue is Jake, the hunk I married) and Jay (who took this shot  but his pic down below!). If there is such a thing as comfort food, they’re my ‘comfort friends’. Friends I am keeping beyond forever

Sweet ending at Le Creperie:

Brownie crepe ala mode

Chicken Stock

Chicken Stock

I find it very useful boiling chicken for some old-fashioned chicken stock. Like they always say, chicken soup is the better alternative to a tranquilizer. I can’t agree more.

I love, too, the many ways and purposes it serves. You may, 1) Eat the chicken-soup ensemble as nilagang manok dish  2) Pour over the chicken stock on ice trays to make ice cubes for future stock use 3) Shred or cube chicken meat for future use like in pansit, pasta or sahog to dishes like pancit molo, chicken sopas or sotanghon soup or to just sip the that warm, comforting sabaw powered by all its chicken goodness.

Now, that’s  hitting several birds with one stone!

It’s never enough to just season your chicken with salt and pepper to make the stock. You want your chicken smothered by all the flavor-enhancing spices and ingredients that make up the perfect stock.

To make this stock, you will need:

1 1/2 kilo whole chicken

1 large carrot, peeled and sliced (1 and 1/2 inch thick)

1 large onion, quartered

3 stalks of celery, peeled

1 bunch scallions

3 thumbsized-ginger, sliced

salt and pepper to taste

1/4 tsp cayenne pepper

water

Season chicken with salt, black pepper and cayenne pepper.

In a boiling pan, place chicken with all the remaining ingredients. Cover with water.

Using low heat, cook chicken until tender.

Cocktails In A Hurry

Cocktails In A Hurry

In a trip to Paris, France about two years ago, I was amused at how regular I saw this olive-cheddar cheese combo in most clubs that we checked out. Quite similarly, its counterpart here would be our usual ‘adobong mani’ that we nibble on along with the booze.

Quite a staple on the club tables, it instantly greets you once you’re seated. Usually free and replenishable, I enjoyed having it there to match with the red wine I took.

Fast forward to now, I make these when I invite family and friends over at our place. That’s cubed sharp cheddar cheese and pitted black olives skewered on a toothpick. Looks elegant, easy to make and perfect to go with wine. Cheers!

The Perfect Corned Beef!

The Perfect Corned Beef!

Two nicely-packaged cans of corned beef greeted me as I arrived home the other day. A friend, Nina Daza-Puyat, had them sent over to my place for tasting. And, what tasting I had!

Now, what to do…

This morning saw me opening a can of Delimondo corned beef by Chef Ed Quimson  to go with some nicely-browned diced potatoes.

Initially, I was tempted to do my classic favorite — a mega combo of corned beef and pork and beans that my lola always cooked for us when we were kids. However, my curiousity killed my impulse and decided to whip up something that wouldn’t mask the original taste of this corned beef that Nina likes so much.

Upon opening the can, I giddily scooped up some corned beef. Haay, I swear, it would’ve gone straight into my tummy before it hit the pan had I not forced myself to STOP! It had the right play of saltiness and linamnam.

Thought, too, that  this corned beef had the perfect color of corned beef. Not too red and definitely not too pale.

The bomb was actually the bits of chunky litid/fat that it had in it. Sarap!!!! Very reminiscent of those homemade corned beef that had some good cuts of beef brisket. It just melted in my mouth with my eyes closed.

___________________________________________________

To do this dish, you will need:

1 big can of corned beef

3 medium-sized potatoes, diced

4 cloves of galic, minced

1 onion, minced

1 tsp dahon ng sibuyas, chopped

oil

______________________________________________

In a frying pan, deep fry potatoes until golden brown. Drain and set aside.

Meantime, using a skillet, saute onion and garlic. Add corned beef. Cook for three minutes. Add potatoes. Serve warm.

Cheesy Lasagna

Cheesy Lasagna

Marvelling at this Lasagna, a party guest once asked me what cheese I used to make it. Without hesitation I gave away the secret– EDEN cheese and a box of another local quick-melting cheese. To which, the other eavesdropping party people cracked up thinking it was a big foodie joke. Well, that joke happened to be the yummiest amusement to date.  

This recipe is an instant party crowd pleaser, no fail. The 1-2-3 punch comes from the perfect play of the meat sauce and the bechamel. The harmonious and rythmic combo of  spicy, a bit sweet (from the sweet onion and red bell peppers), sour and salty components in this dish give it the oomph that’s to die for (or yeah, live for!).

No, this is not a sponsored blog (how I wish!) neither is it a testimonial dish. I just underscored the fact that you DON’T need expensive cheese to make a killer lasagna. Before some lasagna purists crucify me for publishing this recipe using Eden cheese, let me challenge them first to try this. Then, hand me down the verdict!

Okay, today saw me baking this lasagna for friends Faye and Kristine for a belated New Year catching up.

Kristine, moi and Faye

The lunch also included in the menu some parmesan-crusted calamari with tartar sauce, a plate of greens with some fruit-infused vinegrette dressing and lots of laughter, catching up  and updates from all the stories that went with it. Nothing beats great chats with comfort food at the backdrop.

Lasagna:

1 box  curly lasagna noodles

1 box quickmelt cheese, grated

Meat Sauce:

1/2 kilo ground beef

4 cloves of garlic, minced

1 medium-sized white onion, minced

1 tomato, chopped

1 large bell pepper, minced

salt and pepper to taste

750 grams tomato sauce, Italian blend

1 can chorizos, cut lengthwise and sliced horizontally (optional)

Bechamel Sauce:

1 box all purpose cream

1 cup milk

1 box Eden cheese

 cheese, grated

1/4 cup  butter

salt and pepper to taste

4 tbsps flour

___________________________________________________

1. Cook pasta according to package directions.

2. In a separate pan, saute garlic, bell pepper, onion and tomato. Add beef. Season with salt and pepper. Simmer until cooked. Add tomato sauce and chorizos. Continue stirring for the next ten minutes.  Set aside.

3. In a skillet, heat  butter then add all-purpose  creamand milk. Mix well. Add Eden cheese. Slowly add flour to thicken the sauce. Season with salt and pepper. Set aside.

4. In a baking dish, assemble the pasta. The bottom part gets a scoop of meat sauce as base. Smother with a generous amount of bechamel sauce on top of the beef mixture. Lay lasagna noodles. Repeat the layering thrice.

5. Top the dish with the quickmelting cheese.

6. Preheat the oven to 350c and bake for 15 minutes or  until cheeses are turned into golden brown. Once cooked, let stand for 15 minutes. Serve with you favorite toast.

FOOD Mag’s “Cooking For Two”

FOOD Mag’s “Cooking For Two”

Thinking of cooking for two this Vday? FOOD magazine might be able to help you:)

FOOD's February issue. Theme: Chinese cooking. I love it!

I was giddy when FOOD magazine  rang me up for a feature request on the food I was gonna do for Vday. They said I was to prepare an appetizer and at least 2 main dishes. For a week, I did a survey among my friends on what main ingredient they would like to have for a romantic dinner for two. Most of them picked salmon and steak– so, there. FOOD had the two for the feature among the other dishes I prepared for my spread.

For once in my career, I prioritized jazzing up my food more than myself! Haha! I didn’t care if I looked pooped and worn out during the shoot as long as the dill sat prettily on top of the salmon!

Got these mouthwatering slices of Australian steak I used for the FOOD mag shoot (image below,  topmost right) from SM Hypermarket. The brand is Meltique from Australia. There is a new technology in the land down under that allows meat to have a perfect marbling. How? Well, they do the opposite of liposuction! Yes, they inject fat into the meat! The result is a perfect marbling that coats the meat with all the tasty juices of the beef.

For the recipes, please grab the latest copy of FOOD magazine now!

Tuna And Chorizo Linguine

Tuna And Chorizo Linguine


Tuna plus chorizos equals happiness. Yesterday saw me dishing out some tuna and chorizo pasta for my pasta-loving mom and aunt when they swung by my crib for some hearty meryenda.

If I had my way, I’d name this pasta, “Oh my, Mama!” pasta. Lol. Yeah,  in honor of my mom who is a die hard pasta lover. Mom must’ve been an Italiana in her past life who made cheeses and everything yummy and Italian in her lifetime!

Well, save for the chorizos (which is Spanish in origin), the dish was one helluvahn Italian treat. Easy to make, packed with big flavors, fancy-looking, this recipe should make its way to your kitchen soon!

Smothered with chunky tomatoes, chorizos, tuna  and all the Italian flavors, my house guests definitely went for seconds!

Okay, to do this you will need:

1/2 kilo linguine pasta noodles

1 can chunky tuna in solid water

1 can diced tomatoes

1 cup regular tomato sauce

1 stick chorizo, sliced and halved

4 cloves of garlic, minced

10 pitted whole black olives

1 red bell pepper, finely diced

1 green bell pepper, finely diced

1 tbsp fresh rosemary, chopped

1 tbsp fresh sweet basil, chopped

salt and pepper to taste

1/2 cup parmesan cheese

olive oil

Cook pasta according to package directions.

Meantime, in a skillet, saute garlic, bell peppers, olives, chorizos, rosemary, basil and tuna. Season with salt and pepper. Simmer for two minutes. Add diced tomatoes and regular tomato sauce. Lightly stir for the next four minutes.

Toss sauce in pasta. Serve warm with sprinkling of cheese on top.

Baked Chicken In Sinigang Rub

Baked Chicken In Sinigang Rub

A friend and blog reader, Sandy Celi, gave me some of her organic chicken for sampling. I automatically scanned my mental files for a favorite recipe and thought of whipping up my favorite baked chicken in sinigang rub. I thought it was to be our local version of the lemon and pepper rub. Yes, only better.

I grabbed some sachet of my organic sampaloc sinigang mix from Herb’s Best (owned by my cousin-in-law, Fannie Guanzon) and I was set to fire away.

In a snap, I suddenly found myself strutting my stuff in the kitchen gearing up to make some baked chicken in sinigang sampaloc rub. It was to be a dream combo in an untypical sinigang dish. Two chemical and preservative-free major ingredients in one dish name– clap, clap!

When you check Sandy’s blog site  you will read that this chicken comes from a breed of “Grass Fed, Free Ranged, Naturally Grown, Pastured Colored Chickens: Raised with a lot of sunshine, fresh air, supplemented with probiotics and unmedicated feeds”.

No wonder it did not have the innate lansa or slimmyness chickens usually have. Oh and by the way, did I say that it  was distinctly tastier than the regular commercial chicken? Ahhh, sarap Lord! 

Now,  how cool was that?

Okay to do this you will need:

1 big chicken

1 small sachet sampaloc mix

salt and pepper to taste

1 bunch tanglad

1 cup fresh parsley

oil

Preheat oven to 300 deg c.

Season chicken with salt and pepper.

Meantime in a small mixing bowl, mix 2 tbsps oil and 1 small sachet of sampaloc sinigang mix.

Rub onto the chicken.

Insert lemongrass and parsley (with bottom part of the stalks pounded to release flavor) into the cavity.

Bake  for 2-3 hours or until chicken is done. Serve with gravy sauce (recipe below).

Gravy sauce:

Scrape the pan where you baked the chicken by adding 1 cup of boiling chicken stock. Drain to smoothen the mixture.  Transfer mixture in a sauce pan. Simmer on low heat. Add 3 tbsps butter and 2 tbsps flour. Stir until sauce is free of lumps.

Moroccan Lamb Chops With Couscous And Apricots

Moroccan Lamb Chops With Couscous And Apricots

Cruising the food treasure-laden aisles of SM Hypermarket’s meat section today, I was delighted to see some  good-looking cuts of lamb chops. The marbling looked awesome and it just had me grabbing some few slices for today’s meal.

Now, what to do? The usual way would be smothering the lamb with mustard and rosemary or maybe coat it with some generous lather of yogurt and lime. However, some eureka moment prodded me to venture into something majorly diff.  

I knew I wanted something Morrocan, where spices burst and flavors play on the palate. Ahh, Moroccan rub was to be.

Spices are used extensively in Moroccan food. While spices have been imported to Morocco for thousands of years, many ingredients, like saffron, mint olives, oranges and lemons are home-grown.

Common spices include cinnamon, cumin, turmeric, ginger, pepper, paprika, anis seed, sesame seed, coriander, parsley, saffron and mint.

My lamb went with a simple couscous fix and some few bunch of arugula leaves with cherry tomatoes and fresh apricots drizzled with some balsamic vinaegrette.

Too stuffed, I felt too heavy to do the belly dancing  afterwards.

Morrocan Lamb Chops

3 slices lamb chops

3 tbsps extra-virgin olive oil

3 tsps ground turmeric

1 tsp Spanish paprika

1 tsp coriander seeds

1 tsp salt

1/2 tsp garlic powder

1 lemon, wedged

Oil chops with olive oil.

Meantime, combine dry spices in a small container.  Cover and shake to combine.

Rub spice blend into the chops on both sides.  Seal in Ziploc bags and marinate overnight.

Preheat grill pan to high.

Grill chops 7 to 8 minutes, turning once, for medium rare, 10 to 12 minutes for medium to medium well. Serve with wedges of lemon.

For the couscous, you will need:

1 cup cuscous

1 and 1/4 cup hot chicken stock

1/2 tsp cumin

1 tsp turmeric powder

Mix couscous, turmeric powder and cumin. Add hot chicken stock. Let it stay for ten minutes. Fluff couscous using a fork.

Place chops on top of a bed of couscous on a plate when done.

For the sidings:

1 cup arugula leaves

1/2 cup chopped fresh apricots

1 zuchinni, chopped and grilled

5 cherry tomatoes

Toss all salad ingredients. Drizzle with balsamic vinaegrette dressing ( 5 tbsps balsamic vinegar, 5 tbsps olive oil, 3 tbsps honey, combined together).

Happy Vday!!!!!

Buttered Chicken Stew With Sitcharo

Buttered Chicken Stew With Sitcharo

A pack of fresh sitcharo (snowpeas) peeped hello from a stack of veggies in the ref recently. Ahh, I knew it was time for some reunion with one of my most favorite ingredients. I usually use this for my stir-fried sirloin tips. There’s something about sitcharo that perks up the main meat.

And, to couple it with the powerhouse triumvirate  of chicken, tomatoes and butter, come on! As Julia Child once said, “You can’t have enough of the butter!”.

Okay to do this, you will need:

2 whole breast halves with wings

2 cups sitcharo, cleaned and trimmed

1/4 cup butter

6 medium-sized tomatoes, diced

1 medium-sized onion

4 cloves of garlic, minced

salt and pepper to taste

oil

1 tsp dried basil for garnishing

___________________________________________________

In a skillet, saute onion, garlic and tomatoes. Add seasoned chicken. Simmer on slow-medium heat until chicken is tender and tomatoes almost liquid in consistency.

It may be necessary to add water when necessary until chicken is tender enough.

Once chicken is cooked and sauce is reduced to half, add butter and sitcharo. Simmer some more for another three minutes or until sitcharo is half-cooked.

Sprinkle with dried basil. Serve warm.

Makut Theng

Makut Theng

‘Masarap makikain sa kapitbahay!’ or in this case, ‘Masarap kumain ng galing sa kapitbahay!’. My Chinese neighbor and good friend, Myze Ngo, gave me a warm bowl of this Makut Theng or the Chinese version of our nilagang buto-buto.

What I found immersed in the the very tasty pork broth was an interesting mix of  ingredients like some fall-off-the bones pork ribs, ginger, bola-bola, black mushrooms, gabi and lettuce.

I ate it with my sawsawan of hoisin sauce and a bit of hot chillies. Winner!

Myze tells me, these fares are usually found in authentic small Chinese canteens, as she refers to their medium-sized eateries, which usually thrive in places like Chinatown, Banawe, etc.

Can I just say, I am forever delighted sampling authentic Chinese food, it’s a pleasant temporary departure from the Chinese food adjusted to the Filipino palate we usually experience.

To Myze, chin toh sya!

Pesto Cream Fussili Pasta

Pesto Cream Fussili Pasta

Inspired by Cibo’s pasta Genovese, I tried my hand in doing my version of such for today’s meryenda. I thought the fusion of pesto and cream would make a delightful duo to satiate my craving palate. Cibo uses farfale or the bow tie pasta noodles to do this. I believe, it’s one of their topsellers and I wanted that on my plate asap!

Asap it was, I scoured my pantry for the ingredients and was able to dig up some goldmine of shitake mushrooms and some few bunches of fresh basil leaves for the pesto. However, what was available in my pasta jars was a coupla cups of fussili or spiral pasta noodles. Fine, I love fussili! Why, the ridges just hold so much flavor from the sauce!

Easy to make, totally tasty and very healthy, this dish should make its way to your kitchen soon.

Pesto Cream Fussili Pasta

4 cups fussili (spiral) pasta noodles

1 medium-sized onion

3 cloves of garlic, minced

1 can shiitake mushrooms, drained and sliced

1 cup heavy cream

1/4 cup grated parmesan cheese for final topping

1 cup pesto (see recipe below)

olive oil

For the pesto:

4 cups fresh basil leaves

1/2 cup olive oil

3/4 cup grated parmesan cheese

2 cloves garlic, minced

salt and pepper to taste

__________________________________________

Cook pasta according to package directions

In a blender or food processor, pulse basil leaves, garlic and olive oil. Add grated parmesan cheese and season with salt and pepper.

Meantime, using a skillet, saute onion and garlic. Add shiitake mushrooms, pesto and heavy cream. Stir until all ingredients are well blended.

Toss in pasta. Sprinkle with parmesan cheese on top.

Rice Mania!

Rice Mania!

Japanese sasashiniku rice grains

Lately, I have been crazy obsessed with RICE. More specifically, those rice grains used for paella , fried rice and those specialty dishes commonly used in Mexican or Indian cuisine. However, finding some good quality of grains  with a  friendly price tag  was a challenge.

I’ve already  scoured the shelves of Santi’s, Dinelli’s and other gourmet stores for some great finds of grains but only to find their prices too unreasonably exorbitant!

A box of about half a kilo of risotto reis costs about P280, arboryo rice about P800 plus at Terry’s Selection at the Podium.

Being such a grocery rat, I thought I’ve already explored all the big groceries in Metro Manila for some grain finds. Arg, I always ended up empty handed in my quest for those rice grains.

Until one day, I saw this:

I was floored. My, it was a universe of some hard-to-find rice grains!!!!! The  SM Hypermarket’s rice grain selection was crazy fantastic. It was like all the rice agricultural lands of Asia have converged here! Haha!

I could almost smell my basil chicken in coconut milk  on top my warm plate of basmati rice!

Or my baked hoisin ribs on a bed of my vita puro denorado rice..

The very aromatic rice jasmine flower got me imagining my steamed chicken with black mushrooms. I love these grains for it’s very aromatic and tender properties.

Or the malagkit rice for my usual arroz caldo or rice cakes..

The quality, affordability just had me smiling for the next thirty minutes. Finally, I found the rice treasure island! I did not find this selection elsewhere and I was too happy to hoard these grains! Haha!

My greatest grain find was the Japanese sasanishiku. It’s the next best thing when you want to do say, some paella, on a budget without sacrificing quality and taste.

ENDING: This happy dish  of  seafood paella   happened:)

Fondant Cakes, Etc.

Fondant Cakes, Etc.

Pastry expert Aileen Lara is in the thick of baking action again. Yeah, and I’m not complaining. She had me sample her fondant cake with carrot cake filling and was I impressed! The cake was downright perfect in form and in taste. She had me going for seconds!

I noticed, and I’m sure a lot of people will agree with me, that most fondant cakes just look ravishing on the outside and totally hideous in the inside. I mean, hey, sure we want this pretty and all but the tummy down here clamors for some good-tasting filling!

By saying “good” , we mean taste and the “after-feeling” we get. Was it so good that it made you giddy for the next five hours? Was it so crazy delicious that you looked forward to eating it five minutes after you’ve eaten the last morsel of your cake?

Check to all after every food tasting with Aileen’s goodies.

I’ve known Aileen for two decades now and the passion for food, particularly baking has been consistent.

Picture below shows Aileen strutting her culinary stuff in the kitchen.

You’ll know if the pastry was made from the heart by the oomph you get after your first bite… yeah, something like love at first bite or something like that.

When you do business, you put you’re heart in it, if you don’t, the sugar won’t taste as sweet and engaging.

What I like about her cakes is that they’re fun, whimsical and dynamic. Very reflective of her own persona.

I just love these. It totally revvs up parties and special ocassions with the splash of colors of her pastries.

The recent cake she made was for a baby shower. A fondant cake with her signature carrot cake filling. I thought the whole ensemble was totally cute!

Look!

Slicing it, you’d see the filling peeping hello to you:)

For orders, you may message her through 0906.212.9084. She delivers cakes and pastries within Metro Manila:)

My ‘Silog’ Fantasy

My ‘Silog’ Fantasy

To date, I have yet to stop dreaming of putting up a restaurant that would serve ‘silog’ dishes in a semi gourmet-ish plating. Raising the bar of the quality of some of our Pinoy favorite dishes by a notch higher remains to be my biggest advocacy.

A friend sent over to my place some  tocinolongganisa, bacon, ham, and burger patties for sampling. Tocino and longganisa would be the two Pinoy fave dishes I was referring to earlier that could just be my silog hotshots, the remaining three– the ham, bacon and burger patties would be the fab bonuses (the bacon being the biggest bonus!). Haay, I’m tired playing with my imaginary resto on Facebook’s Restaurant City, I want the ‘silog’ restaurant pronto! Haha!

The tocino struck a balance between sweet and salty-garlicky blending. I did not cringe because it got too sweet or something. It’s usually the case with the other brands. This one had the right timpla and the best glazing! Did I say that this tocino was MSG and Salitre free? It’s reduced fat, too. So, lesser evil, I guess.

tocino

The garlic skinless longganisa was my other favorite. Very reminiscent of the ones my mother and sister-in-law used to make in Cagayan De Oro city, it can well substitute my Chippy at any given time– ang sarap papakin! Great with fried rice or even in a pandesal!

skinless garlic longganisa

The bacon was extra good, crunchy, not too salty and a bit leaner than the regular bacon strips sold in the market.

crispy bacon

Meantime, the ham was a player too. I had it wrapped on some warm pita flat bread and had some fresh lettuce provide the crunch and umay breaker.

sweet ham

Finally, the pork burger patties. Quite unconventional as it made use of pork, the taste will eventually grow in you as you chew longer.

burger patty

Stir-Fried Fish Hungarian Sausages

Stir-Fried Fish Hungarian Sausages


Perfect for the Lenten Season, these fish hungarian sausages better make its way to your pantry soon. These sausages aren’t one of those meat-product-forced-to-be-healthy-therefore-should-be-made-into-fish thing (read: corned tuna!). The first time I sampled these, I was very impressed. It tasted very much like the REAL hungarian sausage. I liked the kunat component of the casing and the juiciness of the inside.

I sure found a gold mine again! My friend remarked the other day, “Grabe, ang tyaga mong umikot sa grocery!”, referring to my latest find when I scoured the freezers of SM Hypermarket along Quezon Avenue recently. Finding Fish stuff would relatively be easy but to actually find the great-tasting ones would be a tall order.

Okay, so what did I do? I did my favorite stir-fried sausages in my old-time favorite tomato-pepper sauce. I had a twist though– I smothered some mozzarella to it and it turned out even better!

I did this dish in my recent cooking demo and the audience liked it during the tasting portion. Hope you would too!

Stir-Fried Fish Hungarian Sausages

1 pack fish hungarian sausages, slantly sliced

1 can chunky diced tomato sauce

1 onion, minced

1 head of garlic, minced

1 tomato, quartered

1 red bell pepper, cut into strips

1 green bell pepper, cut into strips

2 tbsps butter

salt and pepper to taste

1/4 tsp cayenne pepper

1/2 cup mozzarella cheese, grated

olive oil

______________________________________________

In a skillet, stir-fry sausages until lightly browned. Remove from pan and set aside.

Using the same skillet and oil, saute onion, garlic and tomato. Add bell peppers and sausages. Season with salt and pepper plus the cayenne pepper. Stir in butter and tomato sauce. Simmer for about three more minutes.

(Optional)

Using  a microwavable plate, pour in some of the dish and sprinkle cheese on top. Heat on microwave for about two minutes on medium heat or until cheese melts.

Fish Fillet for the Lenten Season

Fish Fillet for the Lenten Season

It’s officially the  Holy Week and I’ve been pulling out seafood recipes from my mental recipe files. Growing up, I was gobbling up too many meaty dishes. So, whenever Lenten season happened, I was kinda forced to eat meatless fares that didn’t really get me excited, save for my mom’s sweet and sour lapu-lapu fillet. It was usually served to us on Good Fridays and was I just too delighted to have it!

And, now that I’m older and wiser(???), I’ve come to embrace the many exciting varieties of food that does not necessarily include pork or beef. I look forward to having meals with a simple combo of adobong pusit and ginisang munggo, or say, sinigang na tyan ng bangus and halabos na hipon.  Ahhh, now that got me hungry!

Pan-fried fish fillet

1 whole fillet of cream dory, cut into nugget size (or any fish meat of your choice)

1/2 cup lemon juice

1 cup parmesan cheese

2 cups japanese bread crumbs

1 egg. slightly beaten

1/2 cup flour

oil

Season fish with salt and pepper and marinate in lemon juice for 30 minutes.

In a small mixing bowl, combine Japanese bread crumbs and parmesan cheese.

Dredge the fish nuggets in flour, dip in egg and coat with bread crumbs.

Pan fry until golden brown. Place on kitchen napkins to rid off excess oil.

Serve with mayo-garlic dressing:  Combine 3/4 cup mayo, 1 tsp minced garlic, 2 tbsps lemon juice, salt and pepper.

Serve warm.

Shepherd’s Pie

Shepherd’s Pie

It’s one bombastic dish when all ingredients make you go for seconds. In this case, my favorite sauted beef and creamy mashed potatoes– yes, the savory tandem called shepherd’s pie. The original dish calls for the use of lamb or mutton although the use of ground or roast beef has become  a  preference among foodies overtime.

I usually make this when there’s leftover mashed potatoes in the ref. Why, the overnight version of these tubers tend to be more firm and flexible that makes baking and slicing it afterwards easier.

Okay, here’s how to do it. You will need:

Mashed potato

3 large potatoes

1/4 cup butter

1/4 cup heavy  cream

salt and pepper to taste

_____________________________________-

Boil potatoes. Drain once tender.

Mash with potato masher leaving the skin on.

Throw in remaining ingredients. Mash until all ingredients blend in.

Meat filling

3/4 kilo ground beef

2 tomatoes, diced

5 cloves garlic, minced

1 onion, minced

1/2 cup tomato sauce

salt and pepper to taste

1/2 teaspoon dried basil

1/4 tsp cayenne pepper

oil

1 egg (egg white only)

In a skillet, saute beef in onion, garlic and tomatoes.

Season with salt and pepper. Add cayenne pepper and basil. Add a cup of water. Bring to a simmer until meat is tender and water has evaporated. Add tomato sauce. Simmer for five more minutes.

_______________________________________________

In a pie dish, pour meat mixture and top with mashed potatoes. Brush top with egg white and sprinkle with dried basil leaves. Bake for ten minutes at 350 deg c.

Vongole Pasta

Vongole Pasta

I was gawking at these live white clams when I chanced upon them at SM Hypermarket at The Block in SM City yesterday. They were contained in an aquarium-like casing along with the other great seafood finds when I saw them. I was silently raving and enjoying the site of live seafoods like catfish, suaje, etc. right smack in the middle of an air-conditioned grocery! Why, you can hardly find live clams sold even in wet markets!

So goes my excitement that I immediately grabed a kilo or so. Now what to do? Almost instantly, I remembered Ginny Roces-de Guzman’s rendition of Vongole pasta (Vongole means ‘clams’ in Italian).

I tried my hand in whipping up this Italian dish today and savored every morsel of this pasta. Meatless, healthy and uber tasty, Jake and I finished the whole pan!

I like any dish that’s been infused with wine. With this pasta, I used a South African white wine called Kamala Chardonnay Semillon that Jake and I bought from Wine Depot last Saturday. The wine just put everything together, I mean, the dish rocked because of it. And, together with the clam broth and the flavors of garlic and onion it just spelled– BANG! Ahhh, super good!

The recipe was lifted from Ginny’s family cookbook called, ‘Celebrations’. I’ve been crazy hooked browsing this book. The recipes just make me drool, page after page, picture after picture.

I’ve drawn out my next projects from that book, the cold tomato and sour cream soup, crispy fritters, oriental glazed duck with wild rice pilaf, pao de queijo, mackintosh pie, etc. Can’t wait to try them!

*The book and the story behind the ‘Celebrations’ cookbook will be featured in the May issue of FOOD magazine.

Snapper Con Salsa

Snapper Con Salsa

This post goes out to our good friends, Jed and Beng Busalla– May you have a blessed life in Jakarta!

The past Holy week had me cook quite a wide array of fish fares. I thought it was a welcome departure from the usual chicken and mostly veggies that  I cook on regular days.

I tried my hand in working on this pack of snapper fillets that I spotted at SM HYpermarket recently. I figured it would go well with some salsa made from fresh tomatoes, a few swigs from lime plus my favorite spices, cayenne pepper, chili flakes and cumin in particular to altogether seal the deal.

Okay what did I do? I seasoned 2 whole fillets of snapper with salt and pepper, drizzled juices from half a lime and lathered each fillet with 1/4 tsp of dried basil leaves. Lightly dredged them on flour and pan fried them until they turned golden brown. I set them aside for awhile to make the salsa.

In a skillet, I sauted 1 medium sized minced onion, 1 whole head of minced garlic, 1 big julienned bell pepper and about 6 diced overriped tomatoes. Added about 3 tbsps of balsamic vinegar. Let it simmer til tomatoes became soft and all juiced out. Seasoned with salt, pepper, 1/4 tsp of chili flakes, a pinch of cumin, 1/4 tsp cayene pepper and squeezed in the remaining half of the lime. Simmered some more for about ten minutes, adding water as needed to thin out the salsa until desired consistency was achieved.

On a large plate, I assembled my fillets and poured over the salsa on them. Sprinkled chopped parsley on top and was ready for the taking:)

Sonya’s Garden In Tagaytay

Sonya’s Garden In Tagaytay


My family hied off to good old Tagaytay over the weekend. Our mission was to scratch the itch to go back and experience Sonya’s garden once again.

We so like  the concept of the ‘eat-all-you want’ for P600 per person for all the fantastic eats  we could gobble up.  Excellent food, a picture-perfect  garden, great company– totally priceless.

Met the owner, Sonia.

The service is always excellent. You and your food almost arrive on the table together! Haha! Yes, that fast! The mixed greens and the bread along with  the other sauces, sidings and condiments get to you as soon as you are seated. The pasta is served as soon as you request for them.

The fun part is when you make  your own concoction using the ingredients/sidings  they serve you with. For those who don’t cook, it shouldn’t be a problem because the choices are simple, healthy, all good and ready to eat.

Everything they put on your table are all organic and homegrown– yes, including the uber tasty and tender bread which they bake.

The greens are usually a mega combination of romaine, iceberg and other varieties of lettuces, arugula leaves plus a host of other greens I don’t usually see in many restaurants here in Manila.

I am always overwhelmed by the flavors and varieties they offer their customers.I particularly like their pesto sauce, coarsely chopped, thick but moist and smothered with cubed feta cheese. The black olive pate is also a favorite, the play of sour and salty just hits my taste so suitably. Other choices include: sundried tomatoes, grilled bellpeppers, boiled eggs,jackfruit, ripe mangoes, capers, olives, etc.

All these with their excellent bread or as salad toppers or even tossed in the pasta along with the two pasta sauces to choose from– white chicken sauce or the sundried tomato sauce.

The dessert is made of a super moist slice of chocolate cake and a plate of some baby turons with langka. I just have to warn you to save some space for the sweet ending. The meal  prior to it may be totally crazy.

Of course the sight seeing around Sonya’s garden after the meal is always a treat as well. We were marvelling at the very opulent and sometimes whimsical interiors of the place. It just spelled MAJESTIC!

The interiors of each dining are were all sights to behold!

At the garden adjacent to where we dined

Awesome toilets

I was obsessing with their chandeliers!

Sam with her big, big smile!

 *With additional Photos from my Brother-in-law, Oliver Garcia.

Adobong Pusit

Adobong Pusit

Was happy hearing from a High School friend, Cathee. Thanks my friend for this recipe!

ADOBONG PUSIT: A Promdilayf Special

Dear Caren,

Hi! How are you?  I guess we all got busy jumpstarting our careers and later became preoccupied with starting our own families.  I’m just so glad and thankful for the wonders of modern technology.  I’ve happily reconnected with most of our batchmates and schoolmates through Facebook and from time to time, get a chance to chat with them online.

Maybe I should keep you up to speed with what has happened to me over the last many years or so.  When we graduated from the university, I began my corporate life with what was Aboitiz Shipping then (now known as Aboitiz Transport System Corporation) and built a career in the Training and Development arena.  By 1998, I moved to Cebu to fill in a vacant Training position there.  It was so overwhelming for me as I’ve never been away from my family and comfort zone until then.  Slowly, I got used to independent living and later on, learned to love and appreciate the freedom I had.  It was in Cebu where I met my husband.  I met him in the middle of 1998 and we got married three years later. 

In late 2001, my hubby made a career shift that brought us to General Santos City.  By this time, I had left corporate life to concentrate on building my family life.  With so much time on my hands and my husband busy with out-of-town trips, I busied myself at home by getting reacquainted with cooking.  As a young girl, I’ve always loved to cook and learned so much about it from my Mom and Aunt.  Like them, I took the “ouido” style of cooking…I rarely measured my ingredients and would mostly go by look, feel and taste.  Being away from home, I had to learn old family favorites like Mechado, Adobong Batangas, Sinampalukang Manok and Adobong Pusit so that I wouldn’t miss them so much..Marrying a Cebuano, I was able to stretch my food repertoire to include Visayan fare like Utan Bisaya, Tinolang Isda and Inun-unan,  While the training room or conference room was my kingdom during my corporate days, the kitchen became my dominion beginning early 2002.  Suffice to say, I lord over it until now and have no plans to relinquish it anytime soon.  By the time we got reassigned to Butuan City in early 2007, our family has grown to include my firstborn son, Jarred Andrei, who is now 7 years old and Caitlin Alyssa, 3.5 years old.

When we moved to Butuan City, hubby gifted me with my very own range oven.  With my new cooking buddy, I started to reunite myself with an old love – baking.  Armed with loads of baking recipes from the web, I experimented with all sorts of cookies, pastries and cakes.  Over the Christmas holidays in 2008, I went full swing with baking and used my creations as gifts for family and friends.  I also learned several other recipes that make use of baking.  One of these is your famous Baked Macaroni.  It became the highlight of our Noche Buena feast that year.  Other goodies I’ve learned to prepare using the oven includes Meatloaf (which is my Mom’s specialty), Roast Chicken and Oven Fries.

Last year, we welcomed another addition to our growing family, another girl, Cathleen Janelle.  With hubby and three kids below 10, my hands are full with Mommy duties.  Cooking and baking have become great ways for me to express myself and at the same time please my hungry brood.  My two older kids love to see me in the kitchen all the time and they’re always excited to find out what surprise I’ve concocted for them every meal time.  And so from my promdi kitchen, I share with you a family favorite – ADOBONG PUSIT.  I hope you and your readers enjoy it.  I’m looking forward to more foodie discoveries on your food blog and maybe in the future we can have a cooking marathon webcast through Skype.  Wouldn’t that be something?

Anyway, here’s the recipe and I hope you’ll like it.

Take care and God bless.

Cathee
http://promdi2010.blogspot.com

ADOBONG PUSIT

1 kg pusit, washed and drained (be careful not to wash out the squid ink sac)
1 thumb-size ginger, sliced
1 head of garlic, crushed
1 medium onion, sliced
2 bay leaves
2 tbsp canola oil
3-4 medium tomatoes, sliced
1/4 cup vinegar
1 – 1.5 tsp coarse salt
1 cup water or 1 cup coconut milk (optional)
pepper to taste

In a casserole, place the ginger, bay leaves and half of the garlic at the bottom.  Put the squid over this layer, add in the salt and vinegar.  Cook over medium heat until it comes to a boil.  Add a little water if it gets a bit dry.  Remove squid and sauce from the casserole.  In the same casserole, heat some oil, then saute the onion, remaining garlic and tomatoes until wilted.  Add the squid pieces first and simmer for 5 minutes.  Put in the rest of the sauce and dash of pepper to taste.  If you want some flair, you may add in a cup of coconut milk (if you decide to go for the coconut milk, do not add any water at all during the entire cooking process) towards the end and simmer for a couple of minutes before turning off heat.

Serve hot with rice.

Inagiku– Japanese Food At Its Finest

Inagiku– Japanese Food At Its Finest

Japanese food’s got something in it that gets me all stirred up. The mere appearance of the food is always a sight to behold. Intricate, detailed and beautiful– the Japanese Chefs, no wonder, are famous for their excellent food artisanship.

Now this door leads you to one great restaurant find I discovered not too long ago:

One of the most famous Japanese restaurants in Manila is Inagiku at Shangri-La Hotel. Why, I was roused by the feast of Japanese dishes served to me along with two of my colleagues in the food press one fine evening. The fares arrived almost in a parade-like manner! Haha.

The plated dishes were too pretty to be gobbled up! Picturesque and loaded with all the oomph, my camera never stopped clicking away.

The restaurant’s kitchen was lorded over by Master Sushi Chef, Wataru Hikawa. He was  the one making sure that each plate of their world-class Japanese cuisine would be definitive of good quality– in both taste and appearance.

Their famous Kaiseki dishes include: Fresh Aburi Engawa (lightly grilled flatfish), market fresh Honmaguro Toro (blue fin tuna belly) and soft shell crabs. Their must-haves also include: Shiitake Ebi Nikutsume, Zensai Moriawase, Assorted Specialty Sushi and Sashimi. For the main dishes the topsellers are: Tempura Moriawase – 9 kinds Teppanyaki Live Lobster
Inagiku Kaiseki. For your sweet ending, you might want to try: Homemade Ice Cream: Wasabi, Red Bean, Black Bean or Green Tea.

With the city’s finest Japanese cuisine and an extensive list of Sake from which to choose, Inagiku redefines the art of avante-garde Japanese dining.

I’ve always been a fan of ‘fresh’– yeah, the freshest ingredients excite me no end. It’s got the stamp of the perfect quality I always look after in the food I eat. At Inagiku, fresh is a big word-ALWAYS.

After sampling Inagiku, I suddenly kinda raised the bar in Japanese dining a notch higher. It was such a delightful experience sampling their food!

Aside from the excellent food, the ambience was also something to check out. Cozy, laidback and perfect for some catch up chats, you’ll never feel the rush to leave.

(63 2) 840 0884
Hours

Lunch: 11.30am – 2.30pm
Dinner: 6.30pm – 10.30pm

Location

Level 2

Dress Code

Smart casual

Smoking Policy

Inagiku accommodates both smokers and non-smokers

Rib Eye Tapsi!

Rib Eye Tapsi!

It’s amazing how a lot of Pinoys have come up with food combinations that have made its way to most of our top of mind comfort foods list. Personally, my favorites include tapsilog, pares and goto-tokwa’t baboy tandem with budbod of roasted garlic and chopped scallion stalks. The combinations just work in perfect harmony, needing each ingredient to orchestrate a palate-teasing taste. I cannot eat my pares without the chillies or the soup or the rice, unfried— no, no, no! These meals are definitely all or nothing!

I chanced upon a pack of rib eye meat (breakfast cut) when we did our grocery at SM Hypermarket at the Centris Station over the weekend. Adoring the pinkness and freshness of this choice cut, I grabbed a pack that I would turn into my tapa.

I usually choose the breakfast or the sukiyaki cut  when I buy my beef for tapa. It cooks fast and you get a grip on how you want your beef tapa cooked– rare,well done or medium well. I usually choose the latter, it is, to me, a middleground between retaining the right level of juiciness and the perfect degree of crisp it should have.

The rib-eye part per se is very tasty. That’s why I only use all of only four simple ingredients to marinate it with. Salt, pepper, loooots of garlic and vinegar. the rest of the flavor would come from the beef itself. I love eating beef almost in its naked taste. It’s simply a must try.

For 1/2 kilo of rib-eye, I used 1/4 cup white vinegar, 10 cloves of minced garlic, salt and pepper to taste. Combine all ingredients. Marinate beef for 15 minutes. Fry in hot oil. Serve with fried rice, sunny side up and coleslaw or atchara.

Summer Mango-Philly Maki Rolls

Summer Mango-Philly Maki Rolls

Growing up, I’ve always felt excited with the combination of mango and rice. There’s something about mango that makes rice so exciting to eat. Whether in an adobo-mango-rice combo or, say, chicken in mango salsa with rice– or, yeah, just plain mango and rice! Lol. And, to further team up mango with the linamnam of cream cheese plus the stellar taste of kani, avocado and cucumber rolled as one helluvah sushi, come on!,

Tonight, I made some sushi– of mangoes, cucumber slices, cream cheese and kani! 

I have a confession to make, it took an affirmation from an FB contact, Filemon Yumul, for me to use kani confidently. I mean, I’m allergic to crabs, as in I stop breathing as a worst case scenario, how’s that? Filemon says kani is fish and starch combined with crab flavoring. Okay, I’ve heard that before and he just kinda reassured my next 70 years in this lifetime if and when I decide to chow down the kanis, finally. 

Okay, my good friend, Ria Vinzon-Miguel (wife of culinary ‘rockstar’, Chef Carlo Miguel), just messaged me on FB asking about the recipe of this sushi rice. Okay, here goes:

For the sushi rice, you will need:

3 cups uncooked Japanese rice (I used sasashiniku rice, available at SM Hypermarket)

4  cups water

6 tbsps rice vinegar

2 tbsps granulated sugar

2 tsps salt

Wash rice grains until water runs clear. Soak in water for thirty minutes before cooking. Cook over low heat.

 Once cooked, let cool while fluffing rice. Never stir the rice so as not to crush the grains. As much as possible, use the sushi rice right away after cooking and letting it cool. Otherwise, put in a container and cover with a damp cloth to lock in moisture. NEVER refrigerate the sushi rice.

To prepare the rice vinegar mixture of the sushi that you will need for final sprinkling and keeping the rice moist, you will need:

6 tablespoons rice vinegar
2 tablespoons granulated sugar
2 teaspoons salt

In a small saucepan over medium heat, combine rice vinegar, sugar, and salt. Heat mixture just until the sugar dissolves (do not let it boil). Remove from heat and let cool until ready to use.

Once cooled, sprinkle on sushi rice very gently.

Meantime, slice magoes, peel cucumbers, kani and cream cheese to serve as filling.

Using a Japanese rolling mat, place a nori sheet on top of the mat. Spread a thin layer of sushi rice. Top with mango, cucumber, kani and cream cheese. Roll lightly. Cut into maki roll size. Serve with Kikkoman and wasabi


Grilled Blue Marlin

Grilled Blue Marlin

I had the time, energy and obsession to check out Farmer’s Market in Cubao yesterday. What greeted me was their wide selection of seafood and other kitchen-must-have-now items. The fishes I saw were so fresh that I caught them wiggling and jumping up and down in the metal containers that contained water. That, to me, was the most credible seal of freshness.

What a sight to behold! Where was my camera when I needed it the most?

Okay, I literally cruised the fish stalls to search for some great find of fishes. Was hoping to get some seabass (locally known as apahap) to go with my mint sauce but, unfortunately, they didn’t have it yesterday. Anyway, the abundance of fresh, varied and great-tasting fishes they sold was enough to choose from. I saw some great catch of yellow fin tuna, mackerel, catfish, mahi-mahi, salmon, etc.

As I scanned the fish selection, I was, almost simultaneously, blueprinting my menu for the day.I got some gorgeous cuts of salmon for my sushi, tuna belly and slices of blue marlin. Blue marlin should be the first in my firing line, I thought. And, so it was.

Lunch was grilled Blue Marlin that went with my binagoongang kangkong. What did I do? I seasoned 2 medium sized Blue Marlin slices with rock salt and pepper, marinated them in about 4 tbsps of soy sauce, juice of 3 calamansi and minced four cloves of garlic for about 15 minutes. Grilled for 7 minutes on each side while brushing marinade on them as they grilled. Served them smokin’ with the dressing of 3 tbsps white vinegar, 1 tbsp soy sauce, juice of 1 calamansi, 1 clove of minced garlic and 1 red chilli pepper.

Delish, healthy and quick cooking. Amen? Amen!

Kare-Kare!

Kare-Kare!

I’d eat kare-kare at any given time of the day.  The awesome teamwork of its ingredients that come perfectly into play just blows me away. I’m like, as the gay lingo goes, eating like a “PG” (Patay gutom!), when I’m served with a good dish of Kare-Kare.

My mom, to me, is the kare-kare diva of my life! She does kare-kare as easily as she does her scrambled eggs! Yeah, that easy. Of course, I do like, too, the other Kare-kare dishes I’ve sampled over the years. Top of mind faves are the ones I tried from Abe, Fely J’s, Alex III, Serye and my all time fave, Aristocrat.

The clincher as to how I can tell whether it’s a good kare-kare creation or not is decided usually by how the sauce is done. I’m usually not too fond of some too sweet Kare-kare sauces. I tend to like it more on the ‘peanut-y’ side. That’s why your choice of peanut butter is very crucial. Oh and the bagoong just has to be the perfect alamang, juicy-salty but certainly not sharp on the palate.

Always remember, too, that the meats that go with it SHOULD be tender. Hard and almost rubbery meats in Kare-kare is a no-no, in fact, NEVER! It bums out the entire kare-kare dining experience!

Okay, this is how to do it.

1/2 beef tripe (twalya ng baka) 1/2 kilo bituka ng baka

1/2 kilo oxtail, cut 2 inch long

2 cups of peanut butter

2 cups ground peanuts (available in wet markets, sold by the plastic)

1/2 cup grounded toasted rice

1/2 cup cooked bagoong alamang

3 pcs onions, diced

2 heads of garlic, minced

4 tbsps atsuete water

3 pieces eggplant, sliced 1 inch thick

1 bundle of sitaw (string beans) cut to 2″ long

1 banana bud (puso ng saging), cut similar to eggplant slices, blanch in boiling water

3/4 cup oil

9 cups of water

Salt to taste

In a stock pot, boil beef tripe, bituka  and oxtails in water for an 2 hours or until tender or pressure cook for 45 minutes. Strain and keep the stock.

In a big pan or wok, heat oil and atsuete oil.

Sauté garlic, onions until golden brown, then add the stock, toasted rice, beef tripe, bituka, oxtail and peanut butter. Bring to a boil and simmer for 15 minutes. Salt very, very lightly. Remember you will have to eat this with your bagoong that’s salty already.

Add the eggplant, string beans, pechay and banana bud. Cook the vegetables for a few minutes – Do not overcook the vegetables.

Serve with bagoong on the side and hot plain rice.


The SM Food Council: A new breed of supermarket shoppers– my honor to be part of it!

The SM Food Council: A new breed of supermarket shoppers– my honor to be part of it!

Accepting my certificate from SM's Hendrik Sy

 If you happen to drop by SM Supermarket for your grocery needs, don’t be surprised to find celebrity chef Tristan Encarnacion doing a cooking demonstration or beauty queen Jennifer Barrientos sharing with shoppers her fitness diet of fresh fruits, or see you’re in the same aisle with celebrities Paulo Abrera and Suzi Entrata, availing of the latest store promotions. Chances are, you’ve just had a close encounter with members of the SM Food Council.

With my co SM Supermarket Food Council members, Paolo Abrerra, Suzie Entrata, Love Anover, Anton Diaz, Crystalle Belo and the rest.

 Organized and presented by SM Supermarket on its 25th anniversary, the SM Food Council is a new breed of proactive supermarket shoppers who will not only go to SM Supermarket, Hypermarket or Savemore Market to buy their groceries but also to eagerly share with fellow shoppers their experiences in trying out new store innovations and promotions.

 “The SM Food Council is a group of twenty-five young, talented individuals who not only represent the vibrant and fresh outlook of SM Supermarket but also influence the brand choices of their peers. These ambassadors exemplify the ideals of what the SM brand stands for — leading the way, visionary, and always moving forward,” said Hendrik Sy of SM Supermarket.

 Nowadays, because of the economy and evolving lifestyles, shoppers are more particular about what they put in their grocery carts and they usually have a lot of things to consider before choosing what products to pick out of the shelves. “With the help of the SM Food Council, shoppers will hopefully be more informed about products and services so they can make the right decisions on what to buy,” Sy added.

 The SM Food Council will serve as a consumer panel that will regularly meet with customers to discuss concerns, share insights, and suggest ways to improve the supermarket’s products and services. They will also be the supermarket’s partner in retrofitting evolving technologies and consumption trends into the stores.

As the new faces of SM Supermarket, the Food Council members will also be part of the whole SM Food Group (SM Supermarket, Hypermarket and Savemore Market) events and community projects. They, in turn, will have the opportunity to use these stores as a venue for their advocacies and community related initiatives.

 The SM Food Council members include celebrity couple Paulo Abrera and Suzi Entrata, executive chef Joanne Limoanco, Taekwondo gold medalists Rani Ann Ortega, Camille Alarilla and Janice Lagman, courtside reporter Erika Flores, entrepreneurs Cristalle Henares, Jennie Yap, and Karla Reyes,  theater actress Sheila Martinez and yours truly. Thank you SM!

Me carrying SM Supermarket's Eco-friendly bag!

 Also part of the SM Food Council are Internet marketing guru Anton Diaz, journalist Bianca Consunji, beauty editor Kim Palanca, motivational speaker and author Lloyd Luna, culinary student Audrey Damian, chef and barista Ernest Martin, model Jef Gaitan, IT professional Angeli Marchan, celebrity chef Tristan Encarnacion, TV host Love Añover, search engine consultant Aileen Apollo, beauty queen Jennifer Barrientos, and banker Harrold Fulgencio

The SM Food Council members were chosen for their achievements, valuable contributions in their respective fields, and positive influence among their contemporaries, aside from being loyal SM Supermarket shoppers.

Thank you SM, am so honored to be a part of this!

Stir-Fried White Clams And Broccoli In Oyster Sauce

Stir-Fried White Clams And Broccoli In Oyster Sauce

I had a harried lunch at David’s Tea House along Timog today and my tummy was still begging for more Chinese fares when I left. Why, it just had a single viand of beef ampalaya toppings! So for an encore, I decided to take it upon me to fulfill my tummy’s craving.

For dinner tonight, I made some Chinese dish of Pacific white clams which I bought from SM Hypermarket Centris Station and broccoli stems and flowerettes that I generously smothered with lots of garlic and oyster sauce– now, that was the finale I earlier craved for!

Pacific white clams at SM Hypermarket at Centris Station, Quezon Avenu

Simple, mouthwatering and overloaded with excellent taste. This should find its way to your skillet soon!

You will need:

1 kilo white clams

2 heads of garlic, minced

1 head of broccoli, stems and flowerettes separated. Stems cut into about 1 inch long, 1/2 inch thick.

1/2 cup oyster sauce

water

salt and pepper to taste

Boil clams in about 3 cups of water or just enough to give steam to the clams. until they open. Be sure to discard clams that did not open or did not open wide enough. It means they are not good for consumption anymore. Clams have to be cooked all the way through. Drain and set aside.

Saute in garlic the broccoli stems. Once stem pieces are cooked, add flowerettes. Season with salt and pepper. Mix in clams and oytser sauce. Mix for the next 3-5 minutes.  Be sure NOT to overcook the clams. Serve hot.

The Gustavian Restaurant

The Gustavian Restaurant


Gravlax Salmon Carpaccio

My new friend, Chef Marijo Camarista, ushered me in to the new branch of The Gustavian restaurant at the new Eastwood mall. The original branch is in Cebu. The soft, casual but avante garde feel of the place made my lunch with Chef Marijo worthwhile.

The Gustavian restaurant serves great European food. Very reminiscent of the grandeur in the lifestyles, specifically in the kind of food the Kings ate  in the old world.  

And what feast we had! “Bring out the wine!”, we so excitedly said! Haha! Ah, at 12 noon, Chef Marijo and I were consuming a coupla glasses of wine already! The heck with the sun! Haha!

Okay, what meals did we gobble up? For starters we had the gravlax Salmon Carpaccio in dill sauce  that went with some crunchy french roll. Good start–I thought. I knew I was in for an uber gastronomic fantasy:)

The next food we sampled was the Nicoise Grilled Tuna Belly with Haricot
beans, Tomato, New Potato, Devilled Egg and Olives.

Nicoise Grilled Tuna Belly with Haricot, tomato, baby potatoes and olives

Salads always gear me up for better things to come (to my plate! Ha!). The salad was splendid. Light, perfect mix of acids and greens.

Okay, the next two dishes were:

Wild Mushroom Soup and Pesto Toast

 and…

 Two varieties of soups, yeah! I just had a feast!

Okay, at this point, I had to start pacing. My stomach was beginning to get cramped and I was not about to stop– yet! Haha! So, in between sips, Chef Marijo, told me The Gustavian’s beginnings in Cebu and how it dramatically attracted  a lot of patrons there. And, finally, it’s now in Manila.

Okay, next plate please!

Lengua Spanyol

 The lengua was my favorite. Creamy, tender and unoffensively rich, it just made me say the word, “yummy”, twenty times during my first six bites! At this point, I kinda started to grasp the European concept of country cooking from the old world of this place.

Pesto Crema

The ‘hangover’ from the lengua kinda dampened my excitement for the succeeding dishes but this plate of pasta was promising. The pine nuts subtly did the magic along with the olive olive oil and the freshly grated parmesan cheese.

Chicken Cacciatore

As if I wasn’t about to explode from the previous ’gluttonious’ dining,  this plate just fell from Heaven. Being a fan of sour-y dishes that mostly use tomatoes to seal the deal of the sour power, I had a heyday tasting this! The chicken cacciatore was a great finale.

The Gustavian Restaurant should work its way to your must-go-to list soon. Oh, just make sure you got LOTS of tummy space should you decide to swing by:)

The Gustavian

Eastwood mall

Libis, Quezon City

Mobile # 0917-9853429
Telephone: +632 470-2971, 470-2984

Bistro Filipino By Chef Laudico

Bistro Filipino By Chef Laudico

3 mangoes salad

My husband, Jake, and I have been meaning to see for ourselves what the fuss was about Chef Rolly Laudico’s Bistro Filipino at The Fort. Chef Laudico, after all, has earned the badge of honor in becoming one of the country’s top-ranking Chefs with his innovative, out-of- the -box and unconventional way of presenting Filipino food in the most contemporary way.

bistro filipino interior

bistro filipino interior

Being a staunch advocate of the promotion of Filipino food, I feel that Chefs like him should get all the support and accolade for choosing to push for our local food that’s been clearly laidback for the past many years.

deep fried kangkong and kesong puti in wonton wrappers

I fancied on Chef  Laudico’s concept of predominantly deconstructing most of our local dishes to make it look a tad more ‘gourmetish‘ than the usual.

chicken in coconut cream soup

We opted to do the buffet. It was a departure from the usual food spread on a long table. We were served with a special menu for the buffet and we just picked out what we wanted— in batches.

us angus beef kare-kare

The real challenge was in the pacing as we ate. We couldn’t have possibly gobbled up the entire 50 viands on the buffet menu! Pacing and the selection were key, yeah. We had to choose only the best 15 or so dishes or what our stomachs could accomodate.

kesong puti with ham and potatoes

His food selection was pretty interesting. I personally enjoyed the wagyu and the lengua estofado. His kare-kare was majorly deconstructed (not that I complained), my foodie lolas would have raised a howl big time from their graves! I loved it just the same.

I downed my food with a chilled glass of margarita. I had to rush finishing it, though, as the liquor ban was to take effect after a few hours. Yes, I drink my fruity alcohol at a snail’s pace. Can’t do more than one glass!

chicken binacol

The servings came half less than the regular portions. I begged the waiter to make it even smaller but it still turned out a lot.

wagyu and lengua estofado

It’s been twelve years since Jake and I have been religiously doing this ‘date night’ on Saturdays. This one was one of the best, gastronomically. Wish I could take in  more glasses of Margarita so I could raise it a hundred times over to say, “Cheers to us, babes!”. I love, love date nights with good food– the date is already a ‘best gimmick partner hall of famer’.

tuna kilawin

Ahh, the night was young and so was the buffet! The last stretch of the dinner buffet was made of pasta and sardines-malunggay pesto sauce. At that point, I was beginning to feel restless and decided to walk around the place to jiggle the food down to give way to the last few dishes we were to order.

sardines and malunggay pesto

So, this was the fuss. A very scrumptious and unforgettable fuss, Chef Laudico. Bravo!

I’d definitely be back for the 35 dishes more that we haven’t sampled. Meantime, let me just do a bit of dieting for the next big munch!

Chef Laudico’s Bistro Filipino
Bistro Filipino, Net One Building, in the Fort
+632 856-0634, +632 856-0541

Hearty Chicken Sopas

Hearty Chicken Sopas

Marty, my 3-year old uber cute nephew, spent the day at home playing with my Sam. Our place was literally fully charged, alive and brightened up by this little boy’s presence that Sam almost never let him go.

As if possesed by the same positive energy, I suddenly found myself cooking away in the kitchen  with chicken sopas in the lead role for today’s menu. This dish had the perfect triumvirate of what kids usually look for in their choice of  food– chicken, pasta and soup! Okay, the cream or milk is the welcome bonus.

I just love sipping this soup whether on a rainy or in hot, humid weather. The yumminess is simply timeless, universal and makes you go for seconds.

1/2 kilo thigh fillet

3 pcs small-sized chicken soup pack

1/2 kilo macaroni shells (elbow or salad)

2 large onions, chopped

3 cloves of garlic, minced

1 carrot, cut into strips

3 tbsps patis (fish sauce)

1 box all purpose cream

3 pcs celery sticks, chopped

1 small head of cabbage, choped (optional)

oil

salt and pepper to taste

Season chicken parts with salt and pepper. In a cooking pot, boil chicken along with 1 quartered onion. Bring to a boil until chicken becomes tender. Once cooked, drain and shred the chicken thighs . Meantime, remove and shred chicken meat from the soup pack pieces. Save the stock.

Meantime, in a separate cooking pot, saute garlic and onion. Add celery, carrots and shredded chicken (do not include the bones this time). Season with patis. Add chicken stock. Pour macaroni shells. You may add about 1/2 liter (or more) of water if stock is not enough to cover the mixture. Cook until macaroni becomes al dente  in texture. NEVER overcook the macaroni shells. Add all purpose cream and cabbage. Adjust taste by seasoning with salt and pepper or dropping a piece of chicken cube. Serve hot.

Cheese And Garlic Quesadillas

Cheese And Garlic Quesadillas

Inspired by Mexicali’s cheese and garlic quesadillas, I did my own version today. Simple, extremely easy to make and downright scrumptious, I tell you, this better be a staple meryenda in your homes soon. Ingredients are all but three of them– 6 tortilla breads, 1 box of quick-melting cheese and 1 head of garlic, finely minced.

On one totilla bread, sprinkle cheese for filling plus 1 tsp of garlic. Cover with another tortilla (sandwich style). Lightly heat both sides of bread with the filling inside using a Teflon pan (about 1 minute per side). You may opt to grill the tortillas with the filling if you wish. DON’T overcook or the bread would come out crunchy, toasted and flaky.

Cut in wedges and serve with sour cream (1/2 cup heavy cream, 3 tbsps lemon juice , salt and pepper to taste then mix everything together).

Mayo-Mustard Tuna Spread

Mayo-Mustard Tuna Spread

It was a panic morning for me last Saturday with me  forgetting to map out, at a much earlier time, what was supposed to be served for breakfast. My tummy abruptly growled for food and couldn’t wait longer than 5 minutes for food. Good thing, Sam had already munched down, by this time, her regular fix of pandesal toast with some hint of peanut butter. Now, what did I do? Well, I wanted something fast, delish, healthy and  energy inducing. And it went by the name mayo-mustard tuna spread with some freshly grilled ciabatta bread!

Ooooh, those ciabatta slices  just sandwiched heaven in between them. I love the crunch of ciabatta as you take your first bites and how it gets chewy as you bite some more. Then getting to the tuna spread makes the whole eating experience awesome to the power of ten.

I usually alternate my versions of this tuna spread depending on what’s available in the ref. This version I did was  closely similar to the taste of tartar sauce that’s been smothered onto some great tasting tuna flakes.

Okay, here’s how to make the tuna spread: You will need a can of drained flaked tuna in water, 1 head of minced onion, 1 tbsp pickle relish, 1/2 cup of mayo, 1 tsp of yellow mustard, juice of 1/2 lemon, salt and pepper to taste. Mix everything together. Plate with sliced tomatoes and serve with your favorite toast.

Oliver’s Twist– Queso Rice

Oliver’s Twist– Queso Rice

My brother-in-law, Oliver Garcia, gave me this gastronomic idea of melting some quickmelting  cheese over my hot cup of rice. You may just top the cheese over some hot cup of rice or microwave the cheese and rice.

I thought it would be perfect with some grilled slices of honeycured bacon. Cheese, rice and bacon– just spell awesome comfort food. Why, it just had me gobbling up everything on my plate. Fast, easy and totally delish, it’s definitely worth trying.

Adobo Fetuccine

Adobo Fetuccine

I thought of whipping up pasta this morning for Jake’s baon. However, as I ran through, mentally, what pasta I usually send to his lunch bag, I thought it had been the same banana (or pasta!) over and over again.

Okay, eureka moment did it again and I found myself plucking out from my freezer some pork tenderloin that I rarely (read: Unhealthy kasi ang pork!) buy. Why, paminsan minsan lang naman.

I just happened to chance upon this great cut of loin when I did the grocery at SM Hypermarket, Centris Station over the weekend. Their meat selection was overwhelmingly abundant and had the best quality. However,  this pork tenderloin called my name the loudest! Lol.

I just had to give my usual adobo a facelift, though. I used balsamic vinegar instead of the usual white vinegar and ‘visiting’ spices from China, namely hoisin and oyster sauces. It turned out great. So, who says Italians, Pinoys and Tsinoys can’t get along?

1/2 kilo pork tenderloin, cut into bite sizes

1/2 cup balsamic vinegar

1 head of garlic, minced

salt and pepper to taste

1 3/4cup hoisin sauce

1/4 cup oyster sauce

1/2 kilo fetuccine noodles

water

1/2 cup olive oil

Cook pasta according to package directions.

Meantime, season pork with salt and pepper. Add garlic , balsamic vinegar and cover with water. Cook until pork is VERY tender, about 1 1/2-2 hours and sauce is reduced by half, almost just enough to cover the meat mixture. Add about 1/2 cup olive oil then pour in hoisin and oyster sauce. Stir and simmer for another 4 minutes. Top meat mixture on pasta.

Tofu in Oyster Sauce

Tofu in Oyster Sauce

The Japanese tofu truly does for a light, refreshing and healthy main dish. For weeks now, I’ve been mightily trying to bring to my table at least one staple viand of vegetable or just about anything healthy. The Japanese tofu has a smoother and tender properties as opposed to the local tokwa that we have here. Oh, I super love munching on these tofus minus the guilt!

Imagine the health benefits you get from eating tofu– One half-cup serving of raw firm tofu contains 10.1 grams of protein! It’s enough to fuel you up for a 5k run!

Yesterday, I made some tofu in oyster sauce. I fried about 1 block of a 6-inch tofu and cubed them about half an inch by half an inch thick. Then, in a separate skillet, I sauted 3 cloves of garlic and a bulb of minced onon. Brought back the tofu onto the pan, sprinkled with 2 tbsps of kinchay and slathered it with about half a cup of oyster sauce and seasoned with salt and pepper. Was that easy or what?

HK Choi (Choi Garden)

HK Choi (Choi Garden)
Beef tenderloin, Chinese style, Php 240.

I wasn’t about to retreat from my long overdue diet until I saw the sumptious spread at the HK Choi Chinese restaurant in Megamall. The ‘halo-ed’ half of me kept nagging me inside to hold back from gorging on these lovely dishes and just stick by my diet. On the other hand, the temptress remaining half did her job, her wicked little voice just tempted me no end. I succumbed to it— and… I loved it! Lol.

Sweet and sour pork, Php 240.

The mega triumvirate of yang chow, roasted duck and soup—- just had me rolling my eyes in sheer delight.

Nestled right smack in the middle of Megamall, it was a great (read: yummy) chow stopover we had. My relatives who ate with my family dished out rave reviews of the place, too.

The opulent but modern interior oh HK Choi  set the stage for supreme lunch with engaging chats to boot. I thought the intricate pieces of those Asian furniture, utensils and perfect lighting was well put. Just the way I want to be ‘copied and pasted’ in a perfect, chillaxing restaurant.

House special wonton chicken soup, Php 380.

The house special wonton chicken soup prepped up our stomach bins  with its warm and comfort-rich broth. Why, it was to be Sam’s main course!

Conventionally in Chinese dining, rice is served after all the viands are served and almost consumed. That’s why we had to tell the waiter to serve it first– Pinoy eh!

Yang chow fried rice, Php 200.

And, the rest of the dining ‘superstars’ trickled in one by one. Oh, my plate was too small. Did my ‘halo-ed’ half do that purposely? I wouldn’t be surprised. Arg, the food I scooped for my plate looked like a baby plate! Lol.

Cold cuts, Php 340.

Salad seafood roll, Php 240.

I was munching on the salad seafood roll like I was eating chicharon! The puff, crunch and excellent taste got me gobbling up about two large pieces!

Sam and moi!

Happiness overload. Sould be back. Soon.

H.K. Choi restaurant
2nd floor,  SM Megamall Atrium
telephone: 382-7757

Pasta Milano

Pasta Milano

Like a child handed with a choochoo train, I was ecstatic getting a pack of some whole wheat spaghetti pasta direct from Italia. My husband, Jake, is back from a week-long conference in Italy and he came home with spices and other kitchen stuff that totally got me excited.

Okay, what to do. I scoured our freezer for possible ingredients to go with the pasta noodles. Ohhh, I saw a pack of ribeye (sukiyaki cut) and  mentally screened other potential ingredients that could to go with it. I wanted something light, healthy and very Italian tasting. So I settled for some olive oil-coated pasta with meats, peppers, tomatoes and herbs!

In fact, if I had roasted eggplants, zucchinis and capsicum peppers available in my ref, I would’ve let them join the rest of the ingredients. That would have been the ultimate. But hey, this one was a mighty hit just the same.

Oh, just a side comment– I’ve been going to SM Hypermarket Centris Stn and can I just say, the prices of their veggies are far lower than the standard prices of veggies in most supermarkets. Our helper even quipped, “Eh Mam mas mura pa ho dito ang gulay kesa sa palengke namin eh!”.  Just a quick tip for the budget-conscious shoppers.

Anyway, I immediately donned myself in my new apron from the land of pasta and risotto and off I went to cook away the pasta and everything that went with it!

Pasta Milano

1/4 kilo ribeye sukiyaki cut meat

1 red bell pepper

1 green bell pepper

1 can diced tomatoes

3 tbsps fresh basil, chopped

6 cloves of garlic, minced

1 cup black mushrooms, sliced

1/2 cup grated parmesan cheese

3/4 cup olive oil

salt and pepper to taste

Cook pasta according to package directions.

In a skillet, saute garlic. Add meat, bell peppers and mushrooms. Stir until meat is cooked (about 3 minutes). Pour in the mixture tomatoes and  basil.

Season with salt and pepper. Mix with drained pasta noodles.

Sprinkle with cheese on top. Serve with your favorite toast.

Plating Using Inexpensive Plates

Plating Using Inexpensive Plates

While I feel adulated when somebody appreciates my plating, I can’t help but marvel in silence at how I mostly do the plating using inexpensive plates!

A friend once commented, ” I really like your plating. How I wish I could have your kind of china so I can make my plating look extra elegant!” . Plating a dish exquisitely requires lots of imagination, good sense of style and using very nice and appealing plates. It doesn’t have to be the very lavish and expensive Chinaware, really.

Large saucer plate, P25 (SM Hypermarket, Centris Stn, Quezon Avenue). Jumbo mug, P50.

By nice plates I mean shape, color and design. While I fancy on those elegant, contemporary white ceramic plates, I don’t mind using printed plates. No hard and fast rules, really.

Moroccan-inspired plate, P25 (SM Hypermarket Centris Stn, Quezon Avenue).

 And oh yes and not to be left unnoticed would be my all time favorite rectangular white plate. Quite unconventional, I use this plate as a dining plate when I have guests at home.

Rectangular white plate, P50 (SM Hypermarket, Centris Stn, Quezon Avenue).

 Lately I have been fancying on Japanese dishes and I thought of buying some Japanese plates, trays and other utensils  to ‘Japan-ize’ my spread.

Japanese sushi plate, P120 (Our Home).

It only takes a bit of squeezing your creative juices to produce an elegant plating. It doesn’t have to cost you even hundreds of Pesos. Plate for less, plate like a diva!
Last of my show and tell would be my fish fingers in a beer glass. Instead of using a regular plate, I ‘plated’ these fish fingers in a glass!

Beer glass, below P100 (SM North Avenue, Basement).

C Italian Dining– A Must Eat And C Place!

C Italian Dining– A Must Eat And C Place!
Finally, there’s one great reason to drive to Pampanga. And, the reason starts and ends with the letter C!
Voted not once but twice as Restaurant of the year by The Philippine Tatler, wouldn’t you scratch the itch to hie off to Pampanga to check what C Italian restaurant is all about?

Foodies talk about this restaurant ALL THE TIME!

Nestled right smack in the bustling area of Angeles (very near the Clark airbase), I was just too happy driving over to C to finally sample the very famous Italian dishes they serve. And yeah, nevermind if I missed the television coverage of PNoy’s presidential inauguration, tsk…

The out-of-towners!

Okay, the ‘front act’ of the lunch was an awesome basket of Italian bread– dipped in pesto sauce. I was raving non-stop about the crusty-chewy-oomph loaded characteristics of the bread. It was love at first bite! And to think, we were just starting to warm up!

Italian bread in pesto dipping sauce

 The next to arrive was the jando Italian salami panizza– a certified C bestseller. The novelty of this panizza is in the way you eat it. Oh, my eyes rolled in delight even before I rolled the panizza!
C super classic panizza–jando Italian salami, Php 655.

 You eat the panizza this way: Take a strip of panizza, top with arugula leaves and alfalfa sprouts then roll or fold the strip to make a bite size piece. Arugula+cheese+perfect crust spelled YUMMY font 99!

The first pasta we ordered, Spaghetti con frutti di mare, was loaded with the bounty of the sea. Fresh salmon, mahi-mahi, grouper, prawns and imported green lip mussels sauteed with light extra virgin olive oil in pomodoro sauce, it really got us digging in for more of this yummy pasta fare.

Spaghetti con frutti di mare, Php 580.

 The second pasta was penne calebrese. Ahh, it was super. Made of chunks of US Angus oxtail meat that was tender-braised with red wine, tomatoes, green peppers and capers.

Penne calebrese, Php 580.

 We also ordered a second kind of panizza– Don Carmelo. It had spicy chorizos, anchovies, thyme and pecorino cheese. I’ve always been a fan of pizzas with anchovies and that one, I so enjoyed!

C Italian Dining

1210 Don Juico Avenue

Clarkfield, Pampanga  045.892.4059

Sinigang Na Talakitok Sa Miso

Sinigang Na Talakitok Sa Miso

Inspired by Trellis restaurant in Quezon City, my mom served her rendition of their famous sinigang sa miso using talakitok as the main ingredient. When my dad was still alive, we would troop over to Trellis for their famous sisig, crackling liempo and sinigang sa miso. How we devoured each bite of these super dishes that, upto now, still remain to be Trellis’ bestsellers.

Okay, our Sunday lunch yesterday saw me giving a third hand to mom as she prepared this sinigang for lunch that went with two large servings of crispy pata and two rounds of  tortang giniling cooked over low fire on some fresh banana leaves. Ahh, like always when I’m at mom’s place, my plate worked overtime taking in as much rice and ulam as it could while I dined.

The sinigang, hands down, was my favorite. The asim of the broth, the texture of the miso, chunkiness of the tomatoes and tastiness of the talakitok all sealed by the hot and spicy  taste of the soup just made a perfect sinigang ensemble. So easy to make, too. To date, this has got to be my fave sinigang. My five-star dish, you better make this a staple in your menu soon.

Sinigang na talakitok sa miso

3 slices talakitok (or your choice of fish)

2 pcs panga of talakitok

5 pcs luyang dilaw, peeled and sliced

4 cloves of garlic, minced

1 onion, sliced

2 tomatoes, sliced

4 tbsps miso

3 pcs green chillies (siling pang sigang)

1 pack sinigang mix

5 mustasa leaves

salt and pepper to taste

water

oil

_______________________________________

Fry fish until golden brown. Set aside.

Saute luyang dilaw, garlic, onion, tomatoes and miso. Season with salt and pepper. Pour about 8 cups of water. Add sinigang mix and bring to a boil. Throw in green chillies (you may break them into two to make broth hotter in taste).

Once boiling, throw  in fried fish and mustasta leaves. Simmer until it boils one last time. Serve hot:)

Lumpiang Gulay Na Hubad

Lumpiang Gulay Na Hubad

No, I did not forget to buy the lumpia wrapper for this dish. What I forget now is the number of times we’ve had this in our meals without going for seconds.

Jake’s favorite, this dish is so delish that we can gobble it up even minus the rice. Yes, appetizer style. Strikingly similar  with how Koreans serve their togue (bean sprouts) before the main course in a Korean meal.

I enjoy biting on the togue, baguio beans and tokwa (tofu) and savoring its symphony of flavors. And well, yeah, enclosing this dish in a lumpia wrapper should be a good option, too.

Lumpiang Gulay Na Hubad

4 squares tokwa (tofu)

2 cups of togue (bean sprouts)

10 pcs baguio beans, sliced thinly

1 red bell pepper, cut into thin strips

4 cloves of garlic, minced

1 red onion, sliced

1 chicken cube

salt and pepper to taste

oil

Fry tokwa until golden brown. Once cooked, pat dry with paper towel to remove excess oil. Cut each square into 9 small cubes. Set aside.

In a skillet, saute onion, garlic, baguio beans, togue and red bell pepper. Add chicken cube and season with salt and pepper. Continue mixing until all ingredients are cooked. Throw in tokwa. Serve hot.

Chicken And Peas

Chicken And Peas

I’m tempted to call this dish picadillo but it didn’t use beef, it had raisins in it and I just wanted to highlight the ground chicken as the main ingredient.

Truth to tell, this dish can pass up for an arroz ala cubana meat ensemble, only saucier and uses ground chicken. I usually cook this up on days when I have to squeeze in cooking in between errands and other pressing chores. Why, it takes little time and preparation to do it.

Simple, yum-loaded and quick to make, I give this dish two thumbs-up!

Chicken with peas

1/2 kilo ground chicken

1 onion, sliced

5 cloves of garlic, minced

1 tomato, diced

1 cup frozen green peas, thawed

1/2 cup raisins

3 cups tomato sauce

salt and pepper to taste

____________________________________

In a skillet, saute onion, garlic and tomato. Add ground chicken. Season with salt and pepper. Cook until meat is tender.

Add raisins and green peas. Continue simmering until peas are cooked. Pour tomato sauce. You may add water to thin the sauce if you wish. Let it simmer and continue stirring for five more minutes. Serve hot.

Carrot Cake With Cream Cheese Filling

Carrot Cake With Cream Cheese Filling

Sam pleaded to do carrot cake with me yesterday. Our bonding over this cake goes a long way. We’ve had carrot cake baking sessions quite a number of times already. Sam obsesses with all the whipping, mixing, pouring and tasting involved in baking. She’d trade baking for two episodes of Handy Manny or Angelina Bellerina at any given time.

And, because this cake is  kinda tedious to make (yeah, baking isn’t my thing. So…) , a third hand is always a welcome thing. My little hand, hands down, is the best third hand.

Inspired by a recipe I plucked out from epicurean.com. We started rolling up ur sleeves to get this cake done.

The bright orange colored carrots didn’t escape my sight as I cruised the vegetable aisles of my fave grocery. I thought they looked perfect for my carrot cake. Ahh, how I looked forward seeing Sam glow from 10 watts to 80!

And so the project began..

Carrot cake with cream cheese filling

4 eggs, separated
1 cup sugar
1 and 1/4 cup carrots, grated
1 cup walnuts, coarsely chopped
1 1/2 cup flour, sifted
1 tsp baking powder
1/4 tsp nutmeg
1/2 tsp cinnamon
1 tsp vanilla
pinch salt
1 cup oil
2 1/2 Tbsp
hot water
1/2 tsp baking soda

FILLING
1 box cream cheese
1/4 cup sugar

FROSTING
1 cup whipping cream
1 Tbsp sugar

Directions:
Preheat oven to 350 deg. F. Mix together egg yolks and 1 cup of the sugar. Stir until yolk becomes light in color.
Throw  in carrots, nuts, flour, baking powder, nutmeg, cinnamon, vanilla, salt and oil.

Combine and mix  together hot water and soda and stir into flour mixture.

Beat egg whites until foamy and slowly add remaining sugar. Beat until stiff and glossy.

Fold egg white mixture into carrot mixture.

Turn mixture into a greased 13×9-inch pan lined with greased wax paper and bake for 45 minutes or until done. Cool.

Slice in half horizontally, to form two layers.

Meantime, to do the cream cheese filling, soften the cream cheese and mix in sugar. Using an electric mixer, mix until mixture is creamy and a bit fluffy.

To make the frosting, beat the whipping cream until slightly stiff, then add the sugar and continue beating until mixture creates soft peaks. Frost the entire cake with whipped cream.

Cream Of Chicken Soup

Cream Of Chicken Soup

Nothing beats sipping a warm bowl of soup that was made from the heart. No offense meant to canned soup lovers, but soups made from scraps and scratch are the ones that genuinely rock. Why,  the homemade soup’s edge lies in the fact that it’s healthier, none of the ‘can’ taste and you know a hundred percent what went with the soup when it was cooked.

Okay, this soup (again) was a proud product of a makeover from a leftover (nice rhyme!). The previous evening saw me baking some lemon pepper chicken and had some leftover. Not that it wasn’t good enough to be devoured in one sitting (Ha, defensive me!) but that, Jake and I had quite a big bingeing spree shortly before dinner that left us full til the next day!

Anyway, frankly, I don’t like the idea of reheating  leftover baked chicken for my meals. The overnight period usually leaves the skin stiff, rubbery, greasy and all. The flesh too firm and totally juiceless. But the good news is– I love doing a makeover of baked chicken. First step is to chunk the meat and sometimes the skin, then stir-fry coating  it with a favorite sauce– either bbq or charsiu sauce. Either way would land in between two slices of bread! Sarap!

Today was different, my leftover surprise was made up of these chicken chunks, celery stalks and cream. Cream of chicken soup— now, are you hungry?

Cream of chicken soup

3/4 cup left over chicken (baked, boiled or even fried!), cubed

1 box all purpose cream

1/2 cup celery, chopped

1 medium-sized onion, finely minced

1/4 cup butter

1/2 cup quickmelting cheese (optional)

4 cups of water or whole milk

1 chicken cube

2 tbsps flour diluted in 1/2 cup water

Saute chicken, onion and celery in butter.

Add cream and cheese. Bring to mild simmer until mixture becomes thick. Add water or milk .  Add flour mixture. Let it simmer and continue stirring until desired consistency is achieved. You may actually adjust consistency (to thin the soup) by adding whole milk or water until you reach your desired consistency. Serve hot.

Roasted Eggplant And Feta Spread

Roasted Eggplant And Feta Spread

Next to manchego cheese, feta is my ultimate comfort cheese. A brined curd cheese, I use it best as topping on melba toasts, pesto or sundried sauces or as the final touch to my moussaka. Let’s put it this way, I can simply gobble up feta with NOTHING. Yes, eat it like I do with Chippy. I LOVE feta— enough said.

This weekend had me making some spread made of some roasted eggplant and red bell peppers smothered generously with crumbled feta cheese. It was to be the ‘crowning glory’ of my grilled whole wheat pandesal round. I was amused at the combo of this cheese and the medley of eggplant and peppers that I threw into it. The creamy-soury nature of the feta just did some kick to the almost neutral-tasting but smokey qualities of my veggie roasts. Ahhh, how I devoured this spread on my open-faced pandesal rounds! It’s a must-try, absolutely.

Roasted eggplant with feta spread

2 medium-sized eggplants. cut vertically

2 medium-sized red bell pepper, seeded and cut vertically

1/2 cup crumbled feta cheese

olive oil

salt and pepper to taste

2 tbsps balsamic vinegar

Season eggplant and bell peppers with salt, pepper and balsamic vinegar. Drizzle with some olive oil. Grill until they’re cooked or bellpeppers’ skin can peel easily.

On a plate, scrape the flesh of the eggplant discarding the skin. Do the same with the bell pepper. Cube the bell peppers, cut the flesh of the eggplant into bite size pieces and mix them together. Toss in feta cheese.

Use as topping for your favorite toast.

Corned Beef Paella

Corned Beef Paella

It was one rainy, gloomy and chilly late afternoon when I had the adrenalin rush  to work around my kitchen and whip up what was to be served for dinner the other night. Jake scored a bottle of white wine and it was to be the missing link to this fantastic dinner dish. Wine, paella with good music at the backdrop equalled two hours of catch up chat with Jake who got busy at work the whole day.

Okay, quite unconventionally, I used corned beef instead of the usual combo of meats and seafoods associated with paella. I thought I’d explore a bit and scour the grocery cabinet for potential ingredients to complete ‘team paella’ for that night. So, shiitake joined, asparagus was in and all the other ingredients just blended well with the rest of my paella ensemble. Ending– the dish was a winner.

Corned beef paella

2 cups arborio uncooked rice

5 cups of water

1 can corned beef

1 can shiitake mushroom, sliced

6 asparagus spheres, stemmed

2 pcs of lemon, wedged

3 tbsps turmeric powder

4 threads, saffron

1 onion, minced

4 cloves of garlic, minced

olive oil

In a paellera, saute onion and garlic. Add corned beef and shiitake mushrooms. Mix in arborio grains and turmeric. Coat well with the corned beef mixture. Add water and simmer until rice is cooked.

Meantime, season asparagus spheres with salt and pepper. Lightly fry in oil until cooked.

Top asparagus and lemon wedges on paella. Serve warm.

Jen’s Fave Roast!

Jen’s Fave Roast!

In a trip to Chicago four years ago, I met Jen. Quite surprisingly, we hit it off in the first two minutes that we met. Why, if there was a category in the Guiness Book of World Records for a ‘fastest getting to know you’ moment, we would’ve bagged the top prize! Haha. Ours is a long distance friendship, though, with us touching base with each other only through Facebook and YM. And our most glaring common denominator? FOOD!

Sam with Tita Jen. Chicago USA, 2007.

Jen just amuses me with her very  insightful nature everytime we talk about food. She’s one foodie who’s one with her food– all the time. Heart and soul in the kitchen, heart and soul in whatever she lays her hands on. I totally admire her. And yeah,  was giddy getting a recipe from her today with a very sweet note to match. This note comes all the way from Mexico where she and hubby, Sieg, are now based after having stayed in Tokyo, Japan for quite awhile.

Finally, Jen, here goes your dish:

Hey Caren!

It took me 6 months to finally write and cook something for you.  Let me warn you first that am not much of a writer so when you asked me to write something for you, I scratched my head and thought, “can I just cook for her instead?!?!”  What to write? What to cook? You are probably expecting a Mexican inspired dish from me especially since we are living in the heart of Mexico. I have not yet immersed myself into Mexican cooking so I thought my all time favorite could do the trick (hopefully!).  So, I bought myself a good-sized whole chicken, a bunch of rosemary, two handfuls of mushrooms, and a couple pieces of lemon, onion and garlic and said, “I would cook my favorite Roast Chicken recipe for a dear friend”.

This recipe was sourced from Tyler Florence of Food Network. Am not so good at whipping up my own recipe but am used to searching for the best recipe and adding my own touch to it.  I love cooking Roast Chicken! While it takes a lot of time to cook (approximately 1.5 hour), I find it very easy to make and while it’s cooking, I can then do other things than just stay in the kitchen.

For the Roast Chicken, you will need:

1 whole chicken

Red onion, cut in quarters (enough to stuff the chicken)

1 Lemon, cut in half

Fresh rosemary

6 cloves of garlic, smashed

1 tablespoon olive oil and more to drizzle on the chicken

Few slices of bacon (not necessary)

Salted butter

Sliced mushrooms, washed and dried

Salt and pepper

Granulated garlic or garlic powder

Wash the chicken thoroughly and dry with a paper towel.  I buy my chicken here clean already (no insides and with the neck part cut) but still I wash it again, specially the inside.

In a bowl, mix the onions, lemon, garlic and rosemary. Add salt, pepper and granulated garlic.  There’s garlic in the mixture already but because I love garlic so I put a pinch of granulated garlic still.  Add the olive oil and toss.

Take the butter, add a bit more salt and place little pieces underneath the skin.  The recipe did not call for this but I find that it adds more taste to the meat.  I could just imagine using Dairy Cream butter but I don’t have that here L.  Season the inside of the chicken with salt and pepper then stuff the chicken with the mixture. To keep the mixture inside, I pull either the skin of the chicken to close the bottom part and use a toothpick to close it.  Then I tie the chicken legs and wings.  I honestly don’t know how to tie a chicken but I do whatever to keep the legs and wings from spreading while cooking (ha!ha!ha!).

Season the whole chicken with salt, pepper and garlic powder.  Place on the roasting pan, drizzle some olive oil and sprinkle whatever rosemary you have left.  The recipe called for just roasting the chicken as is but I normally add some onions, garlic and lemon pieces on the roasting pan.  Roast the chicken (breast side up) in 400F for 1.5 hours. 

You might ask what do you need the bacon for as I mentioned needing it on the recipe list.  After 45 minutes of roasting the chicken, lay the strips of bacon on the chicken and add the sliced mushrooms on the pan (before adding the mushrooms, I season it first with salt and pepper). 

Baste the chicken with its own liquid (from the pan) to keep it moist.  Once done, take out the stuffing and leave it to rest for 15 minutes.  This I did not know before, apparently you need to let it rest to keep the moisture inside the chicken.  With the juices of the lemon, I find that the chicken is a bit wet, not crispy enough for my liking. So after cutting it, I would put it back in the oven for about 5 to 10 minutes.

I love French fries so I always eat my roast chicken with fried potatoes.  But this version is a bit healthier.  Cut the potatoes, season generously with salt and pepper, add rosemary leaves and drizzle with a bit of olive oil.  Toss the potatoes so each piece has some olive oil.  Place in a Pyrex pan and put it the oven for 30 minutes. To save time, just put it in the oven when the chicken has been roasting for an hour.

Voila! There I have my Sunday Chicken Dinner.

Chicken Hainanese

Chicken Hainanese

My first taste of Hainanese chicken happened during the late 90′s when my sister, Tina, and I trooped over to my fave Chocolate Kiss Cafe. Ahh, how I devoured every morsel of their hainanese! The play of flavors from the broth, the mega triumvirate of hoisin, chili and ginger sauces and the succulent chicken just brought home the bacon (or the chicken?).

Today, I literally dished out what was to be my hotshot for the day– my hommade hainanese, yeah, with all the eye-candy trimmings that went with it. Couldn’t be chipper as I relished my own hainanese creation. Bliss– Try this soon:)

Crazy About Callos

Crazy About Callos

With either pandesal or rice– I am callos’ most avid fanatic. Inspired by my Mom’s immortal version of callos, I decided to whip up my own creation tonight.

Mom had a bit of tweaking of the conventional callos in that she incorporates potatoes into her version and seasons with our native patis (fish sauce). Why not? I must say, these are welcome ingredients that are loaded up with taste enhancing abilities.

According to my Mom, this dish was a favorite of my Lolo Iking (her late  dad). She said he would usually eat a bowl of callos with pandesal to match. Ah, now that’s good taste, eh? And, so, overtime, my Mom had made this dish as part of her potluck repertoire during special ocassions.

A few years ago, I had the chance to taste callos from its place of origin in Spain. Funny, I thought I like callos better in Pinas, specifically in my own Mother’s kitchen.

Mom, this is for you:)

1/2 kilo ox tripe

4 slices of meat from pata ng baka

1 pc chorizo de bilbao, sliced

tomato paste (optional)

tomato sauce

1 red bell pepper, julienned

1 green bell pepper, julienned

4 medium-sized potatoes

1 cup garbanzos

salt and pepper to taste

oil

_______________________________________________

Season meats with salt and pepper. Pressure cook ox tripe and pata  for 45 minutes. Drain and cut for about an inch long and 1/3 inch wide. Set aside.

In a skillet, saute onion, garlic and tomato. Add ox tripe and pata slices season with patis. Stir for the next two minutes. Add tomato paste (dilute with water if you want to adjust consistency). Mom does not use tomato paste because she is partial to its sweet-ish taste.

Add bell peppers, chorizos and garbanzos. Simmer for another 3 minutes then add potatoes. Cook until potatoes are tender. Add tomato sauce. Serve hot.

Lisa’s Bread Pudding

Lisa’s Bread Pudding

Lisa’s Bread Pudding

“I wanna learn how to cook!”

Six big words from a serious culinary newbie then got me drawing up a menu for a cooking session. Having been raised knowing, tasting and devouring good food, it wasn’t hard coaching my high school buddy, Lisa Marie Virginia Monique Roa Africa-Carandang (Whew, Lisa, I’m insane having remembered your full name since the late 80′s!).

She was to leave for Tokyo, Japan with hubby, Eric, and kids when she got us to cook together. So, here was how Lisa looked like when we did the lessons:

And she made this:

Stewed beef in marinara sauce

I thought she was excellent during the session. Now the tougher challenge, doing dishes on her own in faraway Japan. Ha!

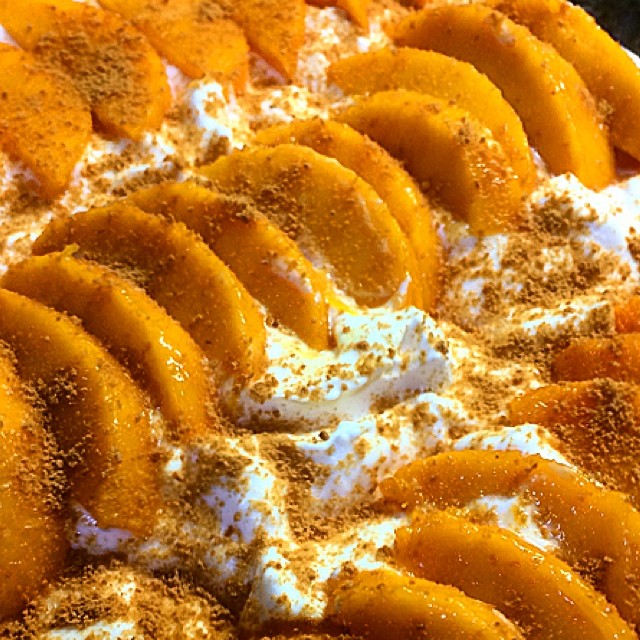
Only recently, I was so thrilled getting a recipe from Lisa (which I requested for) plus a photo to match. I could not believe what she just made– bread pudding. Not that I did not believe she could whip upsomething like that but more like– I was green with envy because I cannot, for the life of me, bake!!!! Haha!

Lisa, you are awesome!

Here goes her note and recipe for us:

Hey Caren!  Would you believe it’s been exactly a year since we moved to Tokyo…and since our cooking lesson?!  The move to Tokyo has been both fulfilling and a challenge for all of us.  It truly is a wonderful and dynamic city;  a melting pot of cultures.  We have been really blessed to have been given the opportunity to immerse ourselves in a society that is so unique, diverse and as rich as Japan‘s.

Living in Tokyo has been life-changing.  The biggest one, as you very well know, is cooking!  Having been married for over 11 years, not once did I feel the need to familiarize myself with the kitchen, (except for the refrigerator)!  I mean, I can’t even cook rice!  So, you can imagine the terror when I found out I had to cook!

The first night was a nightmare!  We decided to just have spam and eggs for dinner.  Albeit simple in theory, it was not easy in reality.  Mare, Spam na nga lang…nasunog ko pa!  I failed to notice that the knob of the range started with “high” temperature (I.e. to ignite the fire).  To save dinner, Eric just decided to cook the eggs himself…lest I burn that too!  (Maybe I was subconsciously testing my family’s love for me as my daughter said, “It’s okay Mom, we can just take out the brown parts.“) 

There are a lot more “funny” stories along the way, (one of Eric’s favorite is my mistaking vinegar for oil when I was making scrambled eggs and suspecting that the eggs were rotten), but thankfully there are more successful stories to share .

Since then I am proud to say that I have served a variety of dishes including Meatloaf, Chicken Cordon Bleu, Sukiyaki, Kare-Kare, et al.  I’ve even ventured into baking simple desserts like Brown Sugar Bars and Bread Pudding!  Of course, all of which were products of a lot of trial and error.  Even if the ulam is as basic as Adobo or Sinigang, it still took some time before I could perfect the taste and consistency. 

The greatest fulfillment of course, is seeing the satisfied faces of Eric and the kids!  My kids even talk about my “delicious snacks” to their classmates!  They are the best customers I could ever wish for…supportive, not mapili and the most forgiving of critics.  Although at times the food does not turn out as expected, they never fail to show their appreciation for the “work” that I put into it. 

You were right.  Just do it!  Stop obsessing with recipes but trust in your “panlasa”…  

So yes!  I can cook na…finally!  Thanks for helping me take out the trauma of cooking.  Naturally, I still have a lot of things to learn but at least now I have that peace of mind knowing that…hindi na mamatay sa gutom ang pamilya ko!  Hahaha! 

Here is the recipe for Bread Pudding.  It’s a very simple dish which my kids love to do with me.  I found the recipe on the Internet but I made some changes according to my family‘s taste…

BREAD PUDDING RECIPE

Bread Pudding Ingredients:

2 cups whole milk

¼ cup butter

1/3 cup sugar

3 eggs

2 teaspoons cinnamon

1 teaspoon vanilla extract

3 cups bread, tore into pieces (any bread, although French bread or raisin bread is the best)

raisins (I use about ¼ cup only)

Bread Pudding Sauce Ingredients:

1 cup whole milk
2 Tablespoon butter
1/3 cup sugar
1 teaspoon vanilla
1 Tablespoon flour
dash of salt

Directions

Bread Pudding

1.  In a saucepan, over medium heat, heat milk.  Add butter.  Stir constantly until butter is melted.  Set aside.

2.  In a separate container, combine sugar, eggs, cinnamon and vanilla.  Slowly add milk mixture.  Set aside. 

3.  Place torn pieces of bread on a casserole.

4.  Pour batter on top of bread.  Sprinkle raisins.

5.  Bake at 350F for 45 to 50 minutes or until set. 

Bread Pudding Sauce

1.  Mix everything together in a saucepan and bring to a boil stirring constantly.  Set aside for a few minutes and then pour on warm bread pudding. 

2.  ENJOY! 


Everyday Kainan Weekend!

Everyday Kainan Weekend!

Inspired by my Lola's menudo

If a menudo contest would be held today, I would definitely be in it. Why, this has got to be  a flagship dish of my childhood filled with memories of good food, good food and the best menudo.

Inspired by my lola’s famous menudo, this version, and I am confident to say, is the BEST version for me. It is unique in that the taba have been cut off from the lean meat and are made into chicharon then later on combined with the rest of the menudo ensemble. The meat is marinated in soy sauce and calamansi before it is cooked. In that way, meat is flavored long before you start infusing flavor as you heat it. Also, it barely uses commercial tomato sauce that usually tastes fakely thick  and artificial.

In this recipe, the small amount of commecial tomato sauce is only to spike some color to the dish.

In fact, my lola’s version totally did away with the use of commercial tomato sauce. She used REAL tomatoes.

During my childhood, we ate it best with a glass of ice-cold Coke. It made the whole pleasant dining experience intensified and more satisfying. To date, Coke has remained to be our menudo’s best partner.

With this perfect tandem, expect the dining table to burst with energy in the conversations, chitchat and bonding brought to you by the happy hormones triggered by a fabulous loveteam named– Menudo and Coke.

Menudo

1 kilo pork casim, diced with fat and lean meat separated

6 medium-sized tomatoes, sliced

1 medium-sized onions

5 cloves of garlic, minced

2 small boxes raisins

1 big can garbanzos

1 small pack tomato sauce

1 red bell pepper, minced

3 large potatoes, diced

4 pcs calamansi

3/4 cup soy sauce

Canola oil

Salt and pepper to taste

__________________________________________________

Season lean pork meat  with salt and pepper. Marinate with calamansi and soy sauce for 30 minutes.

Season taba (fat) with salt and pepper. Cover with water in a small frying pan. Cook until water has evaporated, taba has turned into golden brown  and crispy. Set aside.

Meantime, in a frying pan, fry potatoes until they turn golden brown in color. Drain from excess oil and set aside.

In a skillet, saute onion, bell pepper, garlic and tomatoes. Add lean pork meat. Season with salt and pepper. Cover with water. Bring to a boil until water is reduced into half and meat already very tender. Add tomato sauce, garbanzos and raisins.

Continue simmering for another five minutes. Add fried potatoes and chicharon (taba from the casim). Serve hot.

Bam-i

Bam-i

I once made my bully love me after I fed her with my Mom’s bam-i. Almost abruptly, she started being nice to me after her first plate of my bam-i. This dish is so good, I eat it like there’s no tomorrow.

One of mom’s many signature dishes, I love this one for many reasons. For one it is a symphony of flavors that get me going for seconds ALWAYS when it is served. The linamnam factor of the canton and sotanghon combined, the juicy chicken that dictates the general taste of the pansit, the asim (sour component) of the calamansi that goes well in contrast with the garlicky taste and aroma the garlic gives  just blows me away. Ahh, give me that plate of bam-i now!

BAM-I

500  grams canton

300 grams sotanghon

2 whole chicken breasts, boiled and shredded

2 medium-sized carrots, cut into strips

1/2 cup dahon ng sibuyas, chopped

3/4 cups celery, chopped

5 pcs calamansi, halved

1 onion, sliced

2 heads of garlic, minced

1 liter chicken stock

3 tbsps fish sauce (patis)

oil

salt and pepper to taste

___________________________________________________

In a casserole, saute garlic until golden brown. Drain excess oil. Set aside.

In the same pan, saute onion until translucent in color. Add chicken and celery. Season with salt and pepper and fish sauce. Throw in carrots and stir for about two minutes.

Add chicken stock and bring to a boil.

Mix in pancit canton and sotanghon.

Cook until liquid is gone and pancit tender and moist.

Prepare roasted garlic, calamansi and chopped dahon ng sibuyas in mini containers and use as ‘budbod’ once pancit has been served.

Serve with your favorite toast.

Chicken Arrozcaldo

Chicken Arrozcaldo


I’ve been told many times over that chicken arrozcaldo isn’t as popular in a lot of provinces as it is in Manila. Outside the metro, it is usually served when somebody is sick or not feeling well. It’s not something you may order outside their homes. Quite the opposite here in Manila where you find it from the posh five-star hotels down to the most modest eatery at any given place. Chicken arrozcaldo is a favorite– anywhere, anytime.

The classic way of preparing chicken arrozcaldo would be using chicken choice cuts, bone-in and all. In my version, I already pre-boil and shred chicken that would be mixed in with the rice. I guess am too lazy to trim off meat from the bones while it’s immersed in the arrozcaldo–too messy.

Over at the Yrastorza household, chicken arrozcaldo is quite a staple viand on the dining table– sick or not, we all eat this like crazy. One of the many heirloom recipes from Mom, we never eat this without the ‘budbod’ of dahon ng sibuyas and roasted garlic. Eating this without the two would be like having your kare-kare without the bagoong or something like that. The concept of having condiments to go with it is enough excitement for me. Super love!

Chicken Arrozcaldo

1 whole breast of chicken, seasoned with salt and pepper, boiled and shredded

2 cups uncooked malagkit rice

two thumb-sized ginger, sliced

1/2 cup dahon ng sibuyas, chopped

2 heads of garlic, finely minced

2 tbsps fish sauce (patis)

1/4 tsp kasubha

6 pcs calamansi, halved

salt and pepper to taste

oil

1 liter chicken stock (from the boiled chicken)

_______________________________________________

Saute garlic in oil until golden brown. Drain excess oil. Set aside in a small container.

Meantime, in a casserole, saute ginger and onion. Add chicken and malagkit rice. Stir for about a minute until rice grains are well coated. Season with salt and pepper. Add chicken stock.

Cook until rice is tender. Make sure you constantly stir the arrozcaldo while it cooks. You may add chicken stock or water to adjust consistency.

Finally, add kasubha. Continue stirring for the next 3 minutes.

Serve hot with the condiments (dahon ng sibuyas, roasted garlic, calamansi and pamintang durog) on the side.

Molo Soup

Molo Soup

Hot, hot, hot!

Literally and figuratively, molo soup is HOT!

The warm, comforting and soothing effect of this soup are enough reasons to make this a staple in your kitchen menu. The solid combination of chicken, pork dumplings and the garlicky flavor of the broth just make a perfect soup.

Especially lately that it has been raining, molo soup should be the excellent comfort food with a wet weather at the backdrop.

Molo soup

For the pork dumpling:

1/2 kilo ground pork

1 onion, minced

1 egg

4 tbsps flour

salt and pepper to taste

molo wrappers

For the chicken broth:

1 pc chicken thigh/legs

salt and pepper to taste

1 onion, quartered

_________________________

1/4 cup deveined shrimps, chopped

1 medium onion, sliced

1 head of garlic, minced

2 tbsps patis (fish sauce)

1/2 cup dahon ng sibuyas (green spring onions)

_________________________

To make the broth, season chicken with salt and pepper. In a pot, cover with water and add onion. Cook until chicken is tender and cooked. Shred chicken and set aside. Meantime, keep stock for later use.

________________________

The pork dumplings are made by seasoning the ground pork with salt and pepper and adding onion, egg and flour. Mix well and wrap in molo wrappers. Set aside.

________________________

In another pot, saute onion, garlic, chicken and shrimps. Season with patis. Add chicken stock and bring to a boil. Once boiling, drop dumplings and cook for ten to fifteen minutes. Top with dahon ng sibuyas (green spring onions). Serve hot.

Sole Fillet In Quick Tomato-Mushroom Medley Sauce

Sole Fillet In Quick Tomato-Mushroom Medley Sauce

In one of our trips to our favorite Belinni’s Italian Restaurant at Cubao X, we decided to look away from our staple-usual faves of pasta and risotto to try another Italian dish that we haven’t tried. SOLE FISH— the menu emphasized how bestseller their sole fillet was via the marking that meant it was a must-try.

With great expectations, we looked forward to having the first bite of the dish. When the plate of sole arrived, what greeted us was a payatot (thin) piece of fish, bone in and all. The sauce didn’t even help at all. Ugh, what a letdown.

So this explains why I made my own. My style, my way and you can’t say otherwise because this is MY blog! Hahaha! In Filipino, walang kokontra!!! (Nobody can’t oppose!)

____________________________________________

Sole Fillet In Tomato-Mushroom Medley Sauce

5 whole sole fillets, seasoned with salt and pepper

5 large tomatoes, diced

2 medium-sized red onions, sliced

6 cloves of garlic, minced

1/2 cup flour

1 can button mushrooms, thickly sliced

2 tsps dried basil

1/2 cup white wine

salt and pepper to taste

olive oil

_____________________________________________-

Lightly dredge sole fillets on flour. Pan- fry until slightly brown on both sides. Set aside.

In a skillet, saute onion, garlic and tomatoes. Continue stirring until tomatoes have been completelycrushed and mashed turning into a chunky tomato sauce. Add basil, mushrooms and white wine. Let it simmer for another 3 minutes.

Top on sole fillets while hot. Serve immediately.

Chicken Liver Adobo

Chicken Liver Adobo

Copy and paste the picture of chicken liver adobo I did last week to this blog—CHECK. Holding back this writer’s saliva as this picture appears before her while doing this post’s draft– XXXXXXXX!!!!!!!! Arg, I am so tempted to delete this photo on my screen! It’s 9:32 pm and I got no  plans to defrost a pack of chicken livers to silence my nagging craving at this hour.

It is, hands down, one of my fave comfort dishes. I am totally ignited like wildfire when a plate of this adobo is served before me as in LAMON! The slightly sour-garlicky-malinamnam components do make for a perfect triumvirate. Of course, this dish is best partnered with sinangag (garlic fried rice).

High in cholesterol but low in fat and a perfect source of protein, my desire to eat it just looks away from the downside. My bad– Oh well, sarap eh!

Chicken Liver Adobo

1/2 kilo chicken liver (hearts removed)

1/2 cup white vinegar

1 whole head of garlic, minced

3 tbsps spring onion, finely chopped

3 tbsps soy sauce

2 cups of water

2 laurel leaves salt and pepper to taste

1/2 cup canola oil

________________________________________________

In a bowl, season liver with salt and pepper. Combine with garlic, vinegar, soy sauce and water.

Bring to a simmer until liquid is reduced to half. Add oil and continue to simmer until ninety percent of the marinade has evapotated and the oil slightly beginning to fry the liver.

At this point, you want the oil to dominate the sauce while retaining some liquid from the marinade. Add laurel leaves and cook for 3 minutes more.

Top with spring onions and serve hot with rice.

Ye Dang!

Ye Dang!

It was my first time to try Ye Dang Korean restaurant today and was I enthused to try EVERYTHING that was laid on our dining table. Thanks to my NFF (newly-found friend), Mariel Lee, for taking me there and advancing her delish birthday treat for me!

Not only did I feast on great Korean food but also had a wonderful time with all the chit chats that went with it.

Okay, what did we pluck out from the menu? For starters we had the Korean appetizers. Kimchi was on top of my list.

Strangely, the first few years that I have been trying this dish, I wasn’t sure if I really liked it. I mean, fermented pickled cabbage with all the Korean spices just did not tickle my fancy. I thought the strong taste plus the out of this world flavor just turned me off! But the Koreans are crazy about this! They even have a kimchi-flavored pizza!

Fast forward to today, the tart, mildly-sour and spicy flavor of  kimchi finally made me a convert. I’ve developed a strong liking for it— no, a LOVING for it!

The other appetizers included the spiced raddish slices–

The fishcake that I so liked–

Not to forget my fave Korean dilis in sweet and spicy blend–

And, the bean sprouts that I gobbled up like I do with lapid’s chicharon! Hahaha! So addicting!

Yes! And, we’ve only just begun!

The appetizers came with a bunch of iceberg lettuce and sesame  leaves. The leaves were supposed to be wrappers for the starters and the main dishes. The concept just got me excited. I made several of these wraps one of which was this:

I raved about the rawness of the leaves that made perfect combination with the filling. The sesame leaves rendered a nutty-crunchy taste and texture that left me going for seconds.

The novelty in the dining experience here was in the fact that we were given the choice of having our food cooked before us, yes, on our table (similar to shabu-shabu) or in the kitchen.

The cooking on the spot began with a flaming-hot bunch of charcoal–

I couldn’t look away from the charcoal because of two things: curiosity and hunger. Arg, bring it on!

Finally, the dak-kui (grilled chicken) and the kalbi (sweet beef ribs) were on board!

My eyes were as big as my plate when our serving  of  kalbi jim (beef shortribs stew)  was laid before me. I was actually settled with KIMCHI restaurant’s beef stew already until this came along.

Fall off the bones and totally scrumptious– this was today’s dining superstar, hands down.

The chapchae tasted okay but my top pick in this category remains to be the version of Sorabol which we used to frequent in Greenbelt.

On the whole, I was more than delighted swinging by this Korean restaurant. The ambience, food and feel totally felt Korean!  I swore to return with a bigger appetite and more friends to bring.

Meralco Ave., Ortigas
Mandaluyong City
(02) 636-1461
 

Sardines And Portobello Mushrooms On Whole Wheat Pasta

Sardines And Portobello Mushrooms On Whole Wheat Pasta

It was already 30 minutes past the hour of eleven in the morning today and I was still undecided what magic to do in the kitchen. Scouring the pantry, I saw a pack of whole wheat pasta and some few pieces of portobello mushrooms in the ref.

I thought it would be lovely to pair them off and seal the flavors with a hefty serving of mackerel sardines. Ahh, Sunday special– sardines and portobello mushrooms on whole wheat pasta.

Lately, I have been fancying on light coated pasta noodles. Something in the mold of aglio olio, at the most, a good plate of arabiatta. Today’s pasta was a cross between alio oglio and herbed pasta with two major add-ons– sardines and my latest mushroom craze, portobello. The symphony of flavors courtesy of the garlic, sardines, mushrooms and the nuttiness of the whole wheat pasta just melted in my mouth like anything.

Agaricus bosporus or commonly known as portobello mushrooms are one of the most consumed mushrooms in the world. The woodsy, fresh taste it yields loads the dishes its extra oomph.

Oddly though, my kitchen help insisted that these mushrooms were something they considered “pest” in the provincial  barrios along with basil leaves (which, according to her, were their pigs’ favorite food!), tarragon leaves, scalops (which they sold for a measly fifty pesos per SACK!) and baby potatoes and corn. All certified quasi-gourmet ingredients in the metro na inapak apakan lang nila! (that they just stepped on!).

Healthy, scrumptious and extremely easy to make– I guarantee you– there will be no leftovers. Now, is that good or bad?

Sardines and portobello mushrooms on whole wheat pasta

1/2 kilo whole wheat spaghetti

5 pcs sardines in olive oil

5 pcs medium-sized portobello mushrooms, sliced

2 whole heads of garlic, finely minced

1/4 cup parsley, coarsely chopped

Parmesan cheese

salt and pepper to taste

1 cup olive oil

__________________________________________________

Cook pasta according to package directions. Drain and sprinkle with oil to avoid sticking of the noodles. Set aside.

In a skillet, saute garlic, mushrooms and sardines. Add salt, pepper and parsley. Toss in pasta. Season some more if necessary.

Top with parmesan cheese. Serve with your favorite toast.

Asian Chicken with Shiitake and Green Beans

Asian Chicken with Shiitake and Green Beans

One of the most popular species in the mushroom family, the shiitake mushroom has remained to be a favorite ingredient in a lot of Asian cookery. Its wonderful texture, excellent flavor and health benefits are just but few reasons why it is a preferred choice by foodies all over the world.

Originating from the Japanese word shii mushroom which describes the Japanese tree Castanopsis cuspidata that gives the dead logs on which shiitake mushrooms come from, these dark-colored mushrooms have been proven to contain medicinal properties. Studies show that steady use of these mushrooms may reduce the risk of cardiac disorders, certain types of cancer, allergies and promotes good blood circulation.

Given these nutritional facts about shiitake mushroom, it has become a favorite ingredient in a lot of food stores that advocate health and wellness. It’s even become a substitute for meat! Why, the taste of shiitake is said to be four to ten times more flavorful than the other type of mushrooms like button, Portobello or pearl mushrooms.

The flexible characteristic of the shiitake transcends from being just a second-fiddle ingredient to being the main ingredient in certain dishes. There was even a restaurant that once served adobo made out of shiitake mushrooms!  No wonder, it’s been around for centuries now.

2 whole breast fillets, skinned and sliced into bite-size pieces

5 pcs shiitake mushrooms, sliced

1 whole head of garlic, minced

1 medium onion, minced

2 pcs thumb-sized ginger, sliced

4 pcs green beans, cut 1 inch-long

1/2 cup hoisin sauce

3 tbsps sesame oil

1/2 cup canola oil

salt and pepper to taste

1 tsp chili sauce (optional)

_________________________________________________

Season Chicken with salt and pepper. Set aside.

In a skillet, saute ginger, garlic and onion. Add chicken and stir-fry until chicken is cooked (about 5 minutes).

Add hoisin and chili sauce. Stir until chicken pieces are well coated with hoisin sauce. Toss in mushrooms and green beans. Cook until green beans are medium-well in doneness. Serve hot.

Recipe: Sole fillet in tomato mushroom medley sauce | ABS-CBN News | Latest Philippine Headlines, Breaking News, Video, Analysis, Features

Recipe: Sole fillet in tomato mushroom medley sauce | ABS-CBN News | Latest Philippine Headlines, Breaking News, Video, Analysis, Features

Recipe: Sole fillet in tomato mushroom medley sauce | ABS-CBN News | Latest Philippine Headlines, Breaking News, Video, Analysis, Features.

Garlic Tapa

Garlic Tapa

It was half past ten in the morning. The fantastic aroma from the skillet was beginning to fill up the kitchen while the baunan was atop the counter, ready to catch the day’s baon. The baon was garlic tapa with sliced tomatoes, ahh, a major comfort food in the Yrastorza batcave– now and always.

So, who was the lucky member of the household to tuck in a savory tapa into the lunchbox? Not hubby Jake and certainly, not little Sam. Whoelse but Janine, our trusted kitchen help. Yup, I cooked for her. She’s been a very efficient all-around house aid and whipping up some garlic tapa was a little price to pay. She brought it to my daughter’s school while she waited it out until Sam’s dismissal time.

Our tapa isn’t the sweet style or anything close to that. It is the garlic-pepper ridden kind. Frankly, I am not a fan of marinades that mask beef’s wonderful flavor. I don’t like coating it with sugar nor pineaple juice that deprives me from tasting the almost nude taste of beef.

I like garlic. Lots of garlic. Lightly toasted but never overly done as it yields a quite offensive bitter taste. And, cane vinegar should be a good acid to bring out beef’s great flavor. Beef, vinegar  and garlic together should be the bomb.

The choice cut, thickness and overall qulality of beef meat is as crucial as what seasoning goes into the tapa. I like the sukiyaki or the breakfast cut that allows me to pare down cooking time into half because of its thinness. Cooks fast, engaging to eat and usually reasonably priced.

Oh well. Time to wear that apron and do this garlic tapa!

1/4 kilo beef, breakfast or sukiyaki cut

1/4 cup cane vinegar

1 whole head of garlic, minced

salt and pepper to taste

oil

1 large tomato, sliced

3 tbsps cup green onions, chopped

_______________________________________

Combine all ingredients and let sit for 30 minutes.

Fry beef with the garlic and vinegar marinade on medium heat until desired doneness id achieved.

Serve with sliced tomatoes and sprinkle with chopped green onions.

Scrambled Egg With Burong Mustasa

Scrambled Egg With Burong Mustasa

The first time I caught a glimpse of  burong mustasa (pickled mustard greens)was during a trip to Gapan, Nueva Ecija many years back. My folks just loved driving away weekends visiting towns that sold scrumptious, exclusively native and inexpensive chow goodies. We would get these burong mustasa  sold in the markets for us to bring home to Manila. This fare is quite famous in the northern part of Luzon, spanning Bulacan to Tarlac. Ahh, super sarap!

Apart from the great taste, it is nutritional in that these mustard greens are proven to be loaded with health benefits saving us from certain diseases like respiratory disorders, gout, etc.

My Tita who shuttles from Pamapanga to Manila at least twice a week just sent me two big packs of these pickled mustards.

Pickled mustard or locally known as burong mustasa, is made by immersing these mustard leaves in rice water and coarse salt for a couple of days.

Anyway, I did not have the patience to wait it out for days. Thanks to tita for just handing me over these packs.

So what did I do? I just chopped about 3 buro leaves and mixed it with two slightly beaten eggs and added about 2 pinches of coarse salt. My mom does it by sauteing garlic and onion first before throwing in chopped burong mustasa and mixing in the egg before it hits the pan for scarambling. Definitely, a good option, too.

However, I like the mustard greens a bit raw and exclusive to egg only– yeah, date silang dalawa lang!

Cooked it on low heat stirring the egg mixture continously. Ahh, it went well with my tapa for breakfast. Happiness!

Korean Noodles With Pork And Mushrooms

Korean Noodles With Pork And Mushrooms

Lately, I have been drawn to Korean grocery stores for their cooking must haves. My penchant for anything Korean was ignited once again after my friend and I trooped over to Ye Dang very recently to sample the most talked about Korean restaurant in the metro.

Cruising the aisles of my newly found favorite Korean grocery somewhere in QC, I saw a huge pack of glass noodles that I would make into some spicy noodle dish. A toss up of noodles, shiitake mushrooms, diced pork and coated with hoisin, pork broth and sesame oil, this dish was the welcome nightcap I looked forward to after a long day.

The dish may appear to have a close semblance with another favorite Korean dish, the chap chae. However, this one  didn’t include spinach, beef and soy sauce in its list of ingredients.

Spicy Noodles With Pork And Mushrooms

1/2 kilo glass noodles

5 pcs fresh shiitake mushrooms, sliced

3/4 cup hoisin sauce

3 tbsps brown sugar

3 slices of pork spare ribs

1 cup cabbage, finely chopped

5 cloves of garlic, minced

1 white onion, minced

2 tsps chili flakes

salt and pepper to taste

sesame oil

_______________________________________________

Season pork with salt and pepper. Boil until pork becomes tender (keep the broth!). Slice and discard the bones. Set aside.

In a skillet, saute onion and garlic. Add mushrooms, cabbage and pork. Stir in hoisin sauce ang sugar. Season with salt and pepper.

Pour about 4 cups of the pork broth and bring to a boil.

Add glass noodles and reduce heat  to a medium simmer.

Cook until noodles are tender and soupiness is gone. Add chili flakes. Serve hot.

Classic Puttanesca

Classic Puttanesca

Twirling the puttanesca onto my fork, I was reminded of my date nights with hubby, Jake, when we  used to troop over to our favorite Italian resto, Cosa Nostra in Malate when it was still abuzz with the gimmick peeps.

We would order  plates of light-coated pasta that were peppered with sauces that tasted fresh, light and very Italian. The ingredients they used were nothing but top quality, authentic and flavor loaded. Am totally clueless now, though, how they are today, 10:29 PM of November 16, 2010!

Fast forward to today, I decided to dish out some puttanesca to go with the chardonnay that begged to team up with the pasta. Awesome, I knew we were in for a great dining chitchat with the yummy food at the backdrop.

Just a sidebar– puttanesca is always best with mashed anchovies. It binds the flavors together and defines its flagship taste. Easy to make and delightful to eat!

Puttanesca

1/4 kilo spaghetti noodles

1 can Del Monte tomato sauce (petite cut)

3/4 cup olive oil

1 head of garlic, minced

3 pcs anchovy fillets, mashed

1/2 cup black olives, sliced

1/2 cup capers

1/2 tsps chilli flakes

1/2 cup grated parmesan or romano cheese

salt and pepper to taste

1 tbsp chopped parsley for garnishing

__________________________________________

Cook spaghetti according to package directions. Drain and set aside.

In a skillet, saute garlic, anchovies, capers, chilli flakes and olives. Add tomato sauce. Simmer for about ten minutes.

Toss in cooked spaghetti and  sprinkle with cheese. Top with chopped parsley for garnishing.

Turkey Breast Fillet With Blueberry Preserves And Herbed Cheese Sandwich

Turkey Breast Fillet With Blueberry Preserves And Herbed Cheese Sandwich

It was in 1863 when Thanksgiving was declared a national holiday in the United States. The Americans then started to use turkey as their dish centerpiece for Thanksgiving. The focal dish that it has become, its popularity in America and Europe has been immeasurable since.

The rich, juicy and taste -loaded leftover turkey breasts were sitting on the ref when I decided to make it into a sandwich. I thought a see-saw of flavors, salty and sweet would be perfect to go with the turkey.

So, here was how I did it.

To make it you will need:

500 grams tukey breast fillet leftover

4 slices of herbed or smokey dutch cheese (or any cheese you want)

3/4 cup bluberry chunky preserves

4 slices of bread

parsley for garnishing

Assemble the ingredients on top of a slice of bread. The blueberry preserves then about 250 gms of turkey breasts for each sandwich and cheese. Cover with another slice. You may heat sandwich if you wish.

Top with a sprig of parsley for garnishing.

Happy Thanksgiving!

Buttered Spareribs Stew

Buttered Spareribs Stew

Slow cooking makes sure you get the maximum taste of your meat. Flavors become richer, concentrated and harmoniously blended. This stew is a favorite in my Mom’s crib.  She usually uses babyback ribs but I kinda thought spareribs would be as good and was I right!

Best eaten with steamed rice, I guarantee you 50 burps after you eat this!

Buttered Spareribs Stew

1  kilo pork spareribs, chopped into cubes

5 medium-sized tomatoes

2 heads of garlic

1 oinion, sliced

1 cup green peas

3/4 cup butter (reserve half for final flavoring)

1 tsp soy sauce

canola oil

1 tsp cayenne pepper

salt and pepper to taste

water

_____________________________________________

Season pork with salt and pepper.

Saute onion, garlic, tomatoes, soy sauce and half the butter. Add Pork and cover with water. Set in low-medium heat and bring to a boil until meat is done or you may add water until desired tenderness is achieved (about 1 cup only everytime needed).

When sauce has been reduced to half:

Add green peas, cayenne pepper, 1/2 cup canola oil and the remaining half of the butter about 15 minutes before turning off the heat. Serve hot.

Chicken Adobo Flakes (Ilonggo Version)

Chicken Adobo Flakes (Ilonggo Version)

My favorite version of chicken adobo, I stack up on this when I do it in big batches. I use it making a crusty pannini, fried rice, canape topping or simply to papak like chippy! Lol. The crunch, savory appeal of this adobo just breaks my diet(?) everytime.

One of the many heirloom recipes from my Ilongga grandmother who had the most intense affair with the pots and pans, this Ilonggo adobo version uses ONLY vinegar as the the prime acid minus the soy sauce. Of course, slathered with LOTS of garlic and LOTS of LOVE! Lol.

Chicken adobo

1 and 1/2 kilo chicken breasts

3/4 cup cane vinegar

2 heads of garlic, minced

2 laurel leaves

1 tsp pamintang buo

salt and pepper to taste

1 cup canola oil

water

________________________________—

Season chicken with salt and pepper.

In a casserole, combine chicken, garlic, pamintang buo, vinegar and cover with water.

Cook until chicken is cooked, crumbled, flaked and golden brown (adding water may be necessary until chicken is tender).

Once water is gone, add oil, laurel leaves  and continue stirring until chicken is golden brown and crunchy.

Classic Baked Macaroni

Classic Baked Macaroni

It was my daughter Sam’s Christmas party and parents were asked to dish out something for the buffet spread. Swamped with yuletide chores, I flexed some muscles, mustered energy to whip up a great dish of pasta. Classic baked mac was to be. Scrumptious, relatively easy to make and a universal favorite, I knew I cooked the right thing.

Baked Macaroni

Cheesy Baked Mac

1 pack elbow macaroni  noodles

1 box quickmelt cheese, grated

3/4 cup parmesan cheese, grated

1/2 cup mozzarela cheese, grated (optional)

Meat Sauce:

1/2 kilo ground beef

4 cloves of garlic, minced

1 medium-sized onion, minced

1 tomato, chopped

salt and pepper to taste

750 grams tomato sauce, Italian blend

1 can chorizos, cut lengthwise and sliced horizontally (optional)

Bechamel Sauce:

2 boxes  all purpose cream

1 cup milk

1 box cheddar cheese, grated

1/4 cup  butter

1/4 cup curly parsley, chopped

salt and pepper to taste

3/4 cup  flour

___________________________________________________

1. Cook pasta according to package directions.

2. In a separate pan, saute garlic, onion and tomato. Add beef. Season with salt and pepper. Simmer until cooked. Add tomato sauce and chorizos. Continue stirring for the next ten minutes. Remove from fire then add cooked pasta in the beef mixture. Set aside.

3. In a skillet, heat  butter then add all-purpose  cream and milk. Mix well. Add cheddar cheese. Slowly add flour to thicken the sauce (the thicker the better!). Season with salt and pepper. Set aside.

4. In a baking dish, assemble the pasta. Scoop up some beef mixture that would be the first layer. Smother with a generous amount of bechamel sauce on top of the beef mixture. repeat the layering twice.

5. Top the dish with the remaining cheeses.

6. Preheat the oven to 350c and bake for 15 minutes or  until cheeses are turned into golden brown. Once cooked, let stand for 15 minutes. Sprinkled with chopped parsley. Serve with you favorite toast.

Oriental Chicken With Sliced Eggplants

Oriental Chicken With Sliced Eggplants

I almost ended up eating at Little Asia yesterday except that the majority of my friends opted to train our sights on this tea place called Bubble Tea. And since my palate still was looking for the kung pao chicken this morning, I decided to cook the next best thing, oriental chicken with sliced eggplants.

It was to be my hubby, Jake’s, baon and breakfast for me. Okay, how did I do it?

I made 5 strips of chicken crispers , cut it 1 inch long and set it aside. Sliced native eggplants the size of the chicken crispers, too.

In a skillet, I poured 1/4 cup of canola oil and 2 tbsps sesame oil (optional). Sauted 4 round slices of ginger and mixed in 1/4 cup of hoisin sauce. With the sauce heated up and ready, I just tossed in the chicken crispers and eggplants into the skillet  until they were well coated and eggplants half cooked and tender.

Baked Bangus Belly

Baked Bangus Belly

Wrapped in our backyard banana leaves, stuffed with onions and tomatoes, slightly charred from the flame grilling, inihaw na bangus has got to be one of the flagship dishes of my childhood. It usually went with Dad’s ginisang munggo with a few pieces of suaje shrimps and a coupla bunches of dahon ng ampalaya for the final add on.

Fast forward to today, I usually do a spin off of my childhood’s inihaw na bangus except that I bake it, makes use of the belly part only and fired up by some few additional spices. Oh, and the price for living in a building? No banana leaves around!!!! So I usually settle for the next best thing– aluminum foil!

Healthy, totally scrumptious and easy to make, Jake and I can gobble this up (even without rice) in all of 3 minutes!

Baked Bangus Belly

2 pcs bangus belly

1 red onion, sliced

1 tomato, sliced

4 cloves of garlic, minced

2 tbsps fresh basil, chopped (optional)

1 tsp, fresh spring onions (dahon ng sibuyas)

1 stalk of lemon grass, pounded (optional)

1/4 tsp paprika

salt and pepper to taste

aluminum foil

________________________________________

Preheat oven to 300 degrees c.

Season bangus belly with salt and pepper

On a piece of bangus belly (skin down), place all ingredients. Top with the remaining slice of bangus belly. Wrap in foil.

Bake for 30 minutes. Serve warm.

Dressing:

4 tbps cane vinegar

1 tbsp soy sauce

2 tbsps  chopped onion

1 red sili

1 clove chopped garlic

Mix everything together and pour in a small bowl. Serve with the baked bangus.


Inadobong Puso Ng Saging

Inadobong Puso Ng Saging

A big smile was plastered on my face as I stepped down from the weighing scale. Why, I just shed off a whopping 19 pounds in a span of 3 months. Silly me, I should have done what I had to do a long time ago to drop the weight.

Okay, can I just say, eating vegetables majorly contributed to the weight loss. Gone were the days when we were kids and how we warded off the hand that served us, what looked like, a boring plate of gulay.

Veggies need not look boring and taste awful. We can actually savor a good serving of veggies while saying, “Ay grabe ang sarap naman nito!” fifty times! I mean, really now, it’s all in the taste and presentation.

Tonight, I did inadobong puso ng saging. US certified- nutrition and diet expert, Nadine Tengco, remarked in one of her seminars, puso ng saging is an excellent source of dietary fiber, calcium, potassium and protein and would be a  perfect “rice extender” to make up for the rice “limit”. According to her, women are only supposed to consume 1/3 cup of rice per meal only. So, what she does, she eats lots of this dish to satiate her appetite.

And, I’ve been doing just that. Yeah, for three months now. This dish for the weight loss– and it’s working for me! Puso ng saging is the way to go!

Inadobong Puso Ng Saging:

1 medium sized puso ng saging (banana heart), thinly sliced

1/2 cup rock salt (for cleansing and rubbing off bitterness from the banana heart)

1 head of garlic, minced

1 onion, sliced

1/4 cup of cane vinegar

3/4 cup water

6 pcs suaje (shrimps)

salt and pepper to taste

_______________________________________

In a bowl, mix  sliced puso ng saging with salt. Rub mixture firmly with your two hands until the bitter taste goes off. Rinse thoroughly with running water.

In a skillet, cook shrimps until they turn pink. Set aside.

In the same skillet, saute onions and garlic. Add sliced puso ng saging, vinegar salt and pepper. Simmer for about 3 minutes. Add water. Simmer for ten more minutes or until liquid has evaporated into half. Top with shrimps. Serve hot.

Smoked Fish With Feta On Whole Wheat Pasta

Smoked Fish With Feta On Whole Wheat Pasta

My intense liking for smoked bangus started about six years ago when a friend had me taste what was to be my ultimate bottle of happiness that was made up of smoked bangus flakes in olive oil and powered by a number of spices that rocked my world since. The brand of that smoked bangus: Santwaryo. I believe they sell it in their resto branch somewhere in Metro Walk.

Am such a ‘groupie’ of smoked bangus. In whatever form or dish it’s mixed in, whether in pasta, pate or simply when you eat it fried (oh, yeah with a mean dish of scrambled eggs! ), the flavor just gets me going for seconds.

Last weekend saw me doing pasta using smoked bangus (packed, not the bottled). Still on the diet trail, I, of course, made sure that all ingredients I used never added up to my caloric intake (Yee, feeling! Lol). Of course! I’ve been sweating it out spinning at the gym for months now and do I just gobble up ‘cardiac delights’ at the mere presence of it? NO WAY. Well, forgive me for the cheeses though. Hee.

Okay, so what went with the pasta? Read on:

300 grams whole wheat pasta (spaghetti)

1 medium sized smoked bangus, skin, head and tail removed

2 heads of garlic, finely minced

1/2 cup chopped flat parsley

3/4 cup olive oil

1/2 cup parmesan cheese

1/2 cup feta cheese, crumbled or cubed

salt and pepper to taste

Cook pasta according to package directions.

Loosely crumble/flake smoked bangus meat. Set aside.

In a skillet, pour two rounds of olive oil. Saute garlic, smoked bangus and 1/4 cup  parsley. Season with salt and pepper. Add remaining oil.

Toss in pasta. Top with feta and parmesan cheese. Sprinkle with the remaining chopped parsley. Serve with your favorite toast.

Lentejas Castellana Soup

Lentejas Castellana Soup

I had 30 minutes to kill before I hit Sam’s school to pick her up. Top of mind last minute stop would be whizzing down to Terry Selection at The Podium for some quick check on what interesting stuff I might find there.

Fast, alert  and wide-eyed, I managed to score a pack of black pasta, a nice claypot, lentils and chorizos in all of 20 minutes. Ah, I was like a 5 year old taking home a brand-new Barbie scooter! Cheap thrill ba?

At home, as I dashed in my kitchen after a long day, I decided to ‘sentence’ the Salamanca chorizos and Castellana lentils that same night. I made a thick soup and peppered it with all the goodness of the chorizos. Ahh, I could almost imagine my husband, Jake, gobbling up the soup with his Chillean wine to match and my day’s stories on the side.

Harvested from Castilla and Andalucia, Castellana lentils are the most used lentils in Spain. It’s greenish-brown in color, larger and a bit more easy to make tender as opposed to the other varieties.

Meantime, Salamanca chorizos are made from pork loin and is spiced up by thick chunks of parika. I was eating and eating them while I readied them for the soup. Ahhh, sarap!

1 cup lentils

3 cups water

___________________

1 cup chorizos, sliced

5 cloves of garlic

1 onion, finely minced

2-3 cups chicken stock

1 cup spinach leaves

salt and pepper to taste

olive oil

_________________

Cook lentils until tender. Drain and set aside.

Meantime in a skillet, saute garlic, onion and chorizos. Season with salt and pepper. Add chicken stock and lentils. Bring to a boil and add spinach leaves. Serve hot.

Roasted Eggplant In Apple Cider Vinegar

Roasted Eggplant In Apple Cider Vinegar

I woke up this morning with a definite meal in mind for breakfast. Crispy dilis, scrambled eggs, red rice and my precious siding of roasted eggplant smothered with all the healthy goodness of apple cider vinegar and heaps and heaps of crushed garlic.

The original version of this eggplant ensemble comes from the siding that I make for my pochero. That’s eggplant and squash combined, plus spices to boot. Pochero is not pochero to me without this killer siding that loads the pochero with all the sumptiousness it should have. Okay, it was not pochero that I had for breakfast today, alright.

Just the same, I made a version of that siding to go with my crispy dilis, hence:

I roasted 6 medium-sized eggplants. Scraped and mashed the flesh, seasoned it with salt and pepper and about 3 tbsps of apple cider vinegar. Loaded it with about 1 head of coarsely chopped garlic and meeehn, can I just say, it went perfect with the dilis ‘barkada’.

Short and sweet. I love mornings:)

Parsley Pesto

Parsley Pesto

My school co-parent/good friend, Annette Alberto,  had us dine at their place sometime last year for a playdate with the kids and some good evening of chat with us, parents. Her spread of salpicao, pasta and salad left me bewitched big time as we left their crib. I specifically took fancy on the pasta (of red sauced spaghetti) siding that perfectly blended with her spaghetti. She said it was to add a new dimension to the taste of the spaghetti. And what dimension it was!

I held back my peace and never asked EXACTLY what went into the sauce but the most I gathered from her was that she put parsley, olive oil and garlic.  Okay, the parsley was to be the sauce’s lead star.

Fast forward to today, I readied the chopping board for some tedious chopping of parsley, garlic and to be swigged into a good kind of olive oil. Yes, I made pesto, alright, although I had second thoughts calling it “pesto” in the strictest sense of what it means.

Pesto is a traditional  Italian sauce, made up of basil leaves, olive oil, garlic, parmesan cheese and a handful of pine nuts. It is usually incorporated into pasta noodles, brushed onto crusty breads or used in flavoring grains, meats and other dish staples.

The sauce I made defied a coupla things–  First, the basil was replaced by pasrley, it used LOTS of chopped garlic, did  away with pine nuts (or any nuts for that matter) and used parsley leaves instead of basil leaves. Hand made and not blender-produced, ha! But lemme tell you– THIS WAS  SO GOOD!

The unique characteristic of parsley is in its subtle “fresh” taste. It was  a welcome departure from the usual strong and sometimes overpowering taste of say, basil or rosemary.

Bottle it up, use it the way you use basil pesto– you’re good!

Thanks Annette for the inspiration. Parsley is my new basil! Mabuhay ka!

3 cups parsley leaves (curly or flat), finely chopped

1 1/2 cups olive oil

2 heads of garlic, finely chopped

1/2 cup parmesan cheese

salt and pepper to taste

__________________________________

Combine all ingredients. Do not use food processor. You may store for future use.

Cerealicious

Cerealicious

Strolling by my lone self in Robinson’s Galleria one lunch time not too long ago, I happened to pass by a Crealicious store and decided to try it for the first time. I figured, since I was on a diet, a cup of oatmeal would stuff and satiate my appetite for the day. Low cal, rich in fiber and good for the heart, I was sold that it was to be the perfect meal for me.

Scouring their menu, the list of cereal choices got me totally giddy. Fruit loops, honey gold flakes, honey stars, coco flakes, etc., it seemed like a wonderland of cereals waiting to be consumed. And since I was dieting, I thought that Cerealicious was excellent for my diet.

The lady behind the counter was gracious enough to offer, what appeared to be, a  list of products with the corresponding calorie equivalent per item. I could not begin to say how amused I was being able to actually count the calories I was taking in! Since that time on, I have been trooping over to Cerealicious very often.

Very recently, I discovered that their outlet in Megamall served savory dishes and ‘unusual’ desserts worth trying. While I examined the menu, I was so tempted to try not one or two dishes but FIVE! Hahaha!

Sigh, I heeded the call of the deep fried dishes!  My curiosity got the better of me and gave in to the chicken, shrimp, bread and potatoes all coated in the goodness of pounded cornflakes!

Hep! Before you judge my crazy appetite, lemme emphasize that these dishes down below were shared with a friend of mine, Trina.

I saw other choices in the menu for the hardcore figure conscious, though. The pasta in pomodoro sauce or pesto would not bloat you out. Of course, all the rest of the Cerealicious choices ARE predominantly low fat and gorgeous tasting!

Well, in the end, I was glad I trusted my instincts and had a fantastic feast!

Sorry but the “SLURP” button of this website is unavailable. Instead, you might want to check out the nearest Crealicious branch near your place (Mine is Megamall, Ground Floor, Bldg A).

Here goes my feast!

Bacon Cheese Munchers


Cerealicious Chicken Pesto Pasta


Bubba Shrimp

Cerealicious Cordon Bleu

Peanut Butter And Banana French Toast

BUrrrrrp. Love it!